What is Lean
Lean is a functional programming language that makes it easy to write correct and maintainable code. You can also use Lean as an interactive theorem prover.
Lean programming primarily involves defining types and functions. This allows your focus to remain on the problem domain and manipulating its data, rather than the details of programming.
-- Defines a function that takes a name and produces a greeting.
def getGreeting (name : String) := s!"Hello, {name}! Isn't Lean great?"

-- The `main` function is the entry point of your program.
-- Its type is `IO Unit` because it can perform `IO` operations (side effects).
def main : IO Unit :=
  -- Define a list of names
  let names := ["Sebastian", "Leo", "Daniel"]

  -- Map each name to a greeting
  let greetings := names.map getGreeting

  -- Print the list of greetings
  for greeting in greetings do
    IO.println greeting
Lean has numerous features, including:
- Type inference
- First-class functions
- Powerful data types
- Pattern matching
- Type classes
- Monads
- Extensible syntax
- Hygienic macros
- Dependent types
- Metaprogramming
- Multithreading
- Verification: you can prove properties of your functions using Lean itself
Tour of Lean
The best way to learn about Lean is to read and write Lean code. This article will act as a tour through some of the key features of the Lean language and give you some code snippets that you can execute on your machine. To learn about setting up a development environment, check out Setting Up Lean.
There are two primary concepts in Lean: functions and types. This tour will emphasize features of the language which fall into these two concepts.
Functions and Namespaces
The most fundamental pieces of any Lean program are functions organized into namespaces.
Functions perform work on inputs to produce outputs,
and they are organized under namespaces,
which are the primary way you group things in Lean.
They are defined using the def command,
which give the function a name and define its arguments.
namespace BasicFunctions

-- The `#eval` command evaluates an expression on the fly and prints the result.
#eval 2+2

-- You use 'def' to define a function. This one accepts a natural number
-- and returns a natural number.
-- Parentheses are optional for function arguments, except for when
-- you use an explicit type annotation.
-- Lean can often infer the type of the function's arguments.
def sampleFunction1 x := x*x + 3

-- Apply the function, naming the function return result using 'def'.
-- The variable type is inferred from the function return type.
def result1 := sampleFunction1 4573

-- This line uses an interpolated string to print the result. Expressions inside
-- braces `{}` are converted into strings using the polymorphic method `toString`
#eval println! "The result of squaring the integer 4573 and adding 3 is {result1}"

-- When needed, annotate the type of a parameter name using '(argument : type)'.
def sampleFunction2 (x : Nat) := 2*x*x - x + 3

def result2 := sampleFunction2 (7 + 4)

#eval println! "The result of applying the 2nd sample function to (7 + 4) is {result2}"

-- Conditionals use if/then/else
def sampleFunction3 (x : Int) :=
  if x > 100 then
    2*x*x - x + 3
  else
    2*x*x + x - 37

#eval println! "The result of applying sampleFunction3 to 2 is {sampleFunction3 2}"

end BasicFunctions
-- Lean has first-class functions.
-- `twice` takes two arguments `f` and `a` where
-- `f` is a function from natural numbers to natural numbers, and
-- `a` is a natural number.
def twice (f : Nat → Nat) (a : Nat) :=
  f (f a)

-- `fun` is used to declare anonymous functions
#eval twice (fun x => x + 2) 10

-- You can prove theorems about your functions.
-- The following theorem states that for any natural number `a`,
-- adding 2 twice produces a value equal to `a + 4`.
theorem twiceAdd2 (a : Nat) : twice (fun x => x + 2) a = a + 4 :=
  -- The proof is by reflexivity. Lean "symbolically" reduces both sides of the equality
  -- until they are identical.
  rfl

-- `(· + 2)` is syntax sugar for `(fun x => x + 2)`. The parentheses + `·` notation
-- is useful for defining simple anonymous functions.
#eval twice (· + 2) 10

-- Enumerated types are a special case of inductive types in Lean,
-- which we will learn about later.
-- The following command creates a new type `Weekday`.
inductive Weekday where
  | sunday    : Weekday
  | monday    : Weekday
  | tuesday   : Weekday
  | wednesday : Weekday
  | thursday  : Weekday
  | friday    : Weekday
  | saturday  : Weekday

-- `Weekday` has 7 constructors/elements.
-- The constructors live in the `Weekday` namespace.
-- Think of `sunday`, `monday`, …, `saturday` as being distinct elements of `Weekday`,
-- with no other distinguishing properties.
-- The command `#check` prints the type of a term in Lean.
#check Weekday.sunday
#check Weekday.monday

-- The `open` command opens a namespace, making all declarations in it accessible without
-- qualification.
open Weekday
#check sunday
#check tuesday

-- You can define functions by pattern matching.
-- The following function converts a `Weekday` into a natural number.
def natOfWeekday (d : Weekday) : Nat :=
  match d with
  | sunday    => 1
  | monday    => 2
  | tuesday   => 3
  | wednesday => 4
  | thursday  => 5
  | friday    => 6
  | saturday  => 7

#eval natOfWeekday tuesday

def isMonday : Weekday → Bool :=
  -- `fun` + `match`  is a common idiom.
  -- The following expression is syntax sugar for
  -- `fun d => match d with | monday => true | _ => false`.
  fun
    | monday => true
    | _      => false

#eval isMonday monday
#eval isMonday sunday

-- Lean has support for type classes and polymorphic methods.
-- The `toString` method converts a value into a `String`.
#eval toString 10
#eval toString (10, 20)

-- The method `toString` converts values of any type that implements
-- the class `ToString`.
-- You can implement instances of `ToString` for your own types.
instance : ToString Weekday where
  toString (d : Weekday) : String :=
    match d with
    | sunday    => "Sunday"
    | monday    => "Monday"
    | tuesday   => "Tuesday"
    | wednesday => "Wednesday"
    | thursday  => "Thursday"
    | friday    => "Friday"
    | saturday  => "Saturday"

#eval toString (sunday, 10)

def Weekday.next (d : Weekday) : Weekday :=
  match d with
  | sunday    => monday
  | monday    => tuesday
  | tuesday   => wednesday
  | wednesday => thursday
  | thursday  => friday
  | friday    => saturday
  | saturday  => sunday

#eval Weekday.next Weekday.wednesday
-- Since the `Weekday` namespace has already been opened, you can also write
#eval next wednesday

-- Matching on a parameter like in the previous definition
-- is so common that Lean provides syntax sugar for it. The following
-- function uses it.
def Weekday.previous : Weekday -> Weekday
  | sunday    => saturday
  | monday    => sunday
  | tuesday   => monday
  | wednesday => tuesday
  | thursday  => wednesday
  | friday    => thursday
  | saturday  => friday

#eval next (previous wednesday)

-- We can prove that for any `Weekday` `d`, `next (previous d) = d`
theorem Weekday.nextOfPrevious (d : Weekday) : next (previous d) = d :=
  match d with
  | sunday    => rfl
  | monday    => rfl
  | tuesday   => rfl
  | wednesday => rfl
  | thursday  => rfl
  | friday    => rfl
  | saturday  => rfl

-- You can automate definitions such as `Weekday.nextOfPrevious`
-- using metaprogramming (or "tactics").
theorem Weekday.nextOfPrevious' (d : Weekday) : next (previous d) = d := by
  cases d       -- A proof by case distinction
  all_goals rfl  -- Each case is solved using `rfl`
Quickstart
These instructions will walk you through setting up Lean 4 together with VS Code as an editor for Lean 4. See Setup for supported platforms and other ways to set up Lean 4.
-
Install VS Code.
-
Launch VS Code and install the
lean4extension by clicking on the "Extensions" sidebar entry and searching for "lean4".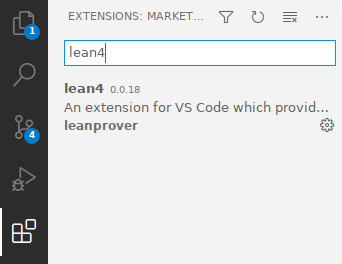
-
Open the Lean 4 setup guide by creating a new text file using "File > New Text File" (
Ctrl+N), clicking on the ∀-symbol in the top right and selecting "Documentation… > Setup: Show Setup Guide".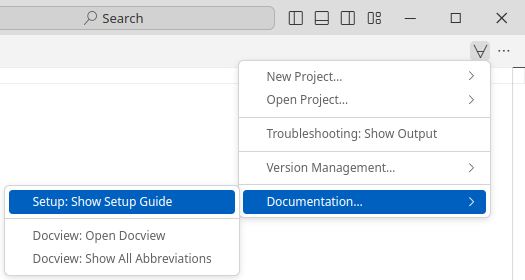
-
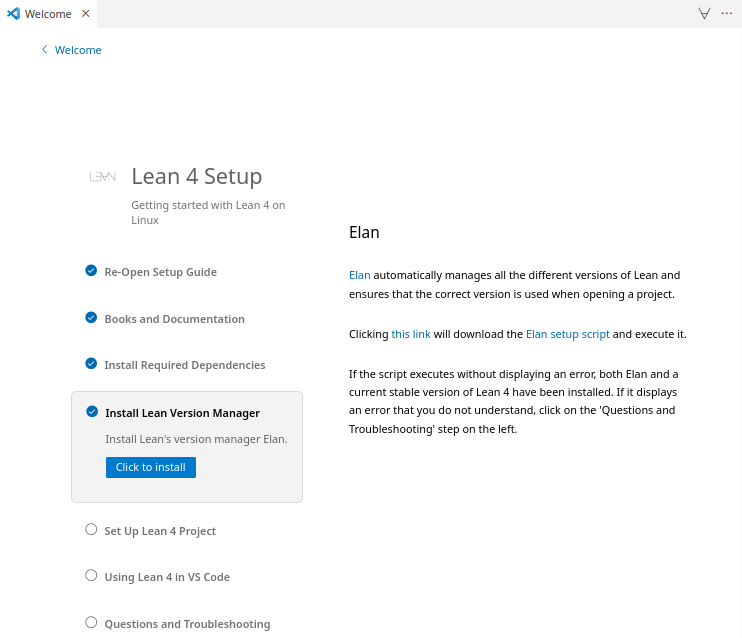
Follow the Lean 4 setup guide. It will walk you through learning resources for Lean 4, teach you how to set up Lean's dependencies on your platform, install Lean 4 for you at the click of a button and help you set up your first project.
Supported Platforms
Tier 1
Platforms built & tested by our CI, available as binary releases via elan (see below)
- x86-64 Linux with glibc 2.27+
- x86-64 macOS 10.15+
- aarch64 (Apple Silicon) macOS 10.15+
- x86-64 Windows 10+
Tier 2
Platforms cross-compiled but not tested by our CI, available as binary releases
Releases may be silently broken due to the lack of automated testing. Issue reports and fixes are welcome.
- aarch64 Linux with glibc 2.27+
- x86 (32-bit) Linux
- Emscripten Web Assembly
Setting Up Lean
See also the quickstart instructions for a standard setup with VS Code as the editor.
Release builds for all supported platforms are available at https://github.com/leanprover/lean4/releases.
Instead of downloading these and setting up the paths manually, however, it is recommended to use the Lean version manager elan instead:
$ elan self update  # in case you haven't updated elan in a while
# download & activate latest Lean 4 stable release (https://github.com/leanprover/lean4/releases)
$ elan default leanprover/lean4:stable
lake
Lean 4 comes with a package manager named lake.
Use lake init foo to initialize a Lean package foo in the current directory, and lake build to typecheck and build it as well as all its dependencies. Use lake help to learn about further commands.
The general directory structure of a package foo is
lakefile.lean  # package configuration
lean-toolchain # specifies the lean version to use
Foo.lean       # main file, import via `import Foo`
Foo/
  A.lean       # further files, import via e.g. `import Foo.A`
  A/...        # further nesting
.lake/         # `lake` build output directory
After running lake build you will see a binary named ./.lake/build/bin/foo and when you run it you should see the output:
Hello, world!
Editing
Lean implements the Language Server Protocol that can be used for interactive development in Emacs, VS Code, and possibly other editors.
Changes must be saved to be visible in other files, which must then be invalidated using an editor command (see links above).
Theorem Proving in Lean
We strongly encourage you to read the book Theorem Proving in Lean. Many Lean users consider it to be the Lean Bible.
Functional Programming in Lean
The goal of this book is to be an accessible introduction to using Lean 4 as a programming language. It should be useful both to people who want to use Lean as a general-purpose programming language and to mathematicians who want to develop larger-scale proof automation but do not have a background in functional programming. It does not assume any background with functional programming, though it's probably not a good first book on programming in general. New content will be added once per month until it's done.
Examples
- Palindromes
- Binary Search Trees
- A Certified Type Checker
- The Well-Typed Interpreter
- Dependent de Bruijn Indices
- Parametric Higher-Order Abstract Syntax
(this example is rendered by Alectryon in the CI)
/-!
# Palindromes

Palindromes are lists that read the same from left to right and from right to left.
For example, `[a, b, b, a]` and `[a, h, a]` are palindromes.

We use an inductive predicate to specify whether a list is a palindrome or not.
Recall that inductive predicates, or inductively defined propositions, are a convenient
way to specify functions of type `... → Prop`.

This example is a based on an example from the book "The Hitchhiker's Guide to Logical Verification".
-/

inductive Palindrome : List α → Prop where
  | nil      : Palindrome []
  | single   : (a : α) → Palindrome [a]
  | sandwich : (a : α) → Palindrome as → Palindrome ([a] ++ as ++ [a])

/-!
The definition distinguishes three cases: (1) `[]` is a palindrome; (2) for any element
`a`, the singleton list `[a]` is a palindrome; (3) for any element `a` and any palindrome
`[b₁, . . ., bₙ]`, the list `[a, b₁, . . ., bₙ, a]` is a palindrome.
-/

/-!
We now prove that the reverse of a palindrome is a palindrome using induction on the inductive predicate `h : Palindrome as`.
-/
theorem palindrome_reverse (h : Palindrome as) : Palindrome as.reverse := by
  induction h with
  | nil => exact Palindrome.nil
  | single a => exact Palindrome.single a
  | sandwich a h ih => simp; exact Palindrome.sandwich _ ih

/-! If a list `as` is a palindrome, then the reverse of `as` is equal to itself. -/
theorem reverse_eq_of_palindrome (h : Palindrome as) : as.reverse = as := by
  induction h with
  | nil => rfl
  | single a => rfl
  | sandwich a h ih => simp [ih]

/-! Note that you can also easily prove `palindrome_reverse` using `reverse_eq_of_palindrome`. -/
example (h : Palindrome as) : Palindrome as.reverse := by
  simp [reverse_eq_of_palindrome h, h]

/-!
Given a nonempty list, the function `List.last` returns its element.
Note that we use `(by simp)` to prove that `a₂ :: as ≠ []` in the recursive application.
-/
def List.last : (as : List α) → as ≠ [] → α
  | [a],         _ => a
  | _::a₂:: as, _ => (a₂::as).last (by simp)

/-!
We use the function `List.last` to prove the following theorem that says that if a list `as` is not empty,
then removing the last element from `as` and appending it back is equal to `as`.
We use the attribute `@[simp]` to instruct the `simp` tactic to use this theorem as a simplification rule.
-/
@[simp] theorem List.dropLast_append_last (h : as ≠ []) : as.dropLast ++ [as.last h] = as := by
  match as with
  | [] => contradiction
  | [a] => simp_all [last, dropLast]
  | a₁ :: a₂ :: as =>
    simp [last, dropLast]
    exact dropLast_append_last (as := a₂ :: as) (by simp)

/-!
We now define the following auxiliary induction principle for lists using well-founded recursion on `as.length`.
We can read it as follows, to prove `motive as`, it suffices to show that: (1) `motive []`; (2) `motive [a]` for any `a`;
(3) if `motive as` holds, then `motive ([a] ++ as ++ [b])` also holds for any `a`, `b`, and `as`.
Note that the structure of this induction principle is very similar to the `Palindrome` inductive predicate.
-/
theorem List.palindrome_ind (motive : List α → Prop)
    (h₁ : motive [])
    (h₂ : (a : α) → motive [a])
    (h₃ : (a b : α) → (as : List α) → motive as → motive ([a] ++ as ++ [b]))
    (as : List α)
    : motive as :=
  match as with
  | []  => h₁
  | [a] => h₂ a
  | a₁::a₂::as' =>
    have ih := palindrome_ind motive h₁ h₂ h₃ (a₂::as').dropLast
    have : [a₁] ++ (a₂::as').dropLast ++ [(a₂::as').last (by simp)] = a₁::a₂::as' := by simp
    this ▸ h₃ _ _ _ ih
termination_by as.length

/-!
We use our new induction principle to prove that if `as.reverse = as`, then `Palindrome as` holds.
Note that we use the `using` modifier to instruct the `induction` tactic to use this induction principle
instead of the default one for lists.
-/
theorem List.palindrome_of_eq_reverse (h : as.reverse = as) : Palindrome as := by
  induction as using palindrome_ind
  next   => exact Palindrome.nil
  next a => exact Palindrome.single a
  next a b as ih =>
    have : a = b := by simp_all
    subst this
    have : as.reverse = as := by simp_all
    exact Palindrome.sandwich a (ih this)

/-!
We now define a function that returns `true` iff `as` is a palindrome.
The function assumes that the type `α` has decidable equality. We need this assumption
because we need to compare the list elements.
-/
def List.isPalindrome [DecidableEq α] (as : List α) : Bool :=
    as.reverse = as

/-!
It is straightforward to prove that `isPalindrome` is correct using the previously proved theorems.
-/
theorem List.isPalindrome_correct [DecidableEq α] (as : List α) : as.isPalindrome ↔ Palindrome as := by
  simp [isPalindrome]
  exact Iff.intro (fun h => palindrome_of_eq_reverse h) (fun h => reverse_eq_of_palindrome h)

#eval [1, 2, 1].isPalindrome
#eval [1, 2, 3, 1].isPalindrome

example : [1, 2, 1].isPalindrome := rfl
example : [1, 2, 2, 1].isPalindrome := rfl
example : ![1, 2, 3, 1].isPalindrome := rfl
(this example is rendered by Alectryon in the CI)
/-!
# Binary Search Trees

If the type of keys can be totally ordered -- that is, it supports a well-behaved `≤` comparison --
then maps can be implemented with binary search trees (BSTs). Insert and lookup operations on BSTs take time
proportional to the height of the tree. If the tree is balanced, the operations therefore take logarithmic time.

This example is based on a similar example found in the ["Software Foundations"](https://softwarefoundations.cis.upenn.edu/vfa-current/SearchTree.html)
book (volume 3).
-/

/-!
We use `Nat` as the key type in our implementation of BSTs,
since it has a convenient total order with lots of theorems and automation available.
We leave as an exercise to the reader the generalization to arbitrary types.
-/

inductive Tree (β : Type v) where
  | leaf
  | node (left : Tree β) (key : Nat) (value : β) (right : Tree β)
  deriving Repr

/-!
The function `contains` returns `true` iff the given tree contains the key `k`.
-/
def Tree.contains (t : Tree β) (k : Nat) : Bool :=
  match t with
  | leaf => false
  | node left key value right =>
    if k < key then
      left.contains k
    else if key < k then
      right.contains k
    else
      true

/-!
`t.find? k` returns `some v` if `v` is the value bound to key `k` in the tree `t`. It returns `none` otherwise.
-/
def Tree.find? (t : Tree β) (k : Nat) : Option β :=
  match t with
  | leaf => none
  | node left key value right =>
    if k < key then
      left.find? k
    else if key < k then
      right.find? k
    else
      some value

/-!
`t.insert k v` is the map containing all the bindings of `t` along with a binding of `k` to `v`.
-/
def Tree.insert (t : Tree β) (k : Nat) (v : β) : Tree β :=
  match t with
  | leaf => node leaf k v leaf
  | node left key value right =>
    if k < key then
      node (left.insert k v) key value right
    else if key < k then
      node left key value (right.insert k v)
    else
      node left k v right
/-!
Let's add a new operation to our tree: converting it to an association list that contains the key--value bindings from the tree stored as pairs.
If that list is sorted by the keys, then any two trees that represent the same map would be converted to the same list.
Here's a function that does so with an in-order traversal of the tree.
-/
def Tree.toList (t : Tree β) : List (Nat × β) :=
  match t with
  | leaf => []
  | node l k v r => l.toList ++ [(k, v)] ++ r.toList

#eval Tree.leaf.insert 2 "two"
      |>.insert 3 "three"
      |>.insert 1 "one"

#eval Tree.leaf.insert 2 "two"
      |>.insert 3 "three"
      |>.insert 1 "one"
      |>.toList

/-!
The implementation of `Tree.toList` is inefficient because of how it uses the `++` operator.
On a balanced tree its running time is linearithmic, because it does a linear number of
concatenations at each level of the tree. On an unbalanced tree it's quadratic time.
Here's a tail-recursive implementation than runs in linear time, regardless of whether the tree is balanced:
-/
def Tree.toListTR (t : Tree β) : List (Nat × β) :=
  go t []
where
  go (t : Tree β) (acc : List (Nat × β)) : List (Nat × β) :=
    match t with
    | leaf => acc
    | node l k v r => go l ((k, v) :: go r acc)

/-!
We now prove that `t.toList` and `t.toListTR` return the same list.
The proof is on induction, and as we used the auxiliary function `go`
to define `Tree.toListTR`, we use the auxiliary theorem `go` to prove the theorem.

The proof of the auxiliary theorem is by induction on `t`.
The `generalizing acc` modifier instructs Lean to revert `acc`, apply the
induction theorem for `Tree`s, and then reintroduce `acc` in each case.
By using `generalizing`, we obtain the more general induction hypotheses

- `left_ih : ∀ acc, toListTR.go left acc = toList left ++ acc`

- `right_ih : ∀ acc, toListTR.go right acc = toList right ++ acc`

Recall that the combinator `tac <;> tac'` runs `tac` on the main goal and `tac'` on each produced goal,
concatenating all goals produced by `tac'`. In this theorem, we use it to apply
`simp` and close each subgoal produced by the `induction` tactic.

The `simp` parameters `toListTR.go` and `toList` instruct the simplifier to try to reduce
and/or apply auto generated equation theorems for these two functions.
The parameter `*` instructs the simplifier to use any equation in a goal as rewriting rules.
In this particular case, `simp` uses the induction hypotheses as rewriting rules.
Finally, the parameter `List.append_assoc` instructs the simplifier to use the
`List.append_assoc` theorem as a rewriting rule.
-/
theorem Tree.toList_eq_toListTR (t : Tree β)
        : t.toList = t.toListTR := by
  simp [toListTR, go t []]
where
  go (t : Tree β) (acc : List (Nat × β))
     : toListTR.go t acc = t.toList ++ acc := by
    induction t generalizing acc <;>
      simp [toListTR.go, toList, *, List.append_assoc]

/-!
The `[csimp]` annotation instructs the Lean code generator to replace
any `Tree.toList` with `Tree.toListTR` when generating code.
-/
@[csimp] theorem Tree.toList_eq_toListTR_csimp
                 : @Tree.toList = @Tree.toListTR := by
  funext β t
  apply toList_eq_toListTR

/-!
The implementations of `Tree.find?` and `Tree.insert` assume that values of type tree obey the BST invariant:
for any non-empty node with key `k`, all the values of the `left` subtree are less than `k` and all the values
of the right subtree are greater than `k`. But that invariant is not part of the definition of tree.

So, let's formalize the BST invariant. Here's one way to do so. First, we define a helper `ForallTree`
to express that idea that a predicate holds at every node of a tree:
-/
inductive ForallTree (p : Nat → β → Prop) : Tree β → Prop
  | leaf : ForallTree p .leaf
  | node :
     ForallTree p left →
     p key value →
     ForallTree p right →
     ForallTree p (.node left key value right)

/-!
Second, we define the BST invariant:
An empty tree is a BST.
A non-empty tree is a BST if all its left nodes have a lesser key, its right nodes have a greater key, and the left and right subtrees are themselves BSTs.
-/
inductive BST : Tree β → Prop
  | leaf : BST .leaf
  | node :
     ForallTree (fun k v => k < key) left →
     ForallTree (fun k v => key < k) right →
     BST left → BST right →
     BST (.node left key value right)

/-!
We can use the `macro` command to create helper tactics for organizing our proofs.
The macro `have_eq x y` tries to prove `x = y` using linear arithmetic, and then
immediately uses the new equality to substitute `x` with `y` everywhere in the goal.

The modifier `local` specifies the scope of the macro.
-/
/-- The `have_eq lhs rhs` tactic (tries to) prove that `lhs = rhs`,
    and then replaces `lhs` with `rhs`. -/
local macro "have_eq " lhs:term:max rhs:term:max : tactic =>
  `(tactic|
    (have h : $lhs = $rhs :=
       -- TODO: replace with linarith
       by simp_arith at *; apply Nat.le_antisymm <;> assumption
     try subst $lhs))

/-!
The `by_cases' e` is just the regular `by_cases` followed by `simp` using all
hypotheses in the current goal as rewriting rules.
Recall that the `by_cases` tactic creates two goals. One where we have `h : e` and
another one containing `h : ¬ e`. The simplifier uses the `h` to rewrite `e` to `True`
in the first subgoal, and `e` to `False` in the second. This is particularly
useful if `e` is the condition of an `if`-statement.
-/
/-- `by_cases' e` is a shorthand form `by_cases e <;> simp[*]` -/
local macro "by_cases' " e:term :  tactic =>
  `(tactic| by_cases $e <;> simp [*])


/-!
We can use the attribute `[simp]` to instruct the simplifier to reduce given definitions or
apply rewrite theorems. The `local` modifier limits the scope of this modification to this file.
-/
attribute [local simp] Tree.insert

/-!
We now prove that `Tree.insert` preserves the BST invariant using induction and case analysis.
Recall that the tactic `. tac` focuses on the main goal and tries to solve it using `tac`, or else fails.
It is used to structure proofs in Lean.
The notation `‹e›` is just syntax sugar for `(by assumption : e)`. That is, it tries to find a hypothesis `h : e`.
It is useful to access hypothesis that have auto generated names (aka "inaccessible") names.
-/

theorem Tree.forall_insert_of_forall
        (h₁ : ForallTree p t) (h₂ : p key value)
        : ForallTree p (t.insert key value) := by
  induction h₁ with
  | leaf => exact .node .leaf h₂ .leaf
  | node hl hp hr ihl ihr =>
    rename Nat => k
    by_cases' key < k
    . exact .node ihl hp hr
    . by_cases' k < key
      . exact .node hl hp ihr
      . have_eq key k
        exact .node hl h₂ hr

theorem Tree.bst_insert_of_bst
        {t : Tree β} (h : BST t) (key : Nat) (value : β)
        : BST (t.insert key value) := by
  induction h with
  | leaf => exact .node .leaf .leaf .leaf .leaf
  | node h₁ h₂ b₁ b₂ ih₁ ih₂ =>
    rename Nat => k
    simp
    by_cases' key < k
    . exact .node (forall_insert_of_forall h₁ ‹key < k›) h₂ ih₁ b₂
    . by_cases' k < key
      . exact .node h₁ (forall_insert_of_forall h₂ ‹k < key›) b₁ ih₂
      . have_eq key k
        exact .node h₁ h₂ b₁ b₂

/-!
Now, we define the type `BinTree` using a `Subtype` that states that only trees satisfying the BST invariant are `BinTree`s.
-/
def BinTree (β : Type u) := { t : Tree β // BST t }

def BinTree.mk : BinTree β :=
  ⟨.leaf, .leaf⟩

def BinTree.contains (b : BinTree β) (k : Nat) : Bool :=
  b.val.contains k

def BinTree.find? (b : BinTree β) (k : Nat) : Option β :=
  b.val.find? k

def BinTree.insert (b : BinTree β) (k : Nat) (v : β) : BinTree β :=
  ⟨b.val.insert k v, b.val.bst_insert_of_bst b.property k v⟩

/-!
Finally, we prove that `BinTree.find?` and `BinTree.insert` satisfy the map properties.
-/

attribute [local simp]
  BinTree.mk BinTree.contains BinTree.find?
  BinTree.insert Tree.find? Tree.contains Tree.insert

theorem BinTree.find_mk (k : Nat)
        : BinTree.mk.find? k = (none : Option β) := by
  simp

theorem BinTree.find_insert (b : BinTree β) (k : Nat) (v : β)
        : (b.insert k v).find? k = some v := by
  let ⟨t, h⟩ := b; simp
  induction t with simp
  | node left key value right ihl ihr =>
    by_cases' k < key
    . cases h; apply ihl; assumption
    . by_cases' key < k
      cases h; apply ihr; assumption

theorem BinTree.find_insert_of_ne (b : BinTree β) (ne : k ≠ k') (v : β)
        : (b.insert k v).find? k' = b.find? k' := by
  let ⟨t, h⟩ := b; simp
  induction t with simp
  | leaf =>
    intros le
    exact Nat.lt_of_le_of_ne le ne
  | node left key value right ihl ihr =>
    let .node hl hr bl br := h
    specialize ihl bl
    specialize ihr br
    by_cases' k < key; by_cases' key < k
    have_eq key k
    by_cases' k' < k; by_cases' k  < k'
    have_eq k k'
    contradiction
(this example is rendered by Alectryon in the CI)
/-!
# A Certified Type Checker

In this example, we build a certified type checker for a simple expression
language.

Remark: this example is based on an example in the book [Certified Programming with Dependent Types](http://adam.chlipala.net/cpdt/) by Adam Chlipala.
-/
inductive Expr where
  | nat  : Nat → Expr
  | plus : Expr → Expr → Expr
  | bool : Bool → Expr
  | and  : Expr → Expr → Expr

/-!
We define a simple language of types using the inductive datatype `Ty`, and
its typing rules using the inductive predicate `HasType`.
-/
inductive Ty where
  | nat
  | bool
  deriving DecidableEq

inductive HasType : Expr → Ty → Prop
  | nat  : HasType (.nat v) .nat
  | plus : HasType a .nat → HasType b .nat → HasType (.plus a b) .nat
  | bool : HasType (.bool v) .bool
  | and  : HasType a .bool → HasType b .bool → HasType (.and a b) .bool

/-!
We can easily show that if `e` has type `t₁` and type `t₂`, then `t₁` and `t₂` must be equal
by using the the `cases` tactic. This tactic creates a new subgoal for every constructor,
and automatically discharges unreachable cases. The tactic combinator `tac₁ <;> tac₂` applies
`tac₂` to each subgoal produced by `tac₁`. Then, the tactic `rfl` is used to close all produced
goals using reflexivity.
-/
theorem HasType.det (h₁ : HasType e t₁) (h₂ : HasType e t₂) : t₁ = t₂ := by
  cases h₁ <;> cases h₂ <;> rfl

/-!
The inductive type `Maybe p` has two constructors: `found a h` and `unknown`.
The former contains an element `a : α` and a proof that `a` satisfies the predicate `p`.
The constructor `unknown` is used to encode "failure".
-/

inductive Maybe (p : α → Prop) where
  | found : (a : α) → p a → Maybe p
  | unknown

/-!
We define a notation for `Maybe` that is similar to the builtin notation for the Lean builtin type `Subtype`.
-/
notation "{{ " x " | " p " }}" => Maybe (fun x => p)

/-!
The function `Expr.typeCheck e` returns a type `ty` and a proof that `e` has type `ty`,
or `unknown`.
Recall that, `def Expr.typeCheck ...` in Lean is notation for `namespace Expr def typeCheck ... end Expr`.
The term `.found .nat .nat` is sugar for `Maybe.found Ty.nat HasType.nat`. Lean can infer the namespaces using
the expected types.
-/
def Expr.typeCheck (e : Expr) : {{ ty | HasType e ty }} :=
  match e with
  | nat ..   => .found .nat .nat
  | bool ..  => .found .bool .bool
  | plus a b =>
    match a.typeCheck, b.typeCheck with
    | .found .nat h₁, .found .nat h₂ => .found .nat (.plus h₁ h₂)
    | _, _ => .unknown
  | and a b =>
    match a.typeCheck, b.typeCheck with
    | .found .bool h₁, .found .bool h₂ => .found .bool (.and h₁ h₂)
    | _, _ => .unknown

theorem Expr.typeCheck_correct (h₁ : HasType e ty) (h₂ : e.typeCheck ≠ .unknown)
        : e.typeCheck = .found ty h := by
  revert h₂
  cases typeCheck e with
  | found ty' h' => intro; have := HasType.det h₁ h'; subst this; rfl
  | unknown => intros; contradiction

/-!
Now, we prove that if `Expr.typeCheck e` returns `Maybe.unknown`, then forall `ty`, `HasType e ty` does not hold.
The notation `e.typeCheck` is sugar for `Expr.typeCheck e`. Lean can infer this because we explicitly said that `e` has type `Expr`.
The proof is by induction on `e` and case analysis. The tactic `rename_i` is used to to rename "inaccessible" variables.
We say a variable is inaccessible if it is introduced by a tactic (e.g., `cases`) or has been shadowed by another variable introduced
by the user. Note that the tactic `simp [typeCheck]` is applied to all goal generated by the `induction` tactic, and closes
the cases corresponding to the constructors `Expr.nat` and `Expr.bool`.
-/
theorem Expr.typeCheck_complete {e : Expr} : e.typeCheck = .unknown → ¬ HasType e ty := by
  induction e with simp [typeCheck]
  | plus a b iha ihb =>
    split
    next => intros; contradiction
    next ra rb hnp =>
      -- Recall that `hnp` is a hypothesis generated by the `split` tactic
      -- that asserts the previous case was not taken
      intro h ht
      cases ht with
      | plus h₁ h₂ => exact hnp h₁ h₂ (typeCheck_correct h₁ (iha · h₁)) (typeCheck_correct h₂ (ihb · h₂))
  | and a b iha ihb =>
    split
    next => intros; contradiction
    next ra rb hnp =>
      intro h ht
      cases ht with
      | and h₁ h₂ =>  exact hnp h₁ h₂ (typeCheck_correct h₁ (iha · h₁)) (typeCheck_correct h₂ (ihb · h₂))

/-!
Finally, we show that type checking for `e` can be decided using `Expr.typeCheck`.
-/
instance (e : Expr) (t : Ty) : Decidable (HasType e t) :=
  match h' : e.typeCheck with
  | .found t' ht' =>
    if heq : t = t' then
      isTrue (heq ▸ ht')
    else
      isFalse fun ht => heq (HasType.det ht ht')
  | .unknown => isFalse (Expr.typeCheck_complete h')
(this example is rendered by Alectryon in the CI)
/-!
# The Well-Typed Interpreter

In this example, we build an interpreter for a simple functional programming language,
with variables, function application, binary operators and an `if...then...else` construct.
We will use the dependent type system to ensure that any programs which can be represented are well-typed.

Remark: this example is based on an example found in the Idris manual.
-/

/-!
Vectors
--------

A `Vector` is a list of size `n` whose elements belong to a type `α`.
-/

inductive Vector (α : Type u) : Nat → Type u
  | nil : Vector α 0
  | cons : α → Vector α n → Vector α (n+1)

/-!
We can overload the `List.cons` notation `::` and use it to create `Vector`s.
-/
infix:67 " :: " => Vector.cons

/-!
Now, we define the types of our simple functional language.
We have integers, booleans, and functions, represented by `Ty`.
-/
inductive Ty where
  | int
  | bool
  | fn (a r : Ty)

/-!
We can write a function to translate `Ty` values to a Lean type
— remember that types are first class, so can be calculated just like any other value.
We mark `Ty.interp` as `[reducible]` to make sure the typeclass resolution procedure can
unfold/reduce it. For example, suppose Lean is trying to synthesize a value for the instance
`Add (Ty.interp Ty.int)`. Since `Ty.interp` is marked as `[reducible]`,
the typeclass resolution procedure can reduce `Ty.interp Ty.int` to `Int`, and use
the builtin instance for `Add Int` as the solution.
-/
@[reducible] def Ty.interp : Ty → Type
  | int    => Int
  | bool   => Bool
  | fn a r => a.interp → r.interp

/-!
Expressions are indexed by the types of the local variables, and the type of the expression itself.
-/
inductive HasType : Fin n → Vector Ty n → Ty → Type where
  | stop : HasType 0 (ty :: ctx) ty
  | pop  : HasType k ctx ty → HasType k.succ (u :: ctx) ty

inductive Expr : Vector Ty n → Ty → Type where
  | var   : HasType i ctx ty → Expr ctx ty
  | val   : Int → Expr ctx Ty.int
  | lam   : Expr (a :: ctx) ty → Expr ctx (Ty.fn a ty)
  | app   : Expr ctx (Ty.fn a ty) → Expr ctx a → Expr ctx ty
  | op    : (a.interp → b.interp → c.interp) → Expr ctx a → Expr ctx b → Expr ctx c
  | ife   : Expr ctx Ty.bool → Expr ctx a → Expr ctx a → Expr ctx a
  | delay : (Unit → Expr ctx a) → Expr ctx a

/-!
We use the command `open` to create the aliases `stop` and `pop` for `HasType.stop` and `HasType.pop` respectively.
-/
open HasType (stop pop)

/-!
Since expressions are indexed by their type, we can read the typing rules of the language from the definitions of the constructors.
Let us look at each constructor in turn.

We use a nameless representation for variables — they are de Bruijn indexed.
Variables are represented by a proof of their membership in the context, `HasType i ctx ty`,
which is a proof that variable `i` in context `ctx` has type `ty`.

We can treat `stop` as a proof that the most recently defined variable is well-typed,
and `pop n` as a proof that, if the `n`th most recently defined variable is well-typed, so is the `n+1`th.
In practice, this means we use `stop` to refer to the most recently defined variable,
`pop stop` to refer to the next, and so on, via the `Expr.var` constructor.

A value `Expr.val` carries a concrete representation of an integer.

A lambda `Expr.lam` creates a function. In the scope of a function of type `Ty.fn a ty`, there is a
new local variable of type `a`.

A function application `Expr.app` produces a value of type `ty` given a function from `a` to `ty` and a value of type `a`.

The constructor `Expr.op` allows us to use arbitrary binary operators, where the type of the operator informs what the types of the arguments must be.

Finally, the constructor `Exp.ife` represents a `if-then-else` expression. The condition is a Boolean, and each branch must have the same type.

The auxiliary constructor `Expr.delay` is used to delay evaluation.
-/


/-!
When we evaluate an `Expr`, we’ll need to know the values in scope, as well as their types. `Env` is an environment,
indexed over the types in scope. Since an environment is just another form of list, albeit with a strongly specified connection
to the vector of local variable types, we overload again the notation `::` so that we can use the usual list syntax.
Given a proof that a variable is defined in the context, we can then produce a value from the environment.
-/
inductive Env : Vector Ty n → Type where
  | nil  : Env Vector.nil
  | cons : Ty.interp a → Env ctx → Env (a :: ctx)

infix:67 " :: " => Env.cons

def Env.lookup : HasType i ctx ty → Env ctx → ty.interp
  | stop,  x :: xs => x
  | pop k, x :: xs => lookup k xs

/-!
Given this, an interpreter is a function which translates an `Expr` into a Lean value with respect to a specific environment.
-/
def Expr.interp (env : Env ctx) : Expr ctx ty → ty.interp
  | var i     => env.lookup i
  | val x     => x
  | lam b     => fun x => b.interp (Env.cons x env)
  | app f a   => f.interp env (a.interp env)
  | op o x y  => o (x.interp env) (y.interp env)
  | ife c t e => if c.interp env then t.interp env else e.interp env
  | delay a   => (a ()).interp env

open Expr

/-!
We can make some simple test functions. Firstly, adding two inputs `fun x y => y + x` is written as follows.
-/

def add : Expr ctx (Ty.fn Ty.int (Ty.fn Ty.int Ty.int)) :=
  lam (lam (op (·+·) (var stop) (var (pop stop))))

#eval add.interp Env.nil 10 20

/-!
More interestingly, a factorial function fact (e.g. `fun x => if (x == 0) then 1 else (fact (x-1) * x)`), can be written as.
Note that this is a recursive (non-terminating) definition. For every input value, the interpreter terminates, but the
definition itself is non-terminating. We use two tricks to make sure Lean accepts it. First, we use the auxiliary constructor
`Expr.delay` to delay its unfolding. Second, we add the annotation `decreasing_by sorry` which can be viewed as
"trust me, this recursive definition makes sense". Recall that `sorry` is an unsound axiom in Lean.
-/

def fact : Expr ctx (Ty.fn Ty.int Ty.int) :=
  lam (ife (op (·==·) (var stop) (val 0))
           (val 1)
           (op (·*·) (delay fun _ => app fact (op (·-·) (var stop) (val 1))) (var stop)))
  decreasing_by sorry

#eval fact.interp Env.nil 10
(this example is rendered by Alectryon in the CI)
/-!
# Dependent de Bruijn Indices

In this example, we represent program syntax terms in a type family parameterized by a list of types,
representing the typing context, or information on which free variables are in scope and what
their types are.


Remark: this example is based on an example in the book [Certified Programming with Dependent Types](http://adam.chlipala.net/cpdt/) by Adam Chlipala.
-/

/-!
Programmers who move to statically typed functional languages from scripting languages
often complain about the requirement that every element of a list have the same type. With
fancy type systems, we can partially lift this requirement. We can index a list type with a
“type-level” list that explains what type each element of the list should have. This has been
done in a variety of ways in Haskell using type classes, and we can do it much more cleanly
and directly in Lean.

We parameterize our heterogeneous lists by at type `α` and an `α`-indexed type `β`.
-/

inductive HList {α : Type v} (β : α → Type u) : List α → Type (max u v)
  | nil  : HList β []
  | cons : β i → HList β is → HList β (i::is)

/-!
We overload the `List.cons` notation `::` so we can also use it to create
heterogeneous lists.
-/
infix:67 " :: " => HList.cons

/-! We similarly overload the `List` notation `[]` for the empty heterogeneous list. -/
notation "[" "]" => HList.nil

/-!
Variables are represented in a way isomorphic to the natural numbers, where
number 0 represents the first element in the context, number 1 the second element, and so
on. Actually, instead of numbers, we use the `Member` inductive family.

The value of type `Member a as` can be viewed as a certificate that `a` is
an element of the list `as`. The constructor `Member.head` says that `a`
is in the list if the list begins with it. The constructor `Member.tail`
says that if `a` is in the list `bs`, it is also in the list `b::bs`.
-/
inductive Member : α → List α → Type
  | head : Member a (a::as)
  | tail : Member a bs → Member a (b::bs)

/-!
Given a heterogeneous list `HList β is` and value of type `Member i is`, `HList.get`
retrieves an element of type `β i` from the list.
The pattern `.head` and `.tail h` are sugar for `Member.head` and `Member.tail h` respectively.
Lean can infer the namespace using the expected type.
-/
def HList.get : HList β is → Member i is → β i
  | a::as, .head => a
  | a::as, .tail h => as.get h

/-!
Here is the definition of the simple type system for our programming language, a simply typed
lambda calculus with natural numbers as the base type.
-/
inductive Ty where
  | nat
  | fn : Ty → Ty → Ty

/-!
We can write a function to translate `Ty` values to a Lean type
— remember that types are first class, so can be calculated just like any other value.
We mark `Ty.denote` as `[reducible]` to make sure the typeclass resolution procedure can
unfold/reduce it. For example, suppose Lean is trying to synthesize a value for the instance
`Add (Ty.denote Ty.nat)`. Since `Ty.denote` is marked as `[reducible]`,
the typeclass resolution procedure can reduce `Ty.denote Ty.nat` to `Nat`, and use
the builtin instance for `Add Nat` as the solution.

Recall that the term `a.denote` is sugar for `denote a` where `denote` is the function being defined.
We call it the "dot notation".
-/
@[reducible] def Ty.denote : Ty → Type
  | nat    => Nat
  | fn a b => a.denote → b.denote

/-!
Here is the definition of the `Term` type, including variables, constants, addition,
function application and abstraction, and let binding of local variables.
Since `let` is a keyword in Lean, we use the "escaped identifier" `«let»`.
You can input the unicode (French double quotes) using `\f<<` (for `«`) and `\f>>` (for `»`).
The term `Term ctx .nat` is sugar for `Term ctx Ty.nat`, Lean infers the namespace using the expected type.
-/
inductive Term : List Ty → Ty → Type
  | var   : Member ty ctx → Term ctx ty
  | const : Nat → Term ctx .nat
  | plus  : Term ctx .nat → Term ctx .nat → Term ctx .nat
  | app   : Term ctx (.fn dom ran) → Term ctx dom → Term ctx ran
  | lam   : Term (dom :: ctx) ran → Term ctx (.fn dom ran)
  | «let» : Term ctx ty₁ → Term (ty₁ :: ctx) ty₂ → Term ctx ty₂

/-!
Here are two example terms encoding, the first addition packaged as a two-argument
curried function, and the second of a sample application of addition to constants.

The command `open Ty Term Member` opens the namespaces `Ty`, `Term`, and `Member`. Thus,
you can write `lam` instead of `Term.lam`.
-/
open Ty Term Member
def add : Term [] (fn nat (fn nat nat)) :=
  lam (lam (plus (var (tail head)) (var head)))

def three_the_hard_way : Term [] nat :=
  app (app add (const 1)) (const 2)

/-!
Since dependent typing ensures that any term is well-formed in its context and has a particular type,
it is easy to translate syntactic terms into Lean values.

The attribute `[simp]` instructs Lean to always try to unfold `Term.denote` applications when one applies
the `simp` tactic. We also say this is a hint for the Lean term simplifier.
-/
@[simp] def Term.denote : Term ctx ty → HList Ty.denote ctx → ty.denote
  | var h,     env => env.get h
  | const n,   _   => n
  | plus a b,  env => a.denote env + b.denote env
  | app f a,   env => f.denote env (a.denote env)
  | lam b,     env => fun x => b.denote (x :: env)
  | «let» a b, env => b.denote (a.denote env :: env)

/-!
You can show that the denotation of `three_the_hard_way` is indeed `3` using reflexivity.
-/
example : three_the_hard_way.denote [] = 3 :=
  rfl

/-!
We now define the constant folding optimization that traverses a term if replaces subterms such as
`plus (const m) (const n)` with `const (n+m)`.
-/
@[simp] def Term.constFold : Term ctx ty → Term ctx ty
  | const n   => const n
  | var h     => var h
  | app f a   => app f.constFold a.constFold
  | lam b     => lam b.constFold
  | «let» a b => «let» a.constFold b.constFold
  | plus a b  =>
    match a.constFold, b.constFold with
    | const n, const m => const (n+m)
    | a',      b'      => plus a' b'

/-!
The correctness of the `Term.constFold` is proved using induction, case-analysis, and the term simplifier.
We prove all cases but the one for `plus` using `simp [*]`. This tactic instructs the term simplifier to
use hypotheses such as `a = b` as rewriting/simplications rules.
We use the `split` to break the nested `match` expression in the `plus` case into two cases.
The local variables `iha` and `ihb` are the induction hypotheses for `a` and `b`.
The modifier `←` in a term simplifier argument instructs the term simplifier to use the equation as a rewriting rule in
the "reverse direction". That is, given `h : a = b`, `← h` instructs the term simplifier to rewrite `b` subterms to `a`.
-/
theorem Term.constFold_sound (e : Term ctx ty) : e.constFold.denote env = e.denote env := by
  induction e with simp [*]
  | plus a b iha ihb =>
    split
    next he₁ he₂ => simp [← iha, ← ihb, he₁, he₂]
    next => simp [iha, ihb]
(this example is rendered by Alectryon in the CI)
/-!
# Parametric Higher-Order Abstract Syntax

In contrast to first-order encodings, higher-order encodings avoid explicit modeling of variable identity.
Instead, the binding constructs of an object language (the language being
formalized) can be represented using the binding constructs of the meta language (the language in which the formalization is done).
The best known higher-order encoding is called higher-order abstract syntax (HOAS),
and we can start by attempting to apply it directly in Lean.

Remark: this example is based on an example in the book [Certified Programming with Dependent Types](http://adam.chlipala.net/cpdt/) by Adam Chlipala.
-/

/-!
Here is the definition of the simple type system for our programming language, a simply typed
lambda calculus with natural numbers as the base type.
-/
inductive Ty where
  | nat
  | fn : Ty → Ty → Ty

/-!
We can write a function to translate `Ty` values to a Lean type
— remember that types are first class, so can be calculated just like any other value.
We mark `Ty.denote` as `[reducible]` to make sure the typeclass resolution procedure can
unfold/reduce it. For example, suppose Lean is trying to synthesize a value for the instance
`Add (Ty.denote Ty.nat)`. Since `Ty.denote` is marked as `[reducible]`,
the typeclass resolution procedure can reduce `Ty.denote Ty.nat` to `Nat`, and use
the builtin instance for `Add Nat` as the solution.

Recall that the term `a.denote` is sugar for `denote a` where `denote` is the function being defined.
We call it the "dot notation".
-/
@[reducible] def Ty.denote : Ty → Type
  | nat    => Nat
  | fn a b => a.denote → b.denote

/-!
With HOAS, each object language binding construct is represented with a function of
the meta language. Here is what we get if we apply that idea within an inductive definition
of term syntax. However a naive encondig in Lean fails to meet the strict positivity restrictions
imposed by the Lean kernel. An alternate higher-order encoding is parametric HOAS, as introduced by Washburn
and Weirich for Haskell and tweaked by Adam Chlipala for use in Coq. The key idea is to parameterize the
declaration by a type family `rep` standing for a "representation of variables."
-/
inductive Term' (rep : Ty → Type) : Ty → Type
  | var   : rep ty → Term' rep ty
  | const : Nat → Term' rep .nat
  | plus  : Term' rep .nat → Term' rep .nat → Term' rep .nat
  | lam   : (rep dom → Term' rep ran) → Term' rep (.fn dom ran)
  | app   : Term' rep (.fn dom ran) → Term' rep dom → Term' rep ran
  | let   : Term' rep ty₁ → (rep ty₁ → Term' rep ty₂) → Term' rep ty₂

/-!
Lean accepts this definition because our embedded functions now merely take variables as
arguments, instead of arbitrary terms. One might wonder whether there is an easy loophole
to exploit here, instantiating the parameter `rep` as term itself. However, to do that, we
would need to choose a variable representation for this nested mention of term, and so on
through an infinite descent into term arguments.

We write the final type of a closed term using polymorphic quantification over all possible
choices of `rep` type family
-/

open Ty (nat fn)

namespace FirstTry

def Term (ty : Ty) := (rep : Ty → Type) → Term' rep ty

/-!
In the next two example, note how each is written as a function over a `rep` choice,
such that the specific choice has no impact on the structure of the term.
-/
def add : Term (fn nat (fn nat nat)) := fun _rep =>
  .lam fun x => .lam fun y => .plus (.var x) (.var y)

def three_the_hard_way : Term nat := fun rep =>
  .app (.app (add rep) (.const 1)) (.const 2)

end FirstTry

/-!
The argument `rep` does not even appear in the function body for `add`. How can that be?
By giving our terms expressive types, we allow Lean to infer many arguments for us. In fact,
we do not even need to name the `rep` argument! By using Lean implicit arguments and lambdas,
we can completely hide `rep` in these examples.
-/

def Term (ty : Ty) := {rep : Ty → Type} → Term' rep ty

def add : Term (fn nat (fn nat nat)) :=
  .lam fun x => .lam fun y => .plus (.var x) (.var y)

def three_the_hard_way : Term nat :=
  .app (.app add (.const 1)) (.const 2)

/-!
It may not be at all obvious that the PHOAS representation admits the crucial computable
operations. The key to effective deconstruction of PHOAS terms is one principle: treat
the `rep` parameter as an unconstrained choice of which data should be annotated on each
variable. We will begin with a simple example, that of counting how many variable nodes
appear in a PHOAS term. This operation requires no data annotated on variables, so we
simply annotate variables with `Unit` values. Note that, when we go under binders in the
cases for `lam` and `let`, we must provide the data value to annotate on the new variable we
pass beneath. For our current choice of `Unit` data, we always pass `()`.
-/

def countVars : Term' (fun _ => Unit) ty → Nat
  | .var _    => 1
  | .const _  => 0
  | .plus a b => countVars a + countVars b
  | .app f a  => countVars f + countVars a
  | .lam b    => countVars (b ())
  | .let a b  => countVars a + countVars (b ())

/-! We can now easily prove that `add` has two variables by using reflexivity -/

example : countVars add = 2 :=
  rfl

/-!
Here is another example, translating PHOAS terms into strings giving a first-order rendering.
To implement this translation, the key insight is to tag variables with strings, giving their names.
The function takes as an additional input `i` which is used to create variable names for binders.
We also use the string interpolation available in Lean. For example, `s!"x_{i}"` is expanded to
`"x_" ++ toString i`.
-/
def pretty (e : Term' (fun _ => String) ty) (i : Nat := 1) : String :=
  match e with
  | .var s     => s
  | .const n   => toString n
  | .app f a   => s!"({pretty f i} {pretty a i})"
  | .plus a b  => s!"({pretty a i} + {pretty b i})"
  | .lam f     =>
    let x := s!"x_{i}"
    s!"(fun {x} => {pretty (f x) (i+1)})"
  | .let a b  =>
    let x := s!"x_{i}"
    s!"(let {x} := {pretty a i}; => {pretty (b x) (i+1)}"

#eval pretty three_the_hard_way

/-!
It is not necessary to convert to a different representation to support many common
operations on terms. For instance, we can implement substitution of terms for variables.
The key insight here is to tag variables with terms, so that, on encountering a variable, we
can simply replace it by the term in its tag. We will call this function initially on a term
with exactly one free variable, tagged with the appropriate substitute. During recursion,
new variables are added, but they are only tagged with their own term equivalents. Note
that this function squash is parameterized over a specific `rep` choice.
-/
def squash : Term' (Term' rep) ty → Term' rep ty
 | .var e    => e
 | .const n  => .const n
 | .plus a b => .plus (squash a) (squash b)
 | .lam f    => .lam fun x => squash (f (.var x))
 | .app f a  => .app (squash f) (squash a)
 | .let a b  => .let (squash a) fun x => squash (b (.var x))

/-!
To define the final substitution function over terms with single free variables, we define
`Term1`, an analogue to Term that we defined before for closed terms.
-/
def Term1 (ty1 ty2 : Ty) := {rep : Ty → Type} → rep ty1 → Term' rep ty2

/-!
Substitution is defined by (1) instantiating a `Term1` to tag variables with terms and (2)
applying the result to a specific term to be substituted. Note how the parameter `rep` of
`squash` is instantiated: the body of `subst` is itself a polymorphic quantification over `rep`,
standing for a variable tag choice in the output term; and we use that input to compute a
tag choice for the input term.
-/

def subst (e : Term1 ty1 ty2) (e' : Term ty1) : Term ty2 :=
  squash (e e')

/-!
We can view `Term1` as a term with hole. In the following example,
`(fun x => plus (var x) (const 5))` can be viewed as the term `plus _ (const 5)` where
the hole `_` is instantiated by `subst` with `three_the_hard_way`
-/

#eval pretty <| subst (fun x => .plus (.var x) (.const 5)) three_the_hard_way

/-!
One further development, which may seem surprising at first,
is that we can also implement a usual term denotation function,
when we tag variables with their denotations.

The attribute `[simp]` instructs Lean to always try to unfold `denote` applications when one applies
the `simp` tactic. We also say this is a hint for the Lean term simplifier.
-/
@[simp] def denote : Term' Ty.denote ty → ty.denote
  | .var x    => x
  | .const n  => n
  | .plus a b => denote a + denote b
  | .app f a  => denote f (denote a)
  | .lam f    => fun x => denote (f x)
  | .let a b  => denote (b (denote a))

example : denote three_the_hard_way = 3 :=
  rfl

/-!
To summarize, the PHOAS representation has all the expressive power of more
standard encodings (e.g., using de Bruijn indices), and a variety of translations are actually much more pleasant to
implement than usual, thanks to the novel ability to tag variables with data.
-/

/-!
We now define the constant folding optimization that traverses a term if replaces subterms such as
`plus (const m) (const n)` with `const (n+m)`.
-/
@[simp] def constFold : Term' rep ty → Term' rep ty
  | .var x    => .var x
  | .const n  => .const n
  | .app f a  => .app (constFold f) (constFold a)
  | .lam f    => .lam fun x => constFold (f x)
  | .let a b  => .let (constFold a) fun x => constFold (b x)
  | .plus a b =>
    match constFold a, constFold b with
    | .const n, .const m => .const (n+m)
    | a',       b'       => .plus a' b'

/-!
The correctness of the `constFold` is proved using induction, case-analysis, and the term simplifier.
We prove all cases but the one for `plus` using `simp [*]`. This tactic instructs the term simplifier to
use hypotheses such as `a = b` as rewriting/simplications rules.
We use the `split` to break the nested `match` expression in the `plus` case into two cases.
The local variables `iha` and `ihb` are the induction hypotheses for `a` and `b`.
The modifier `←` in a term simplifier argument instructs the term simplifier to use the equation as a rewriting rule in
the "reverse direction. That is, given `h : a = b`, `← h` instructs the term simplifier to rewrite `b` subterms to `a`.
-/
theorem constFold_sound (e : Term' Ty.denote ty) : denote (constFold e) = denote e := by
  induction e with simp [*]
  | plus a b iha ihb =>
    split
    next he₁ he₂ => simp [← iha, ← ihb, he₁, he₂]
    next => simp [iha, ihb]
Organizational features
In this section we introduce some organizational features of Lean that are not a part of its kernel per se, but make it possible to work in the framework more efficiently.
Variables and Sections
Consider the following three function definitions:
def compose (α β γ : Type) (g : β → γ) (f : α → β) (x : α) : γ :=
  g (f x)

def doTwice (α : Type) (h : α → α) (x : α) : α :=
  h (h x)

def doThrice (α : Type) (h : α → α) (x : α) : α :=
  h (h (h x))
Lean provides us with the variable command to make such declarations look more compact:
variable (α β γ : Type)

def compose (g : β → γ) (f : α → β) (x : α) : γ :=
  g (f x)

def doTwice (h : α → α) (x : α) : α :=
  h (h x)

def doThrice (h : α → α) (x : α) : α :=
  h (h (h x))
We can declare variables of any type, not just Type itself:
variable (α β γ : Type)
variable (g : β → γ) (f : α → β) (h : α → α)
variable (x : α)

def compose := g (f x)
def doTwice := h (h x)
def doThrice := h (h (h x))

#print compose
#print doTwice
#print doThrice
Printing them out shows that all three groups of definitions have exactly the same effect.
The variable command instructs Lean to insert the declared variables as bound variables in definitions that refer to them.
Lean is smart enough to figure out which variables are used explicitly or implicitly in a definition. We can therefore proceed as
though α, β, γ, g, f, h, and x are fixed objects when we write our definitions, and let Lean abstract
the definitions for us automatically.
When declared in this way, a variable stays in scope until the end of the file we are working on.
Sometimes, however, it is useful to limit the scope of a variable. For that purpose, Lean provides the notion of a section:
section useful
  variable (α β γ : Type)
  variable (g : β → γ) (f : α → β) (h : α → α)
  variable (x : α)

  def compose := g (f x)
  def doTwice := h (h x)
  def doThrice := h (h (h x))
end useful
When the section is closed, the variables go out of scope, and become nothing more than a distant memory.
You do not have to indent the lines within a section. Nor do you have to name a section, which is to say,
you can use an anonymous section / end pair.
If you do name a section, however, you have to close it using the same name.
Sections can also be nested, which allows you to declare new variables incrementally.
Namespaces
Lean provides us with the ability to group definitions into nested, hierarchical namespaces:
namespace Foo
  def a : Nat := 5
  def f (x : Nat) : Nat := x + 7

  def fa : Nat := f a
  def ffa : Nat := f (f a)

  #check a
  #check f
  #check fa
  #check ffa
  #check Foo.fa
end Foo

-- #check a  -- error
-- #check f  -- error
#check Foo.a
#check Foo.f
#check Foo.fa
#check Foo.ffa

open Foo

#check a
#check f
#check fa
#check Foo.fa
When we declare that we are working in the namespace Foo, every identifier we declare has
a full name with prefix "Foo." Within the namespace, we can refer to identifiers
by their shorter names, but once we end the namespace, we have to use the longer names.
The open command brings the shorter names into the current context. Often, when we import a
module, we will want to open one or more of the namespaces it contains, to have access to the short identifiers.
But sometimes we will want to leave this information hidden, for example, when they conflict with
identifiers in another namespace we want to use. Thus namespaces give us a way to manage our working environment.
For example, Lean groups definitions and theorems involving lists into a namespace List.
#check List.nil
#check List.cons
#check List.map
We will discuss their types, below. The command open List allows us to use the shorter names:
open List

#check nil
#check cons
#check map
Like sections, namespaces can be nested:
namespace Foo
  def a : Nat := 5
  def f (x : Nat) : Nat := x + 7

  def fa : Nat := f a

  namespace Bar
    def ffa : Nat := f (f a)

    #check fa
    #check ffa
  end Bar

  #check fa
  #check Bar.ffa
end Foo

#check Foo.fa
#check Foo.Bar.ffa

open Foo

#check fa
#check Bar.ffa
Namespaces that have been closed can later be reopened, even in another file:
namespace Foo
  def a : Nat := 5
  def f (x : Nat) : Nat := x + 7

  def fa : Nat := f a
end Foo

#check Foo.a
#check Foo.f

namespace Foo
  def ffa : Nat := f (f a)
end Foo
Like sections, nested namespaces have to be closed in the order they are opened.
Namespaces and sections serve different purposes: namespaces organize data and sections declare variables for insertion in definitions.
Sections are also useful for delimiting the scope of commands such as set_option and open.
In many respects, however, a namespace ... end block behaves the same as a section ... end block.
In particular, if you use the variable command within a namespace, its scope is limited to the namespace.
Similarly, if you use an open command within a namespace, its effects disappear when the namespace is closed.
Implicit Arguments
Suppose we define the compose function as.
def compose (α β γ : Type) (g : β → γ) (f : α → β) (x : α) : γ :=
  g (f x)
The function compose takes three types, α, β, and γ, and two functions, g : β → γ and f : α → β, a value x : α, and
returns g (f x), the composition of g and f.
We say compose is polymorphic over types α, β, and γ. Now, let's use compose:
# def compose (α β γ : Type) (g : β → γ) (f : α → β) (x : α) : γ :=
#   g (f x)
def double (x : Nat) := 2*x
def triple (x : Nat) := 3*x

#check compose Nat Nat Nat double triple 10 -- Nat
#eval  compose Nat Nat Nat double triple 10 -- 60

def appendWorld (s : String) := s ++ "world"
#check String.length -- String → Nat

#check compose String String Nat String.length appendWorld "hello" -- Nat
#eval  compose String String Nat String.length appendWorld "hello" -- 10
Because compose is polymorphic over types α, β, and γ, we have to provide them in the examples above.
But this information is redundant: one can infer the types from the arguments g and f.
This is a central feature of dependent type theory: terms carry a lot of information, and often some of that information can be inferred from the context.
In Lean, one uses an underscore, _, to specify that the system should fill in the information automatically.
# def compose (α β γ : Type) (g : β → γ) (f : α → β) (x : α) : γ :=
#  g (f x)
# def double (x : Nat) := 2*x
# def triple (x : Nat) := 3*x
#check compose _ _ _ double triple 10 -- Nat
#eval  compose Nat Nat Nat double triple 10 -- 60
# def appendWorld (s : String) := s ++ "world"
# #check String.length -- String → Nat
#check compose _ _ _ String.length appendWorld "hello" -- Nat
#eval  compose _ _ _ String.length appendWorld "hello" -- 10
It is still tedious, however, to type all these underscores. When a function takes an argument that can generally be inferred from context, Lean allows us to specify that this argument should, by default, be left implicit. This is done by putting the arguments in curly braces, as follows:
def compose {α β γ : Type} (g : β → γ) (f : α → β) (x : α) : γ :=
  g (f x)
# def double (x : Nat) := 2*x
# def triple (x : Nat) := 3*x
#check compose double triple 10 -- Nat
#eval  compose double triple 10 -- 60
# def appendWorld (s : String) := s ++ "world"
# #check String.length -- String → Nat
#check compose String.length appendWorld "hello" -- Nat
#eval  compose String.length appendWorld "hello" -- 10
All that has changed are the braces around α β γ: Type.
It makes these three arguments implicit. Notationally, this hides the specification of the type,
making it look as though compose simply takes 3 arguments.
Variables can also be specified as implicit when they are declared with
the variable command:
universe u

section
  variable {α : Type u}
  variable (x : α)
  def ident := x
end

variable (α β : Type u)
variable (a : α) (b : β)

#check ident
#check ident a
#check ident b
This definition of ident here has the same effect as the one above.
Lean has very complex mechanisms for instantiating implicit arguments, and we will see that they can be used to infer function types, predicates, and even proofs.
The process of instantiating these "holes," or "placeholders," in a term is part of a bigger process called elaboration.
The presence of implicit arguments means that at times there may be insufficient information to fix the meaning of an expression precisely.
An expression like ident is said to be polymorphic, because it can take on different meanings in different contexts.
One can always specify the type T of an expression e by writing (e : T).
This instructs Lean's elaborator to use the value T as the type of e when trying to elaborate it.
In the following example, this mechanism is used to specify the desired types of the expressions ident.
def ident {α : Type u} (a : α) : α := a

#check (ident : Nat → Nat) -- Nat → Nat
Numerals are overloaded in Lean, but when the type of a numeral cannot be inferred, Lean assumes, by default, that it is a natural number.
So the expressions in the first two #check commands below are elaborated in the same way, whereas the third #check command interprets 2 as an integer.
#check 2         -- Nat
#check (2 : Nat) -- Nat
#check (2 : Int) -- Int
Sometimes, however, we may find ourselves in a situation where we have declared an argument to a function to be implicit,
but now want to provide the argument explicitly. If foo is such a function, the notation @foo denotes the same function with all
the arguments made explicit.
# def ident {α : Type u} (a : α) : α := a
variable (α β : Type)

#check @ident           -- {α : Type u} → α → α
#check @ident α         -- α → α
#check @ident β         -- β → β
#check @ident Nat       -- Nat → Nat
#check @ident Bool true -- Bool
Notice that now the first #check command gives the type of the identifier, ident, without inserting any placeholders.
Moreover, the output indicates that the first argument is implicit.
Named arguments enable you to specify an argument for a parameter by matching the argument with its name rather than with its position in the parameter list. You can use them to specify explicit and implicit arguments. If you don't remember the order of the parameters but know their names, you can send the arguments in any order. You may also provide the value for an implicit parameter when Lean failed to infer it. Named arguments also improve the readability of your code by identifying what each argument represents.
# def ident {α : Type u} (a : α) : α := a

#check ident (α := Nat)  -- Nat → Nat
#check ident (α := Bool) -- Bool → Bool
Auto Bound Implicit Arguments
In the previous section, we have shown how implicit arguments make functions more convenient to use.
However, functions such as compose are still quite verbose to define. Note that the universe
polymorphic compose is even more verbose than the one previously defined.
universe u v w
def compose {α : Type u} {β : Type v} {γ : Type w}
            (g : β → γ) (f : α → β) (x : α) : γ :=
  g (f x)
You can avoid the universe command by providing the universe parameters when defining compose.
def compose.{u, v, w}
            {α : Type u} {β : Type v} {γ : Type w}
            (g : β → γ) (f : α → β) (x : α) : γ :=
  g (f x)
Lean 4 supports a new feature called auto bound implicit arguments. It makes functions such as
compose much more convenient to write. When Lean processes the header of a declaration,
any unbound identifier is automatically added as an implicit argument if it is a single lower case or
greek letter. With this feature, we can write compose as
def compose (g : β → γ) (f : α → β) (x : α) : γ :=
  g (f x)

#check @compose
-- {β : Sort u_1} → {γ : Sort u_2} → {α : Sort u_3} → (β → γ) → (α → β) → α → γ
Note that, Lean inferred a more general type using Sort instead of Type.
Although we love this feature and use it extensively when implementing Lean,
we realize some users may feel uncomfortable with it. Thus, you can disable it using
the command set_option autoImplicit false.
set_option autoImplicit false
/- The following definition produces `unknown identifier` errors -/
-- def compose (g : β → γ) (f : α → β) (x : α) : γ :=
--   g (f x)
The Lean language server provides semantic highlighting information to editors, and it provides visual feedback whether an identifier has been interpreted as an auto bound implicit argument.
Syntax Extensions
Lean's syntax can be extended and customized
by users at every level, ranging from basic "mixfix" notations
over macro transformers to
type-aware elaborators. In fact, all builtin syntax is parsed and
processed using the same mechanisms and APIs open to users. In this
section, we will describe and explain the various extension points.
Significant syntax extensions already builtin into Lean such as the
do notation are described in subsections.
While introducing new syntax is a relatively rare feature in programming languages and sometimes even frowned upon because of its potential to obscure code, it is an invaluable tool in formalization for expressing established conventions and notations of the respective field succinctly in code. Going beyond basic notations, Lean's ability to factor out common boilerplate code into (well-behaved) macros and to embed entire custom domain specific languages (DSLs) to textually encode subproblems efficiently and readably can be of great benefit to both programmers and proof engineers alike.
The do notation
Lean is a pure functional programming language, but you can write effectful code using the do embedded domain specific language (DSL). The following simple program prints two strings "hello" and "world" in the standard output and terminates with exit code 0. Note that the type of the program is IO UInt32. You can read this type as the type of values that perform input-output effects and produce a value of type UInt32.
def main : IO UInt32 := do
  IO.println "hello"
  IO.println "world"
  return 0
The type of IO.println is String → IO Unit. That is, it is a function from String to IO Unit which indicates it may perform input-output effects and produce a value of type Unit. We often say that functions that may perform effects are methods.
We also say a method application, such as IO.println "hello" is an action.
Note that the examples above also demonstrates that braceless do blocks are whitespace sensitive.
If you like ;s and curly braces, you can write the example above as
def main : IO UInt32 := do {
  IO.println "hello";
  IO.println "world";
  return 0;
}
Semicolons can be used even when curly braces are not used. They are particularly useful when you want to "pack" more than one action in a single line.
def main : IO UInt32 := do
  IO.println "hello"; IO.println "world"
  return 0
Whitespace sensitivity in programming languages is a controversial topic among programmers. You should use your own style. We, the Lean developers, love the braceless and semicolon-free style. We believe it is clean and beautiful.
The do DSL expands into the core Lean language. Let's inspect the different components using the commands #print and #check.
# def main : IO UInt32 := do
#  IO.println "hello"
#  IO.println "world"
#  return 0

#check IO.println "hello"
-- IO Unit
#print main
-- Output contains the infix operator `>>=` and `pure`
-- The following `set_option` disables notation such as `>>=` in the output
set_option pp.notation false in
#print main
-- Output contains `bind` and `pure`
#print bind
-- bind : {m : Type u → Type v} → [self : Bind m] → {α β : Type u} →
--        m α → (α → m β) → m β
#print pure
-- pure : {m : Type u → Type v} → [self : Pure m] → {α : Type u} →
--        α → m α

-- IO implements the type classes `Bind` and `Pure`.
#check (inferInstance : Bind IO)
#check (inferInstance : Pure IO)
The types of bind and pure may look daunting at first sight.
They both have many implicit arguments. Let's focus first on the explicit arguments.
bind has two explicit arguments m α and α → m β. The first one should
be viewed as an action with effects m and producing a value of type α.
The second is a function that takes a value of type α and produces an action
with effects m and a value of type β. The result is m β. The method bind is composing
these two actions. We often say bind is an abstract semicolon. The method pure converts
a value α into an action that produces an action m α.
Here is the same function being defined using bind and pure without the do DSL.
def main : IO UInt32 :=
  bind (IO.println "hello") fun _ =>
  bind (IO.println "world") fun _ =>
  pure 0
The notations let x <- action1; action2 and let x ← action1; action2 are just syntax sugar for bind action1 fun x => action2.
Here is a small example using it.
def isGreaterThan0 (x : Nat) : IO Bool := do
  IO.println s!"value: {x}"
  return x > 0

def f (x : Nat) : IO Unit := do
  let c <- isGreaterThan0 x
  if c then
    IO.println s!"{x} is greater than 0"
  else
    pure ()

#eval f 10
-- value: 10
-- 10 is greater than 0
Nested actions
Note that we cannot write if isGreaterThan0 x then ... else ... because the condition in a if-then-else is a pure value without effects, but isGreaterThan0 x has type IO Bool. You can use the nested action notation to avoid this annoyance. Here is an equivalent definition for f using a nested action.
# def isGreaterThan0 (x : Nat) : IO Bool := do
#  IO.println s!"x: {x}"
#  return x > 0

def f (x : Nat) : IO Unit := do
  if (<- isGreaterThan0 x) then
    IO.println s!"{x} is greater than 0"
  else
    pure ()

#print f
Lean "lifts" the nested actions and introduces the bind for us.
Here is an example with two nested actions. Note that both actions are executed
even if x = 0.
# def isGreaterThan0 (x : Nat) : IO Bool := do
#  IO.println s!"x: {x}"
#  return x > 0

def f (x y : Nat) : IO Unit := do
  if (<- isGreaterThan0 x) && (<- isGreaterThan0 y) then
    IO.println s!"{x} and {y} are greater than 0"
  else
    pure ()

#eval f 0 10
-- value: 0
-- value: 10

-- The function `f` above is equivalent to
def g (x y : Nat) : IO Unit := do
  let c1 <- isGreaterThan0 x
  let c2 <- isGreaterThan0 y
  if c1 && c2 then
    IO.println s!"{x} and {y} are greater than 0"
  else
    pure ()

theorem fgEqual : f = g :=
  rfl -- proof by reflexivity
Here are two ways to achieve the short-circuit semantics in the example above
# def isGreaterThan0 (x : Nat) : IO Bool := do
#  IO.println s!"x: {x}"
#  return x > 0

def f1 (x y : Nat) : IO Unit := do
  if (<- isGreaterThan0 x <&&> isGreaterThan0 y) then
    IO.println s!"{x} and {y} are greater than 0"
  else
    pure ()

-- `<&&>` is the effectful version of `&&`
-- Given `x y : IO Bool`, `x <&&> y` : m Bool`
-- It only executes `y` if `x` returns `true`.

#eval f1 0 10
-- value: 0
#eval f1 1 10
-- value: 1
-- value: 10
-- 1 and 10 are greater than 0

def f2 (x y : Nat) : IO Unit := do
  if (<- isGreaterThan0 x) then
    if (<- isGreaterThan0 y) then
      IO.println s!"{x} and {y} are greater than 0"
    else
      pure ()
  else
    pure ()
if-then notation
In the do DSL, we can write if c then action as a shorthand for if c then action else pure (). Here is the method f2 using this shorthand.
# def isGreaterThan0 (x : Nat) : IO Bool := do
#  IO.println s!"x: {x}"
#  return x > 0

def f2 (x y : Nat) : IO Unit := do
  if (<- isGreaterThan0 x) then
    if (<- isGreaterThan0 y) then
      IO.println s!"{x} and {y} are greater than 0"
Reassignments
When writing effectful code, it is natural to think imperatively.
For example, suppose we want to create an empty array xs,
add 0 if some condition holds, add 1 if another condition holds,
and then print it. In the following example, we use variable
"shadowing" to simulate this kind of "update".
def f (b1 b2 : Bool) : IO Unit := do
  let xs := #[]
  let xs := if b1 then xs.push 0 else xs
  let xs := if b2 then xs.push 1 else xs
  IO.println xs

#eval f true true
-- #[0, 1]
#eval f false true
-- #[1]
#eval f true false
-- #[0]
#eval f false false
-- #[]
We can use tuples to simulate updates on multiple variables.
def f (b1 b2 : Bool) : IO Unit := do
  let xs := #[]
  let ys := #[]
  let (xs, ys) := if b1 then (xs.push 0, ys) else (xs, ys.push 0)
  let (xs, ys) := if b2 then (xs.push 1, ys) else (xs, ys.push 1)
  IO.println s!"xs: {xs}, ys: {ys}"

#eval f true false
-- xs: #[0], ys: #[1]
We can also simulate the control-flow above using join-points.
A join-point is a let that is always tail called and fully applied.
The Lean compiler implements them using gotos.
Here is the same example using join-points.
def f (b1 b2 : Bool) : IO Unit := do
  let jp1 xs ys := IO.println s!"xs: {xs}, ys: {ys}"
  let jp2 xs ys := if b2 then jp1 (xs.push 1) ys else jp1 xs (ys.push 1)
  let xs := #[]
  let ys := #[]
  if b1 then jp2 (xs.push 0) ys else jp2 xs (ys.push 0)

#eval f true false
-- xs: #[0], ys: #[1]
You can capture complex control-flow using join-points.
The do DSL offers the variable reassignment feature to make this kind of code more comfortable to write. In the following example, the mut modifier at let mut xs := #[] indicates that variable xs can be reassigned. The example contains two reassignments xs := xs.push 0 and xs := xs.push 1. The reassignments are compiled using join-points. There is no hidden state being updated.
def f (b1 b2 : Bool) : IO Unit := do
  let mut xs := #[]
  if b1 then xs := xs.push 0
  if b2 then xs := xs.push 1
  IO.println xs

#eval f true true
-- #[0, 1]
The notation x <- action reassigns x with the value produced by the action. It is equivalent to x := (<- action)
Iteration
The do DSL provides a unified notation for iterating over datastructures. Here are a few examples.
def sum (xs : Array Nat) : IO Nat := do
  let mut s := 0
  for x in xs do
    IO.println s!"x: {x}"
    s := s + x
  return s

#eval sum #[1, 2, 3]
-- x: 1
-- x: 2
-- x: 3
-- 6

-- We can write pure code using the `Id.run <| do` DSL too.
def sum' (xs : Array Nat) : Nat := Id.run <| do
  let mut s := 0
  for x in xs do
    s := s + x
  return s

#eval sum' #[1, 2, 3]
-- 6

def sumEven (xs : Array Nat) : IO Nat := do
  let mut s := 0
  for x in xs do
    if x % 2 == 0 then
      IO.println s!"x: {x}"
      s := s + x
  return s

#eval sumEven #[1, 2, 3, 6]
-- x: 2
-- x: 6
-- 8

def splitEvenOdd (xs : List Nat) : IO Unit := do
  let mut evens := #[]
  let mut odds  := #[]
  for x in xs do
    if x % 2 == 0 then
      evens := evens.push x
    else
      odds := odds.push x
  IO.println s!"evens: {evens}, odds: {odds}"

#eval splitEvenOdd [1, 2, 3, 4]
-- evens: #[2, 4], odds: #[1, 3]

def findNatLessThan (x : Nat) (p : Nat → Bool) : IO Nat := do
  -- [:x] is notation for the range [0, x)
  for i in [:x] do
    if p i then
      return i -- `return` from the `do` block
  throw (IO.userError "value not found")

#eval findNatLessThan 10 (fun x => x > 5 && x % 4 == 0)
-- 8

def sumOddUpTo (xs : List Nat) (threshold : Nat) : IO Nat := do
  let mut s := 0
  for x in xs do
    if x % 2 == 0 then
      continue -- it behaves like the `continue` statement in imperative languages
    IO.println s!"x: {x}"
    s := s + x
    if s > threshold then
      break -- it behaves like the `break` statement in imperative languages
  IO.println s!"result: {s}"
  return s

#eval sumOddUpTo [2, 3, 4, 11, 20, 31, 41, 51, 107] 40
-- x: 3
-- x: 11
-- x: 31
-- result: 45
-- 45
TODO: describe forIn
Try-catch
TODO
Returning early from a failed match
Inside a do block, the pattern let _ ← <success> | <fail> will continue with the rest of the block if the match on the left hand side succeeds, but will execute the right hand side and exit the block on failure:
def showUserInfo (getUsername getFavoriteColor : IO (Option String)) : IO Unit := do
  let some n ← getUsername | IO.println "no username!"
  IO.println s!"username: {n}"
  let some c ← getFavoriteColor | IO.println "user didn't provide a favorite color!"
  IO.println s!"favorite color: {c}"

-- username: JohnDoe
-- favorite color: red
#eval showUserInfo (pure <| some "JohnDoe") (pure <| some "red")

-- no username
#eval showUserInfo (pure none) (pure <| some "purple")

-- username: JaneDoe
-- user didn't provide a favorite color
#eval showUserInfo (pure <| some "JaneDoe") (pure none)
If-let
Inside a do block, users can employ the if let pattern to destructure actions:
def tryIncrement (getInput : IO (Option Nat)) : IO (Except String Nat) := do
  if let some n ← getInput
  then return Except.ok n.succ
  else return Except.error "argument was `none`"

-- Except.ok 2
#eval tryIncrement (pure <| some 1)

-- Except.error "argument was `none`"
#eval tryIncrement (pure <| none)
Pattern matching
TODO
Monads
TODO
ReaderT
TODO
StateT
TODO
StateRefT
TODO
ExceptT
TODO
MonadLift and automatic lifting
TODO
String interpolation
The s! prefix identifies a string literal as an interpolated string.
An interpolated string is a string literal that might contain interpolation expressions.
When an interpolated string is resolved to a result string, items with interpolation expressions are
replaced by the string representations of the expression results. The polymorphic method toString is used
to convert the value into a string.
String interpolation provides a more readable and convenient syntax to create formatted strings than a string composite formatting feature. The following example uses both features to produce the same output:
def name := "John"
def age  := 28

#eval IO.println s!"Hello, {name}! Are you {age} years old?"

#eval IO.println ("Hello, " ++ name ++ "! Are you " ++ toString age ++ " years old?")

-- `println! <interpolated-string>` is a macro for `IO.println s!<interpolated-string>`
#eval println! "Hello, {name}! Are you {age} years old?"
Structure of an interpolated string
To identify a string literal as an interpolated string, prepend it with s!.
Terms inside braces {} are ordinary expressions whose type implements the type class ToString.
To include a curly brace { in your interpolated string, you must escape it using \{.
You can nest interpolated strings inside interpolated strings.
def vals := [1, 2, 3]

#eval IO.println s!"\{ vals := {vals} }"

#eval IO.println s!"variables: {vals.map (fun i => s!"x_{i}")}"
ToString instances
You can define a ToString instance for your own datatypes.
structure Person where
  name : String
  age  : Nat

instance : ToString Person where
  toString : Person -> String
    | { name := n, age := v } => s!"\{ name := {n}, age := {v} }"

def person1 : Person := {
  name := "John"
  age  := 28
}

#eval println! "person1: {person1}"
Notations and Precedence
The most basic syntax extension commands allow introducing new (or overloading existing) prefix, infix, and postfix operators.
infixl:65   " + " => HAdd.hAdd  -- left-associative
infix:50    " = " => Eq         -- non-associative
infixr:80   " ^ " => HPow.hPow  -- right-associative
prefix:75  "-"   => Neg.neg
# set_option quotPrecheck false
postfix:max "⁻¹"  => Inv.inv
After the initial command name describing the operator kind (its
"fixity"), we give the parsing precedence of the operator preceded
by a colon :, then a new or existing token surrounded by double
quotes (the whitespace is used for pretty printing), then the function
this operator should be translated to after the arrow =>.
The precedence is a natural number describing how "tightly" an operator binds to its arguments, encoding the order of operations. We can make this more precise by looking at what the commands above unfold to:
notation:65 lhs:65 " + " rhs:66 => HAdd.hAdd lhs rhs
notation:50 lhs:51 " = " rhs:51 => Eq lhs rhs
notation:80 lhs:81 " ^ " rhs:80 => HPow.hPow lhs rhs
notation:75 "-" arg:75 => Neg.neg arg
# set_option quotPrecheck false
notation:1024 arg:1024 "⁻¹" => Inv.inv arg  -- `max` is a shorthand for precedence 1024
It turns out that all commands from the first code block are in fact
command macros translating to the more general notation command.
We will learn about writing such macros below. Instead of a single
token, the notation command accepts a mixed sequence of tokens and
named term placeholders with precedences, which can be referenced on
the right-hand side of => and will be replaced by the respective
term parsed at that position. A placeholder with precedence p
accepts only notations with precedence at least p in that place.
Thus the string a + b + c cannot be parsed as the equivalent of a + (b + c) because the right-hand side operand of an infixl notation
has precedence one greater than the notation itself. In contrast,
infixr reuses the notation's precedence for the right-hand side
operand, so a ^ b ^ c can be parsed as a ^ (b ^ c). Note that if
we used notation directly to introduce an infix notation like
# set_option quotPrecheck false
notation:65 lhs:65 " ~ " rhs:65 => wobble lhs rhs
where the precedences do not sufficiently determine associativity,
Lean's parser will default to right associativity. More precisely,
Lean's parser follows a local longest parse rule in the presence of
ambiguous grammars: when parsing the right-hand side of a ~ in a ~ b ~ c, it will continue parsing as long as possible (as the current
precedence allows), not stopping after b but parsing ~ c as well.
Thus the term is equivalent to a ~ (b ~ c).
As mentioned above, the notation command allows us to define
arbitrary mixfix syntax freely mixing tokens and placeholders.
# set_option quotPrecheck false
notation:max "(" e ")" => e
notation:10 Γ " ⊢ " e " : " τ => Typing Γ e τ
Placeholders without precedence default to 0, i.e. they accept
notations of any precedence in their place. If two notations overlap,
we again apply the longest parse rule:
notation:65 a " + " b:66 " + " c:66 => a + b - c
#eval 1 + 2 + 3  -- 0
The new notation is preferred to the binary notation since the latter,
before chaining, would stop parsing after 1 + 2. If there are
multiple notations accepting the same longest parse, the choice will
be delayed until elaboration, which will fail unless exactly one
overload is type correct.
Macro Overview
The official paper describing the mechanics behind Lean 4's macro system can be found in Beyond Notations: Hygienic Macro Expansion for Theorem Proving Languages by Sebastian Ullrich and Leonardo de Moura, and the accompanying repo with example code can be found in the paper's code supplement. The supplement also includes a working implementation of the macro expander, so it's a good case study for people interested in the details.
What is a macro in Lean?
A macro is a function that takes in a syntax tree and produces a new syntax tree. Macros are useful for many reasons, but two of the big ones are a) allowing users to extend the language with new syntactic constructs without having to actually expand the core language, and b) allowing users to automate tasks that would otherwise be extremely repetitive, time-consuming, and/or error-prone.
A motivating example is set builder notation. We would like to be able to write
the set of natural numbers 0, 1, and 2 as just {0, 1, 2}. However, Lean does
not natively support this syntax, and the actual definition of a set in Mathlib
does not let us just declare sets in this manner; naively using the set API
would force us to write Set.insert 1 (Set.insert 2 (Set.singleton 3)).
Instead, we can teach Lean's macro system to recognize {0, 1, 2} as a
shorthand for a composition of existing methods and let it do the repetitive
work of creating the Set.insert... invocation for us. In this way, we can have
our more readable and more convenient syntax without having to extend Lean
itself, and while retaining the simple insert/singleton API.
How macros are handled
The general procedure is as follows:
-
Lean parses a command, creating a Lean syntax tree which contains any unexpanded macros.
-
Lean repeats the cycle (elaboration ~> (macro hygiene and expansion) ~> elaboration...)
The cycle in step 2 repeats until there are no more macros which need to be expanded, and elaboration can finish normally. This repetition is required since macros can expand to other macros, and may expand to code that needs information from the elaborator. As you can see, the process of macro parsing and expansion is interleaved with the parsing and elaboration of non-macro code.
By default, macros in Lean are hygienic, which means the system avoids
accidental name capture when reusing the same name inside and outside the macro.
Users may occasionally want to disable hygiene, which can be accomplished with
the command set_option hygiene false. More in-depth information about hygiene
and how it's implemented in the official paper and supplement linked at the top
of this guide.
Elements of "a" macro (important types)
In the big picture, a macro has two components that must be implemented by the
user, parsers and syntax transformers, where the latter is a function that says
what the input syntax should expand to. There is a third component, syntax
categories, such as term, tactic, and command, but declaring a new syntax
category is not always necessary. When we say "parser" in the context of a
macro, we refer to the core type Lean.ParserDescr, which parses elements of
type Lean.Syntax, where Lean.Syntax represents elements of a Lean syntax
tree. Syntax transformers are functions of type Syntax -> MacroM Syntax. Lean
has a synonym for this type, which is simply Macro. MacroM is a monad that
carries state needed for macro expansion to work nicely, including the info
needed to implement hygiene.
As an example, we again refer to Mathlib's set builder notation:
/- Declares a parser -/
syntax (priority := high) "{" term,+ "}" : term

/- Declares two expansions/syntax transformers -/
macro_rules
  | `({$x}) => `(Set.singleton $x)
  | `({$x, $xs:term,*}) => `(Set.insert $x {$xs,*})

/- Provided `Set` has been imported (from Mathlib4), these are all we need for `{1, 2, 3}` to be valid notation to create a literal set -/
This example should also make clear the reason why macros (and pretty much all
of Lean 4's metaprogramming facilities) are functions that take an argument of
type Syntax e.g. Syntax -> MacroM Syntax; the leading syntax element is the
thing that actually triggers the macro expansion by matching with the declared
parser, and as a user, you will almost always be interested in inspecting and
transforming that initial syntax element (though there are cases in which it can
just be ignored, as in the parameter-less exfalso tactic).
Returning briefly to the API provided by Lean, Lean.Syntax, is pretty much
what you would expect a basic syntax tree type to look like. Below is a slightly
simplified representation which omits details in the atom and ident
constructors; users can create atoms and idents which comport with this
simplified representation using the mkAtom and mkIdent methods provided in
the Lean namespace.
# open Lean
inductive Syntax where
  | missing : Syntax
  | node (kind : SyntaxNodeKind) (args : Array Syntax) : Syntax
  | atom : String -> Syntax
  | ident : Name -> Syntax
For those interested, MacroM is a ReaderT:
# open Lean
abbrev MacroM := ReaderT Macro.Context (EStateM Macro.Exception Macro.State)
The other relevant components are defined as follows:
# open Lean
structure Context where
  methods        : MethodsRef
  mainModule     : Name
  currMacroScope : MacroScope
  currRecDepth   : Nat := 0
  maxRecDepth    : Nat := defaultMaxRecDepth
  ref            : Syntax

inductive Exception where
  | error             : Syntax → String → Exception
  | unsupportedSyntax : Exception

structure State where
  macroScope : MacroScope
  traceMsgs  : List (Prod Name String) := List.nil
  deriving Inhabited
As a review/checklist, the three (sometimes only two depending on whether you need a new syntax category) components users need to be concerned with are:
- You may or may not need to declare a new syntax category using
declare_syntax_cat - Declare a parser with either
syntaxormacro - Declare an expansion/syntax transformer with either
macro_rulesormacro
Parsers and syntax transformers can be declared manually, but use of the pattern
language and syntax, macro_rules, and macro is recommended.
syntax categories with declare_syntax_cat
declare_syntax_cat declares a new syntax category, like command, tactic,
or mathlib4's binderterm. These are the different categories of things that
can be referred to in a quote/antiquote. declare_syntax_cat results in a call
to registerParserCategory and produces a new parser descriptor:
set_option trace.Elab.definition true in
declare_syntax_cat binderterm

/-
Output:

[Elab.definition.body] binderterm.quot : Lean.ParserDescr :=
Lean.ParserDescr.node `Lean.Parser.Term.quot 1024
  (Lean.ParserDescr.binary `andthen (Lean.ParserDescr.symbol "`(binderterm|")
    (Lean.ParserDescr.binary `andthen (Lean.ParserDescr.cat `binderterm 0)
      (Lean.ParserDescr.symbol ")")))
-/
Declaring a new syntax category like this one automatically declares a quotation
operator `(binderterm| ...). These pipe prefixes <thing>| are used in
syntax quotations to say what category a given quotation is expected to be an
element of. The pipe prefixes are not used for elements in the term and
command categories (since they're considered the default), but need to be used
for everything else.
Parsers and the syntax keyword
Internally, elements of type Lean.ParserDescr are implemented as parser
combinators. However, Lean offers the ability to write parsers using the
macro/pattern language by way of the syntax keyword. This is the recommended
means of writing parsers. As an example, the parser for the rwa (rewrite, then
use assumption) tactic is:
# open Lean.Parser.Tactic
set_option trace.Elab.definition true in
syntax "rwa " rwRuleSeq (location)? : tactic

/-
which expands to:
[Elab.definition.body] tacticRwa__ : Lean.ParserDescr :=
Lean.ParserDescr.node `tacticRwa__ 1022
  (Lean.ParserDescr.binary `andthen
    (Lean.ParserDescr.binary `andthen (Lean.ParserDescr.nonReservedSymbol "rwa " false) Lean.Parser.Tactic.rwRuleSeq)
    (Lean.ParserDescr.unary `optional Lean.Parser.Tactic.location))

-/
Literals are written as double-quoted strings ("rwa " expects the literal
sequence of characters rwa, while the trailing space provides a hint to the
formatter that it should add a space after rwa when pretty printing this
syntax); rwRuleSeq and location are themselves ParserDescrs, and we finish
with : tactic specifying that the preceding parser is for an element in the
tactic syntax category. The parentheses around (location)? are necessary
(rather than location?) because Lean 4 allows question marks to be used in
identifiers, so location? is one single identifier that ends with a question
mark, which is not what we want.
The name tacticRwa__ is automatically generated. You can name parser
descriptors declared with the syntax keyword like so:
set_option trace.Elab.definition true in
syntax (name := introv) "introv " (colGt ident)* : tactic

/-
[Elab.definition.body] introv : Lean.ParserDescr :=
Lean.ParserDescr.node `introv 1022
  (Lean.ParserDescr.binary `andthen (Lean.ParserDescr.nonReservedSymbol "introv " false)
    (Lean.ParserDescr.unary `many
      (Lean.ParserDescr.binary `andthen (Lean.ParserDescr.const `colGt) (Lean.ParserDescr.const `ident))))
-/
The pattern language
Available quantifiers are ? (one or zero occurrences, see note below), *
(zero or more occurrences), and + (one or more occurrences).
Keep in mind that Lean makes ? available for use in identifiers, so if we want
a parser to look for an optional location, we would need to write
(location)? with parenthesis acting as a separator, since location? would
look for something under the identifier location? (where the ? is part of
the identifier).
Parentheses can be used as delimiters.
Separated lists can be constructed like so: $ts,* for a comma separated list.
"extended splices" can be constructed as $[..]. See the official paper (p. 12)
for more details.
Literals are written as double-quoted strings. A literal may use trailing
whitespace (see e.g. the rwa or introv tactics) to tell the pretty-printer
how it should be displayed, but such whitespace will not prevent a literal with
no trailing whitespace from matching. The spaces are relevant, but not
interpreted literally. When the ParserDescr is turned into a Parser, the actual
token matcher uses the .trim of the provided
string,
but the generated formatter uses the spaces as
specified,
that is, turning the atom "rwa" in the syntax into the string rwa as part of the
pretty printed output.
Syntax expansions with macro_rules, and how it desugars.
macro_rules lets you declare expansions for a given Syntax element using a
syntax similar to a match statement. The left-hand side of a match arm is a
quotation (with a leading <cat>| for categories other than term and
command) in which users can specify the pattern they'd like to write an
expansion for. The right-hand side returns a syntax quotation which is the
output the user wants to expand to.
A feature of Lean's macro system is that if there are multiple expansions for a particular match, Lean will try the most recently declared expansion first, and will retry with other matching expansions if the previous attempt failed. This is particularly useful for extending existing tactics.
The following example shows both the retry behavior, and the fact that macros
declared using the shorthand macro syntax can still have additional expansions
declared with macro_rules. This transitivity tactic is implemented such that
it will work for either Nat.le or Nat.lt. The Nat.lt version was declared "most
recently", so it will be tried first, but if it fails (for example, if the
actual term in question is Nat.le) the next potential expansion will be tried:
macro "transitivity" e:(colGt term) : tactic => `(tactic| apply Nat.le_trans (m := $e))
macro_rules
  | `(tactic| transitivity $e) => `(tactic| apply Nat.lt_trans (m := $e))

example (a b c : Nat) (h0 : a < b) (h1 : b < c) : a < c := by
  transitivity b <;>
  assumption

example (a b c : Nat) (h0 : a <= b) (h1 : b <= c) : a <= c := by
  transitivity b <;>
  assumption

/- This will fail, but is interesting in that it exposes the "most-recent first" behavior, since the
  error message complains about being unable to unify mvar1 <= mvar2, rather than mvar1 < mvar2. -/
/-
example (a b c : Nat) (h0 : a <= b) (h1 : b <= c) : False := by
  transitivity b <;>
  assumption
-/
To see the desugared definition of the actual expansion, we can again use
set_option trace.Elab.definition true in and observe the output of the humble
exfalso tactic defined in Mathlib4:
set_option trace.Elab.definition true in
macro "exfalso" : tactic => `(tactic| apply False.elim)

/-
Results in the expansion:

[Elab.definition.body] _aux___macroRules_tacticExfalso_1 : Lean.Macro :=
fun x =>
  let discr := x;
  /- This is where Lean tries to actually identify that it's an invocation of the exfalso tactic -/
  if Lean.Syntax.isOfKind discr `tacticExfalso = true then
    let discr := Lean.Syntax.getArg discr 0;
    let x := discr;
    do
      /- Lean getting scope/meta info from the macro monad -/
      let info ← Lean.MonadRef.mkInfoFromRefPos
      let scp ← Lean.getCurrMacroScope
      let mainModule ← Lean.getMainModule
      pure
          (Lean.Syntax.node Lean.SourceInfo.none `Lean.Parser.Tactic.seq1
            #[Lean.Syntax.node Lean.SourceInfo.none `null
                #[Lean.Syntax.node Lean.SourceInfo.none `Lean.Parser.Tactic.apply
                    #[Lean.Syntax.atom info "apply",
                      Lean.Syntax.ident info (String.toSubstring "False.elim")
                        (Lean.addMacroScope mainModule `False.elim scp) [(`False.elim, [])]]]])
  else
    /- If this wasn't actually an invocation of the exfalso tactic, throw the "unsupportedSyntax" error -/
    let discr := x;
    throw Lean.Macro.Exception.unsupportedSyntax
-/
We can also create the syntax transformer declaration ourselves instead of using
macro_rules. We'll need to name our parser and use the attribute @[macro myExFalsoParser] to associate our declaration with the parser:
# open Lean
syntax (name := myExfalsoParser) "myExfalso" : tactic

-- remember that `Macro` is a synonym for `Syntax -> TacticM Unit`
@[macro myExfalsoParser] def implMyExfalso : Macro :=
fun stx => `(tactic| apply False.elim)

example (p : Prop) (h : p) (f : p -> False) : 3 = 2 := by
  myExfalso
  exact f h
In the above example, we're still using the sugar Lean provides for creating quotations, as it feels more intuitive and saves us some work. It is possible to forego the sugar altogether:
syntax (name := myExfalsoParser) "myExfalso" : tactic

@[macro myExfalsoParser] def implMyExfalso : Lean.Macro :=
  fun stx => pure (Lean.mkNode `Lean.Parser.Tactic.apply
    #[Lean.mkAtomFrom stx "apply", Lean.mkCIdentFrom stx ``False.elim])

example (p : Prop) (h : p) (f : p -> False) : 3 = 2 := by
  myExfalso
  exact f h
The macro keyword
macro is a shortcut which allows users to declare both a parser and an
expansion at the same time as a matter of convenience. Additional expansions for
the parser generated by the macro invocation can be added with a separate
macro_rules block (see the example in the macro_rules section).
Unexpanders
TODO; for now, see the unexpander in Mathlib.Set for an example.
More illustrative examples:
The Tactic.Basic file in Mathlib4 contains many good examples to learn from.
Practical tips:
You can observe the output of commands and functions that in some way use the
macro system by setting this option to true : set_option trace.Elab.definition true
Lean also offers the option of limiting the region in which option is set with
the syntax set_option ... in):
Hygiene can be disabled with the command option set_option hygiene false
Elaborators
TODO. See Lean Together 2021: Metaprogramming in Lean 4 for an overview as well the continuation about tactic programming. For more information on antiquotations, see also §4.1 of Beyond Notations: Hygienic Macro Expansion for Theorem Proving Languages.
Syntax Metaprogramming Examples
Balanced Parentheses as an Embedded Domain Specific Language
Let's look at how to use macros to extend the Lean 4 parser and embed a language for building balanced parentheses. This language accepts strings given by the BNF grammar
Dyck ::=
  "(" Dyck ")"
  | "{" Dyck "}"
  | end
We begin by defining an inductive data type of the grammar we wish to parse:
inductive Dyck : Type where
  | round : Dyck → Dyck  -- ( <inner> )
  | curly : Dyck → Dyck  -- { <inner> }
  | leaf : Dyck
We begin by declaring a syntax category using the declare_syntax_cat <category> command.
This names our grammar and allows us to specify parsing rules associated with our grammar.
declare_syntax_cat brack
Next, we specify the grammar using the syntax <parse rule> command:
syntax "end" : brack
The above means that the token "end" lives in syntax category brack.
Similarly, we declare the rules "(" Dyck ")" and "{" Dyck "}" using the rules:
syntax "(" brack ")" : brack
syntax "{" brack "}" : brack
Finally, we need a way to build Lean 4 terms from this grammar -- that is, we must translate out of this
grammar into a Dyck value, which is a Lean 4 term. For this, we create a new kind of "quotation" that
consumes syntax in brack and produces a term.
syntax "`[Dyck| " brack "]" : term
To specify the transformation rules, we use macro_rules to declare how the syntax `[Dyck| <brack>]
produces terms. This is written using a pattern-matching style syntax, where the left-hand side
declares the syntax pattern to be matched, and the right-hand side declares the production. Syntax placeholders (antiquotations)
are introduced via the $<var-name> syntax. The right-hand side is
an arbitrary Lean term that we are producing.
macro_rules
  | `(`[Dyck| end])    => `(Dyck.leaf)
  | `(`[Dyck| ($b)]) => `(Dyck.round `[Dyck| $b])  -- recurse
  | `(`[Dyck| {$b}]) => `(Dyck.curly `[Dyck| $b])  -- recurse
#check `[Dyck| end]      -- Dyck.leaf
#check `[Dyck| {(end)}]  -- Dyck.curl (Dyck.round Dyck.leaf)
In summary, we've seen:
- How to declare a syntax category for the Dyck grammar.
- How to specify parse trees of this grammar using
syntax - How to translate out of this grammar into Lean 4 terms using
macro_rules.
The full program listing is given below:
inductive Dyck : Type where
  | round : Dyck → Dyck  -- ( <inner> )
  | curly : Dyck → Dyck  -- { <inner> }
  | leaf : Dyck

-- declare Dyck grammar parse trees
declare_syntax_cat brack
syntax "(" brack ")" : brack
syntax "{" brack "}" : brack
syntax "end" : brack

-- notation for translating `brack` into `term`
syntax "`[Dyck| " brack "]" : term

-- rules to translate Dyck grammar into inductive value of type Dyck
macro_rules
  | `(`[Dyck| end])    => `(Dyck.leaf)
  | `(`[Dyck| ($b)]) => `(Dyck.round `[Dyck| $b])  -- recurse
  | `(`[Dyck| {$b}]) => `(Dyck.curly `[Dyck| $b])  -- recurse

-- tests
#check `[Dyck| end]      -- Dyck.leaf
#check `[Dyck| {(end)}]  -- Dyck.curl (Dyck.round Dyck.leaf)
Arithmetic as an embedded domain-specific language
Let's parse another classic grammar, the grammar of arithmetic expressions with addition, multiplication, integers, and variables. In the process, we'll learn how to:
- Convert identifiers such as
xinto strings within a macro. - add the ability to "escape" the macro context from within the macro. This is useful to interpret identifiers with their original meaning (predefined values) instead of their new meaning within a macro (treat as a symbol).
Let's begin with the simplest thing possible. We'll define an AST, and use operators + and * to denote
building an arithmetic AST.
Here's the AST that we will be parsing:
inductive Arith : Type
  | add : Arith → Arith → Arith  -- e + f
  | mul : Arith → Arith → Arith  -- e * f
  | int : Int → Arith  -- constant
  | symbol : String → Arith  -- variable
We declare a syntax category to describe the grammar that we will be parsing.
See that we control the precedence of + and * by writing syntax:50 for addition and syntax:60 for multiplication,
indicating that multiplication binds tighter than addition (higher the number, tighter the binding).
This allows us to declare precedence when defining new syntax.
declare_syntax_cat arith

syntax num : arith  -- int for Arith.int
syntax str : arith  -- strings for Arith.symbol
syntax:60 arith:60 "+" arith:61 : arith  -- Arith.add
syntax:70 arith:70 "*" arith:71 : arith  -- Arith.mul
syntax "(" arith ")" : arith  -- parenthesized expressions
Further, if we look at syntax:60 arith:60 "+" arith:61 : arith, the
precedence declarations at arith:60 "+" arith:61 conveys that the left
argument must have precedence at least 60 or greater, and the right argument
must have precedence at least61 or greater. Note that this forces left
associativity. To understand this, let's compare two hypothetical parses:
-- syntax:60  arith:60 "+" arith:61 : arith -- Arith.add
-- a + b + c
(a:60 + b:61):60 + c
a + (b:60 + c:61):60
In the parse tree of a + (b:60 + c:61):60, we see that the right argument (b + c) is given the precedence 60. However,
the rule for addition expects the right argument to have a precedence of at least 61, as witnessed by the arith:61 at
the right-hand-side of syntax:60 arith:60 "+" arith:61 : arith. Thus, the rule syntax:60 arith:60 "+" arith:61 : arith
ensures that addition is left associative.
Since addition is declared arguments of precedence 60/61 and multiplication with 70/71, this causes multiplication to bind
tighter than addition. Once again, let's compare two hypothetical parses:
-- syntax:60  arith:60 "+" arith:61 : arith -- Arith.add
-- syntax:70 arith:70 "*" arith:71 : arith -- Arith.mul
-- a * b + c
a * (b:60 + c:61):60
(a:70 * b:71):70 + c
While parsing a * (b + c), (b + c) is assigned a precedence 60 by the addition rule. However, multiplication expects
the right argument to have precedence at least 71. Thus, this parse is invalid. In contrast, (a * b) + c assigns
a precedence of 70 to (a * b). This is compatible with addition which expects the left argument to have precedence
**at least 60 ** (70 is greater than 60). Thus, the string a * b + c is parsed as (a * b) + c.
For more details, please look at the Lean manual on syntax extensions.
To go from strings into Arith, we define a macro to
translate the syntax category arith into an Arith inductive value that
lives in term:
-- auxiliary notation for translating `arith` into `term`
syntax "`[Arith| " arith "]" : term
Our macro rules perform the "obvious" translation:
macro_rules
  | `(`[Arith| $s:str]) => `(Arith.symbol $s)
  | `(`[Arith| $num:num]) => `(Arith.int $num)
  | `(`[Arith| $x + $y]) => `(Arith.add `[Arith| $x] `[Arith| $y])
  | `(`[Arith| $x * $y]) => `(Arith.mul `[Arith| $x] `[Arith| $y])
  | `(`[Arith| ($x)]) => `(`[Arith| $x])
And some examples:
#check `[Arith| "x" * "y"]  -- mul
-- Arith.mul (Arith.symbol "x") (Arith.symbol "y")

#check `[Arith| "x" + "y"]  -- add
-- Arith.add (Arith.symbol "x") (Arith.symbol "y")

#check `[Arith| "x" + 20]  -- symbol + int
-- Arith.add (Arith.symbol "x") (Arith.int 20)

#check `[Arith| "x" + "y" * "z"]  -- precedence
-- Arith.add (Arith.symbol "x") (Arith.mul (Arith.symbol "y") (Arith.symbol "z"))

#check `[Arith| "x" * "y" + "z"]  -- precedence
-- Arith.add (Arith.mul (Arith.symbol "x") (Arith.symbol "y")) (Arith.symbol "z")

#check `[Arith| ("x" + "y") * "z"]  -- parentheses
-- Arith.mul (Arith.add (Arith.symbol "x") (Arith.symbol "y")) (Arith.symbol "z")
Writing variables as strings, such as "x" gets old; wouldn't it be so much
prettier if we could write x * y, and have the macro translate this into Arith.mul (Arith.Symbol "x") (Arith.mul "y")?
We can do this, and this will be our first taste of manipulating macro variables --- we'll use x.getId instead of directly evaluating $x.
We also write a macro rule for Arith| that translates an identifier into
a string, using $(Lean.quote (toString x.getId)):
syntax ident : arith

macro_rules
  | `(`[Arith| $x:ident]) => `(Arith.symbol $(Lean.quote (toString x.getId)))
Let's test and see that we can now write expressions such as x * y directly instead of having to write "x" * "y":
#check `[Arith| x]  -- Arith.symbol "x"

def xPlusY := `[Arith| x + y]
#print xPlusY  -- def xPlusY : Arith := Arith.add (Arith.symbol "x") (Arith.symbol "y")
We now show an unfortunate consequence of the above definitions. Suppose we want to build (x + y) + z.
Since we already have defined xPlusY as x + y, perhaps we should reuse it! Let's try:
#check `[Arith| xPlusY + z] -- Arith.add (Arith.symbol "xPlusY") (Arith.symbol "z")
Whoops, that didn't work! What happened? Lean treats xPlusY itself as an identifier! So we need to add some syntax
to be able to "escape" the Arith| context. Let's use the syntax <[ $e:term ]> to mean: evaluate $e as a real term,
not an identifier. The macro looks like follows:
syntax "<[" term "]>" : arith  -- escape for embedding terms into `Arith`

macro_rules
  | `(`[Arith| <[ $e:term ]>]) => pure e
Let's try our previous example:
#check `[Arith| <[ xPlusY ]> + z] -- Arith.add xPlusY (Arith.symbol "z")
Perfect!
In this tutorial, we expanded on the previous tutorial to parse a more realistic grammar with multiple levels of precedence, how to parse identifiers directly within a macro, and how to provide an escape from within the macro context.
Full code listing
inductive Arith : Type
  | add : Arith → Arith → Arith  -- e + f
  | mul : Arith → Arith → Arith  -- e * f
  | int : Int → Arith  -- constant
  | symbol : String → Arith  -- variable

declare_syntax_cat arith

syntax num : arith  -- int for Arith.int
syntax str : arith  -- strings for Arith.symbol
syntax:60 arith:60 "+" arith:61 : arith  -- Arith.add
syntax:70 arith:70 "*" arith:71 : arith  -- Arith.mul
syntax "(" arith ")" : arith  -- parenthesized expressions

-- auxiliary notation for translating `arith` into `term`
syntax "`[Arith| " arith "]" : term

macro_rules
  | `(`[Arith| $s:str]) => `(Arith.symbol $s)
  | `(`[Arith| $num:num]) => `(Arith.int $num)
  | `(`[Arith| $x + $y]) => `(Arith.add `[Arith| $x] `[Arith| $y])
  | `(`[Arith| $x * $y]) => `(Arith.mul `[Arith| $x] `[Arith| $y])
  | `(`[Arith| ($x)]) => `(`[Arith| $x])

#check `[Arith| "x" * "y"]  -- mul
-- Arith.mul (Arith.symbol "x") (Arith.symbol "y")

#check `[Arith| "x" + "y"]  -- add
-- Arith.add (Arith.symbol "x") (Arith.symbol "y")

#check `[Arith| "x" + 20]  -- symbol + int
-- Arith.add (Arith.symbol "x") (Arith.int 20)

#check `[Arith| "x" + "y" * "z"]  -- precedence
-- Arith.add (Arith.symbol "x") (Arith.mul (Arith.symbol "y") (Arith.symbol "z"))

#check `[Arith| "x" * "y" + "z"]  -- precedence
-- Arith.add (Arith.mul (Arith.symbol "x") (Arith.symbol "y")) (Arith.symbol "z")

#check `[Arith| ("x" + "y") * "z"]  -- parentheses
-- Arith.mul (Arith.add (Arith.symbol "x") (Arith.symbol "y")) (Arith.symbol "z")

syntax ident : arith

macro_rules
  | `(`[Arith| $x:ident]) => `(Arith.symbol $(Lean.quote (toString x.getId)))

#check `[Arith| x]  -- Arith.symbol "x"

def xPlusY := `[Arith| x + y]
#print xPlusY  -- def xPlusY : Arith := Arith.add (Arith.symbol "x") (Arith.symbol "y")

syntax "<[" term "]>" : arith  -- escape for embedding terms into `Arith`

macro_rules
  | `(`[Arith| <[ $e:term ]>]) => pure e

#check `[Arith| <[ xPlusY ]> + z]  -- Arith.add xPlusY (Arith.symbol "z")
Declaring New Types
In Lean's library, every concrete type other than the universes and every type constructor other than the dependent function type is an instance of a general family of type constructions known as inductive types. It is remarkable that it is possible to develop complex programs and formalize mathematics based on nothing more than the type universes, dependent function types, and inductive types; everything else follows from those.
Intuitively, an inductive type is built up from a specified list of constructors. In Lean, the basic syntax for specifying such a type is as follows:
inductive NewType where
  | constructor_1 : ... → NewType
  | constructor_2 : ... → NewType
  ...
  | constructor_n : ... → NewType
The intuition is that each constructor specifies a way of building new objects of NewType, possibly from previously constructed values.
The type NewType consists of nothing more than the objects that are constructed in this way.
We will see below that the arguments to the constructors can include objects of type NewType,
subject to a certain "positivity" constraint, which guarantees that elements of NewType are built
from the bottom up. Roughly speaking, each ... can be any function type constructed from NewType
and previously defined types, in which NewType appears, if at all, only as the "target" of the function type.
We will provide a number of examples of inductive types. We will also consider slight generalizations of the scheme above, to mutually defined inductive types, and so-called inductive families.
Every inductive type comes with constructors, which show how to construct an element of the type, and elimination rules, which show how to "use" an element of the type in another construction.
Enumerated Types
The simplest kind of inductive type is simply a type with a finite, enumerated list of elements.
The following command declares the enumerated type Weekday.
inductive Weekday where
  | sunday    : Weekday
  | monday    : Weekday
  | tuesday   : Weekday
  | wednesday : Weekday
  | thursday  : Weekday
  | friday    : Weekday
  | saturday  : Weekday
The Weekday type has 7 constructors/elements. The constructors live in the Weekday namespace
Think of sunday, monday, …, saturday as being distinct elements of Weekday,
with no other distinguishing properties.
# inductive Weekday where
#  | sunday    : Weekday
#  | monday    : Weekday
#  | tuesday   : Weekday
#  | wednesday : Weekday
#  | thursday  : Weekday
#  | friday    : Weekday
#  | saturday  : Weekday
#check Weekday.sunday   -- Weekday
#check Weekday.monday   -- Weekday
You can define functions by pattern matching.
The following function converts a Weekday into a natural number.
# inductive Weekday where
#  | sunday    : Weekday
#  | monday    : Weekday
#  | tuesday   : Weekday
#  | wednesday : Weekday
#  | thursday  : Weekday
#  | friday    : Weekday
#  | saturday  : Weekday
def natOfWeekday (d : Weekday) : Nat :=
  match d with
  | Weekday.sunday    => 1
  | Weekday.monday    => 2
  | Weekday.tuesday   => 3
  | Weekday.wednesday => 4
  | Weekday.thursday  => 5
  | Weekday.friday    => 6
  | Weekday.saturday  => 7

#eval natOfWeekday Weekday.tuesday -- 3
It is often useful to group definitions related to a type in a namespace with the same name.
For example, we can put the function above into the Weekday namespace.
We are then allowed to use the shorter name when we open the namespace.
In the following example, we define functions from Weekday to Weekday in the namespace Weekday.
# inductive Weekday where
#  | sunday    : Weekday
#  | monday    : Weekday
#  | tuesday   : Weekday
#  | wednesday : Weekday
#  | thursday  : Weekday
#  | friday    : Weekday
#  | saturday  : Weekday
namespace Weekday

def next (d : Weekday) : Weekday :=
  match d with
  | sunday    => monday
  | monday    => tuesday
  | tuesday   => wednesday
  | wednesday => thursday
  | thursday  => friday
  | friday    => saturday
  | saturday  => sunday

end Weekday
It is so common to start a definition with a match in Lean, that Lean provides a syntax sugar for it.
# inductive Weekday where
#  | sunday    : Weekday
#  | monday    : Weekday
#  | tuesday   : Weekday
#  | wednesday : Weekday
#  | thursday  : Weekday
#  | friday    : Weekday
#  | saturday  : Weekday
# namespace Weekday
def previous : Weekday -> Weekday
  | sunday    => saturday
  | monday    => sunday
  | tuesday   => monday
  | wednesday => tuesday
  | thursday  => wednesday
  | friday    => thursday
  | saturday  => friday
# end Weekday
We can use the command #eval to test our definitions.
# inductive Weekday where
#  | sunday    : Weekday
#  | monday    : Weekday
#  | tuesday   : Weekday
#  | wednesday : Weekday
#  | thursday  : Weekday
#  | friday    : Weekday
#  | saturday  : Weekday
# namespace Weekday
# def next (d : Weekday) : Weekday :=
#  match d with
#  | sunday    => monday
#  | monday    => tuesday
#  | tuesday   => wednesday
#  | wednesday => thursday
#  | thursday  => friday
#  | friday    => saturday
#  | saturday  => sunday
# def previous : Weekday -> Weekday
#  | sunday    => saturday
#  | monday    => sunday
#  | tuesday   => monday
#  | wednesday => tuesday
#  | thursday  => wednesday
#  | friday    => thursday
#  | saturday  => friday
def toString : Weekday -> String
  | sunday    => "Sunday"
  | monday    => "Monday"
  | tuesday   => "Tuesday"
  | wednesday => "Wednesday"
  | thursday  => "Thursday"
  | friday    => "Friday"
  | saturday  => "Saturday"

#eval toString (next sunday)             -- "Monday"
#eval toString (next tuesday)            -- "Wednesday"
#eval toString (previous wednesday)      -- "Tuesday"
#eval toString (next (previous sunday))  -- "Sunday"
#eval toString (next (previous monday))  -- "Monday"
-- ..
# end Weekday
We can now prove the general theorem that next (previous d) = d for any weekday d.
The idea is to perform a proof by cases using match, and rely on the fact for each constructor both
sides of the equality reduce to the same term.
# inductive Weekday where
#  | sunday    : Weekday
#  | monday    : Weekday
#  | tuesday   : Weekday
#  | wednesday : Weekday
#  | thursday  : Weekday
#  | friday    : Weekday
#  | saturday  : Weekday
# namespace Weekday
# def next (d : Weekday) : Weekday :=
#  match d with
#  | sunday    => monday
#  | monday    => tuesday
#  | tuesday   => wednesday
#  | wednesday => thursday
#  | thursday  => friday
#  | friday    => saturday
#  | saturday  => sunday
# def previous : Weekday -> Weekday
#  | sunday    => saturday
#  | monday    => sunday
#  | tuesday   => monday
#  | wednesday => tuesday
#  | thursday  => wednesday
#  | friday    => thursday
#  | saturday  => friday
theorem nextOfPrevious (d : Weekday) : next (previous d) = d :=
  match d with
  | sunday    => rfl
  | monday    => rfl
  | tuesday   => rfl
  | wednesday => rfl
  | thursday  => rfl
  | friday    => rfl
  | saturday  => rfl
# end Weekday
Inductive Types
Theorem Proving in Lean has a chapter about inductive datatypes.
Structures
Structure is a special case of inductive datatype. It has only one constructor and is not recursive.
Similar to the inductive command, the structure command introduces a namespace with the same name.
The general form is as follows:
structure <name> <parameters> <parent-structures> where
  <constructor-name> :: <fields>
Most parts are optional. Here is our first example.
structure Point (α : Type u) where
  x : α
  y : α
In the example above, the constructor name is not provided. So, the constructor is named mk by Lean.
Values of type Point are created using Point.mk a b or { x := a, y := b : Point α }. The latter can be
written as { x := a, y := b } when the expected type is known.
The fields of a point p are accessed using Point.x p and Point.y p. You can also the more compact notation p.x and p.y as a shorthand
for Point.x p and Point.y p.
# structure Point (α : Type u) where
#  x : α
#  y : α
#check Point
#check Point       -- Type u -> Type u
#check @Point.mk   -- {α : Type u} → α → α → Point α
#check @Point.x    -- {α : Type u} → Point α → α
#check @Point.y    -- {α : Type u} → Point α → α

#check Point.mk 10 20                   -- Point Nat
#check { x := 10, y := 20 : Point Nat } -- Point Nat

def mkPoint (a : Nat) : Point Nat :=
  { x := a, y := a }

#eval (Point.mk 10 20).x                   -- 10
#eval (Point.mk 10 20).y                   -- 20
#eval { x := 10, y := 20 : Point Nat }.x   -- 10
#eval { x := 10, y := 20 : Point Nat }.y   -- 20

def addXY (p : Point Nat) : Nat :=
  p.x + p.y

#eval addXY { x := 10, y := 20 }    -- 30
In the notation { ... }, if the fields are in different lines, the , is optional.
# structure Point (α : Type u) where
#  x : α
#  y : α
def mkPoint (a : Nat) : Point Nat := {
  x := a
  y := a
}
You can also use where instead of := { ... }.
# structure Point (α : Type u) where
#  x : α
#  y : α
def mkPoint (a : Nat) : Point Nat where
  x := a
  y := a
Here are some simple theorems about our Point type.
# structure Point (α : Type u) where
#  x : α
#  y : α
theorem ex1 (a b : α) : (Point.mk a b).x = a :=
  rfl

theorem ex2 (a b : α) : (Point.mk a b).y = b :=
  rfl

theorem ex3 (a b : α) : Point.mk a b = { x := a, y := b } :=
  rfl
The dot notation is convenient not just for accessing the projections of a structure,
but also for applying functions defined in a namespace with the same name.
If p has type Point, the expression p.foo is interpreted as Point.foo p,
assuming that the first argument to foo has type Point.
The expression p.add q is therefore shorthand for Point.add p q in the example below.
structure Point (α : Type u) where
  x : α
  y : α

def Point.add (p q : Point Nat) : Point Nat :=
  { x := p.x + q.x, y := p.y + q.y }

def p : Point Nat := Point.mk 1 2
def q : Point Nat := Point.mk 3 4

#eval (p.add q).x  -- 4
#eval (p.add q).y  -- 6
After we introduce type classes, we show how to define a function like add so that
it works generically for elements of Point α rather than just Point Nat,
assuming α has an associated addition operation.
More generally, given an expression p.foo x y z, Lean will insert p at the first argument to foo of type Point.
For example, with the definition of scalar multiplication below, p.smul 3 is interpreted as Point.smul 3 p.
structure Point (α : Type u) where
  x : α
  y : α

def Point.smul (n : Nat) (p : Point Nat) :=
  Point.mk (n * p.x) (n * p.y)

def p : Point Nat :=
  Point.mk 1 2

#eval (p.smul 3).x -- 3
#eval (p.smul 3).y -- 6
Inheritance
We can extend existing structures by adding new fields. This feature allows us to simulate a form of inheritance.
structure Point (α : Type u) where
  x : α
  y : α

inductive Color where
  | red
  | green
  | blue

structure ColorPoint (α : Type u) extends Point α where
  color : Color

#check { x := 10, y := 20, color := Color.red : ColorPoint Nat }
-- { toPoint := { x := 10, y := 20 }, color := Color.red }
The output for the check command above suggests how Lean encoded inheritance and multiple inheritance.
Lean uses fields to each parent structure.
structure Foo where
  x : Nat
  y : Nat

structure Boo where
  w : Nat
  z : Nat

structure Bla extends Foo, Boo where
  bit : Bool

#check Bla.mk -- Foo → Boo → Bool → Bla
#check Bla.mk { x := 10, y := 20 } { w := 30, z := 40 } true
#check { x := 10, y := 20, w := 30, z := 40, bit := true : Bla }
#check { toFoo := { x := 10, y := 20 },
         toBoo := { w := 30, z := 40 },
         bit := true : Bla }

theorem ex :
    Bla.mk { x := x, y := y } { w := w, z := z } b
    =
    { x := x, y := y, w := w, z := z, bit := b } :=
  rfl
Default field values
You can assign default value to fields when declaring a new structure.
inductive MessageSeverity
  | error | warning

structure Message where
  fileName : String
  pos      : Option Nat      := none
  severity : MessageSeverity := MessageSeverity.error
  caption  : String          := ""
  data     : String

def msg1 : Message :=
  { fileName := "foo.lean", data := "failed to import file" }

#eval msg1.pos      -- none
#eval msg1.fileName -- "foo.lean"
#eval msg1.caption  -- ""
When extending a structure, you can not only add new fields, but provide new default values for existing fields.
# inductive MessageSeverity
#  | error | warning
# structure Message where
#  fileName : String
#  pos      : Option Nat      := none
#  severity : MessageSeverity := MessageSeverity.error
#  caption  : String          := ""
#  data     : String
structure MessageExt extends Message where
  timestamp : Nat
  caption   := "extended" -- new default value for field `caption`

def msg2 : MessageExt where
  fileName  := "bar.lean"
  data      := "error at initialization"
  timestamp := 10

#eval msg2.fileName  -- "bar.lean"
#eval msg2.timestamp -- 10
#eval msg2.caption   -- "extended"
Updating structure fields
Structure fields can be updated using { <struct-val> with <field> := <new-value>, ... }:
# structure Point (α : Type u) where
#  x : α
#  y : α
def incrementX (p : Point Nat) : Point Nat := { p with x := p.x + 1 }
Type classes
Typeclasses were introduced as a principled way of enabling ad-hoc polymorphism in functional programming languages. We first observe that it would be easy to implement an ad-hoc polymorphic function (such as addition) if the function simply took the type-specific implementation of addition as an argument and then called that implementation on the remaining arguments. For example, suppose we declare a structure in Lean to hold implementations of addition
# namespace Ex
structure Add (a : Type) where
  add : a -> a -> a

#check @Add.add
-- Add.add : {a : Type} → Add a → a → a → a
# end Ex
In the above Lean code, the field add has type
Add.add : {α : Type} → Add α → α → α → α
where the curly braces around the type a mean that it is an implicit argument.
We could implement double by
# namespace Ex
# structure Add (a : Type) where
#  add : a -> a -> a
def double (s : Add a) (x : a) : a :=
  s.add x x

#eval double { add := Nat.add } 10
-- 20

#eval double { add := Nat.mul } 10
-- 100

#eval double { add := Int.add } 10
-- 20

# end Ex
Note that you can double a natural number n by double { add := Nat.add } n.
Of course, it would be highly cumbersome for users to manually pass the
implementations around in this way.
Indeed, it would defeat most of the potential benefits of ad-hoc
polymorphism.
The main idea behind typeclasses is to make arguments such as Add a implicit,
and to use a database of user-defined instances to synthesize the desired instances
automatically through a process known as typeclass resolution. In Lean, by changing
structure to class in the example above, the type of Add.add becomes
# namespace Ex
class Add (a : Type) where
  add : a -> a -> a

#check @Add.add
-- Add.add : {a : Type} → [self : Add a] → a → a → a
# end Ex
where the square brackets indicate that the argument of type Add a is instance implicit,
i.e. that it should be synthesized using typeclass resolution. This version of
add is the Lean analogue of the Haskell term add :: Add a => a -> a -> a.
Similarly, we can register an instance by
# namespace Ex
# class Add (a : Type) where
#  add : a -> a -> a
instance : Add Nat where
  add := Nat.add

# end Ex
Then for n : Nat and m : Nat, the term Add.add n m triggers typeclass resolution with the goal
of Add Nat, and typeclass resolution will synthesize the instance above. In
general, instances may depend on other instances in complicated ways. For example,
you can declare an (anonymous) instance stating that if a has addition, then Array a
has addition:
instance [Add a] : Add (Array a) where
  add x y := Array.zipWith x y (· + ·)

#eval Add.add #[1, 2] #[3, 4]
-- #[4, 6]

#eval #[1, 2] + #[3, 4]
-- #[4, 6]
Note that x + y is notation for Add.add x y in Lean.
The example above demonstrates how type classes are used to overload notation.
Now, we explore another application. We often need an arbitrary element of a given type.
Recall that types may not have any elements in Lean.
It often happens that we would like a definition to return an arbitrary element in a "corner case."
For example, we may like the expression head xs to be of type a when xs is of type List a.
Similarly, many theorems hold under the additional assumption that a type is not empty.
For example, if a is a type, exists x : a, x = x is true only if a is not empty.
The standard library defines a type class Inhabited to enable type class inference to infer a
"default" or "arbitrary" element of an inhabited type.
Let us start with the first step of the program above, declaring an appropriate class:
# namespace Ex
class Inhabited (a : Sort u) where
  default : a

#check @Inhabited.default
-- Inhabited.default : {a : Sort u} → [self : Inhabited a] → a
# end Ex
Note Inhabited.default doesn't have any explicit argument.
An element of the class Inhabited a is simply an expression of the form Inhabited.mk x, for some element x : a.
The projection Inhabited.default will allow us to "extract" such an element of a from an element of Inhabited a.
Now we populate the class with some instances:
# namespace Ex
# class Inhabited (a : Sort _) where
#  default : a
instance : Inhabited Bool where
  default := true

instance : Inhabited Nat where
  default := 0

instance : Inhabited Unit where
  default := ()

instance : Inhabited Prop where
  default := True

#eval (Inhabited.default : Nat)
-- 0

#eval (Inhabited.default : Bool)
-- true
# end Ex
You can use the command export to create the alias default for Inhabited.default
# namespace Ex
# class Inhabited (a : Sort _) where
#  default : a
# instance : Inhabited Bool where
#  default := true
# instance : Inhabited Nat where
#  default := 0
# instance : Inhabited Unit where
#  default := ()
# instance : Inhabited Prop where
#  default := True
export Inhabited (default)

#eval (default : Nat)
-- 0

#eval (default : Bool)
-- true
# end Ex
Chaining Instances
If that were the extent of type class inference, it would not be all that impressive; it would be simply a mechanism of storing a list of instances for the elaborator to find in a lookup table. What makes type class inference powerful is that one can chain instances. That is, an instance declaration can in turn depend on an implicit instance of a type class. This causes class inference to chain through instances recursively, backtracking when necessary, in a Prolog-like search.
For example, the following definition shows that if two types a and b are inhabited, then so is their product:
instance [Inhabited a] [Inhabited b] : Inhabited (a × b) where
  default := (default, default)
With this added to the earlier instance declarations, type class instance can infer, for example, a default element of Nat × Bool:
# namespace Ex
# class Inhabited (a : Sort u) where
#  default : a
# instance : Inhabited Bool where
#  default := true
# instance : Inhabited Nat where
#  default := 0
# opaque default [Inhabited a] : a :=
#  Inhabited.default
instance [Inhabited a] [Inhabited b] : Inhabited (a × b) where
  default := (default, default)

#eval (default : Nat × Bool)
-- (0, true)
# end Ex
Similarly, we can inhabit type function with suitable constant functions:
# namespace Ex
# class Inhabited (a : Sort u) where
#  default : a
# opaque default [Inhabited a] : a :=
#  Inhabited.default
instance [Inhabited b] : Inhabited (a -> b) where
  default := fun _ => default
# end Ex
As an exercise, try defining default instances for other types, such as List and Sum types.
The Lean standard library contains the definition inferInstance. It has type {α : Sort u} → [i : α] → α,
and is useful for triggering the type class resolution procedure when the expected type is an instance.
#check (inferInstance : Inhabited Nat) -- Inhabited Nat

def foo : Inhabited (Nat × Nat) :=
  inferInstance

theorem ex : foo.default = (default, default) :=
  rfl
You can use the command #print to inspect how simple inferInstance is.
#print inferInstance
ToString
The polymorphic method toString has type {α : Type u} → [ToString α] → α → String. You implement the instance
for your own types and use chaining to convert complex values into strings. Lean comes with ToString instances
for most builtin types.
structure Person where
  name : String
  age  : Nat

instance : ToString Person where
  toString p := p.name ++ "@" ++ toString p.age

#eval toString { name := "Leo", age := 542 : Person }
#eval toString ({ name := "Daniel", age := 18 : Person }, "hello")
Numerals
Numerals are polymorphic in Lean. You can use a numeral (e.g., 2) to denote an element of any type that implements
the type class OfNat.
structure Rational where
  num : Int
  den : Nat
  inv : den ≠ 0

instance : OfNat Rational n where
  ofNat := { num := n, den := 1, inv := by decide }

instance : ToString Rational where
  toString r := s!"{r.num}/{r.den}"

#eval (2 : Rational) -- 2/1

#check (2 : Rational) -- Rational
#check (2 : Nat)      -- Nat
Lean elaborate the terms (2 : Nat) and (2 : Rational) as
OfNat.ofNat Nat 2 (instOfNatNat 2) and
OfNat.ofNat Rational 2 (instOfNatRational 2) respectively.
We say the numerals 2 occurring in the elaborated terms are raw natural numbers.
You can input the raw natural number 2 using the macro nat_lit 2.
#check nat_lit 2 -- Nat
Raw natural numbers are not polymorphic.
The OfNat instance is parametric on the numeral. So, you can define instances for particular numerals.
The second argument is often a variable as in the example above, or a raw natural number.
class Monoid (α : Type u) where
  unit : α
  op   : α → α → α

instance [s : Monoid α] : OfNat α (nat_lit 1) where
  ofNat := s.unit

def getUnit [Monoid α] : α :=
  1
Because many users were forgetting the nat_lit when defining OfNat instances, Lean also accepts OfNat instance
declarations not using nat_lit. Thus, the following is also accepted.
class Monoid (α : Type u) where
  unit : α
  op   : α → α → α

instance [s : Monoid α] : OfNat α 1 where
  ofNat := s.unit

def getUnit [Monoid α] : α :=
  1
Output parameters
By default, Lean only tries to synthesize an instance Inhabited T when the term T is known and does not
contain missing parts. The following command produces the error
"failed to create type class instance for Inhabited (Nat × ?m.1499)" because the type has a missing part (i.e., the _).
# -- FIXME: should fail
#check (inferInstance : Inhabited (Nat × _))
You can view the parameter of the type class Inhabited as an input value for the type class synthesizer.
When a type class has multiple parameters, you can mark some of them as output parameters.
Lean will start type class synthesizer even when these parameters have missing parts.
In the following example, we use output parameters to define a heterogeneous polymorphic
multiplication.
# namespace Ex
class HMul (α : Type u) (β : Type v) (γ : outParam (Type w)) where
  hMul : α → β → γ

export HMul (hMul)

instance : HMul Nat Nat Nat where
  hMul := Nat.mul

instance : HMul Nat (Array Nat) (Array Nat) where
  hMul a bs := bs.map (fun b => hMul a b)

#eval hMul 4 3           -- 12
#eval hMul 4 #[2, 3, 4]  -- #[8, 12, 16]
# end Ex
The parameters α and β are considered input parameters and γ an output one.
Given an application hMul a b, after types of a and b are known, the type class
synthesizer is invoked, and the resulting type is obtained from the output parameter γ.
In the example above, we defined two instances. The first one is the homogeneous
multiplication for natural numbers. The second is the scalar multiplication for arrays.
Note that, you chain instances and generalize the second instance.
# namespace Ex
class HMul (α : Type u) (β : Type v) (γ : outParam (Type w)) where
  hMul : α → β → γ

export HMul (hMul)

instance : HMul Nat Nat Nat where
  hMul := Nat.mul

instance : HMul Int Int Int where
  hMul := Int.mul

instance [HMul α β γ] : HMul α (Array β) (Array γ) where
  hMul a bs := bs.map (fun b => hMul a b)

#eval hMul 4 3                    -- 12
#eval hMul 4 #[2, 3, 4]           -- #[8, 12, 16]
#eval hMul (-2) #[3, -1, 4]       -- #[-6, 2, -8]
#eval hMul 2 #[#[2, 3], #[0, 4]]  -- #[#[4, 6], #[0, 8]]
# end Ex
You can use our new scalar array multiplication instance on arrays of type Array β
with a scalar of type α whenever you have an instance HMul α β γ.
In the last #eval, note that the instance was used twice on an array of arrays.
Default instances
In the class HMul, the parameters α and β are treated as input values.
Thus, type class synthesis only starts after these two types are known. This may often
be too restrictive.
# namespace Ex
class HMul (α : Type u) (β : Type v) (γ : outParam (Type w)) where
  hMul : α → β → γ

export HMul (hMul)

instance : HMul Int Int Int where
  hMul := Int.mul

def xs : List Int := [1, 2, 3]

# -- TODO: fix error message
-- Error "failed to create type class instance for HMul Int ?m.1767 (?m.1797 x)"
-- #check fun y => xs.map (fun x => hMul x y)
# end Ex
The instance HMul is not synthesized by Lean because the type of y has not been provided.
However, it is natural to assume that the type of y and x should be the same in
this kind of situation. We can achieve exactly that using default instances.
# namespace Ex
class HMul (α : Type u) (β : Type v) (γ : outParam (Type w)) where
  hMul : α → β → γ

export HMul (hMul)

@[default_instance]
instance : HMul Int Int Int where
  hMul := Int.mul

def xs : List Int := [1, 2, 3]

#check fun y => xs.map (fun x => hMul x y)  -- Int -> List Int
# end Ex
By tagging the instance above with the attribute default_instance, we are instructing Lean
to use this instance on pending type class synthesis problems.
The actual Lean implementation defines homogeneous and heterogeneous classes for arithmetical operators.
Moreover, a+b, a*b, a-b, a/b, and a%b are notations for the heterogeneous versions.
The instance OfNat Nat n is the default instance (with priority 100) for the OfNat class. This is why the numeral
2 has type Nat when the expected type is not known. You can define default instances with higher
priority to override the builtin ones.
structure Rational where
  num : Int
  den : Nat
  inv : den ≠ 0

@[default_instance 200]
instance : OfNat Rational n where
  ofNat := { num := n, den := 1, inv := by decide }

instance : ToString Rational where
  toString r := s!"{r.num}/{r.den}"

#check 2 -- Rational
Priorities are also useful to control the interaction between different default instances.
For example, suppose xs has type α, when elaboration xs.map (fun x => 2 * x), we want the homogeneous instance for multiplication
to have higher priority than the default instance for OfNat. This is particularly important when we have implemented only the instance
HMul α α α, and did not implement HMul Nat α α.
Now, we reveal how the notation a*b is defined in Lean.
# namespace Ex
class OfNat (α : Type u) (n : Nat) where
  ofNat : α

@[default_instance]
instance (n : Nat) : OfNat Nat n where
  ofNat := n

class HMul (α : Type u) (β : Type v) (γ : outParam (Type w)) where
  hMul : α → β → γ

class Mul (α : Type u) where
  mul : α → α → α

@[default_instance 10]
instance [Mul α] : HMul α α α where
  hMul a b := Mul.mul a b

infixl:70 " * "  => HMul.hMul
# end Ex
The Mul class is convenient for types that only implement the homogeneous multiplication.
Scoped Instances
TODO
Local Instances
TODO
Unification Hints
TODO
Builtin Types
Numeric Operations
Lean supports the basic mathematical operations you’d expect for all of the number types: addition, subtraction, multiplication, division, and remainder.
The following code shows how you’d use each one in a def commands:
-- addition
def sum := 5 + 10

-- subtraction
def difference := 95.5 - 4.3

-- multiplication
def product := 4 * 30

-- division
def quotient := 53.7 / 32.2

-- remainder/modulo
def modulo := 43 % 5
Each expression in these statements uses a mathematical operator and evaluates to a single value.
Natural numbers
The Nat type represents the natural numbers, i.e., arbitrary-precision unsigned integers.
There are no overflows.
#eval 100000000000000000 * 200000000000000000000 * 1000000000000000000000
A numeral is considered to be a Nat if there are no typing constraints.
#check 10    -- Nat
#check id 10 -- Nat

def f (x : Int) : Int :=
  x - 1

#eval f (3 - 5) -- 3 and 5 are `Int` since `f` expects an `Int`.
-- -3
The operator - for Nat implements truncated subtraction.
#eval 10 - 5 -- 5
#eval 5 - 10 -- 0

theorem ex : 5 - 10 = 0 :=
  rfl

#eval (5:Int) - 10 -- -5
The operator / for Nat implements Euclidean division.
#eval 10 / 4 -- 2

#check 10.0 / 4.0 -- Float
#eval 10.0 / 4.0  -- 2.5
As we described in the previous sections, we define the Nat type as an inductive datatype.
# namespace hidden
inductive Nat where
  | zero : Nat
  | succ : Nat → Nat
# end hidden
However, the internal representation of Nat is optimized. Small natural numbers (i.e., < 2^63 in a 64-bit machine) are
represented by a single machine word. Big numbers are implemented using GMP numbers.
We recommend you use fixed precision numeric types only in performance critical code.
The Lean kernel has builtin support for the Nat type too, and can efficiently reduce Nat expressions during type checking.
#reduce 100000000000000000 * 200000000000000000000 * 1000000000000000000000

theorem ex
      : 1000000000000000 * 2000000000000000000 = 2000000000000000000000000000000000 :=
  rfl
The sharp-eyed reader will notice that GMP is part of the Lean kernel trusted code base. We believe this is not a problem because you can use external type checkers to double-check your developments, and we consider GMP very trustworthy. Existing external type checkers for Lean 3 (e.g., Trepplein and TC) can be easily adapted to Lean 4. If you are still concerned after checking your development with multiple different external checkers because they may all rely on buggy arbitrary-precision libraries, you can develop your own certified arbitrary-precision library and use it to implement your own type checker for Lean.
Integers
The Int type represents the arbitrary-precision integers. There are no overflows.
#eval (100000000000000000 : Int) * 200000000000000000000 * 1000000000000000000000
Recall that nonnegative numerals are considered to be a Nat if there are no typing constraints.
#check 1 -- Nat
#check -1 -- Int
#check (1:Int) -- Int
The operator / for Int implements integer division.
#eval -10 / 4 -- -2
Similar to Nat, the internal representation of Int is optimized. Small integers are
represented by a single machine word. Big integers are implemented using GMP numbers.
We recommend you use fixed precision numeric types only in performance critical code.
The Lean kernel does not have special support for reducing Int during type checking.
However, since Int is defined as
# namespace hidden
inductive Int : Type where
  | ofNat   : Nat → Int
  | negSucc : Nat → Int
# end hidden
the type checker will be able reduce Int expressions efficiently by relying on the special support for Nat.
theorem ex : -2000000000 * 1000000000 = -2000000000000000000 :=
 rfl
Fixed precision unsigned integers
Float
Arrays
The Array type implements a dynamic (aka growable) array.
It is defined as
# namespace hidden
structure Array (α : Type u) where
  data : List α
# end hidden
but its execution time representation is optimized, and it is similar to C++ std::vector<T> and Rust Vec<T>.
The Lean type checker has no special support for reducing Arrays.
You can create arrays in several ways. You can create a small array by listing consecutive values between
#[ and ] and separated by commas, as shown in the following examples.
#check #[1, 2, 3] -- Array Nat

#check #[] -- Array ?m
The type of the array elements is inferred from the literals used and must be consistent.
#check #["hello", "world"] -- Array String

-- The following is not valid
#check_failure #[10, "hello"]
Recall that the command #check_failure <term> only succeeds when the given term is not type correct.
To create an array of size n in which all the elements are initialized to some value a, use mkArray.
#eval mkArray 5 'a'
-- #['a', 'a', 'a', 'a', 'a']
Accessing elements
You can access array elements by using brackets ([ and ]).
def f (a : Array Nat) (i : Fin a.size) :=
  a[i] + a[i]
Note that the index i has type Fin a.size, i.e., it is natural number less than a.size.
You can also write
def f (a : Array Nat) (i : Nat) (h  : i < a.size) :=
  a[i] + a[i]
The bracket operator is whitespace sensitive.
def f (xs : List Nat) : List Nat :=
  xs ++ xs

def as : Array Nat :=
  #[1, 2, 3, 4]

def idx : Fin 4 :=
  2

#eval f [1, 2, 3] -- This is a function application

#eval as[idx] -- This is an array access
The notation a[i] has two variants: a[i]! and a[i]?. In both cases, i has type Nat. The first one
produces a panic error message if the index i is out of bounds. The latter returns an Option type.
#eval #['a', 'b', 'c'][1]?
-- some 'b'
#eval #['a', 'b', 'c'][5]?
-- none
#eval #['a', 'b', 'c'][1]!
-- 'b!
List
Characters
A value of type Char, also known as a character, is a Unicode scalar value. It is represented using an unsigned 32-bit integer and is statically guaranteed to be a valid Unicode scalar value.
Syntactically, character literals are enclosed in single quotes.
#eval 'a' -- 'a'
#eval '∀' -- '∀'
Characters are ordered and can be decidably compared using the relational operators =, <, ≤, >, ≥.
Strings
Option
Thunks, Tasks, and Threads
A Thunk is defined as
# namespace Ex
# universe u
structure Thunk (α : Type u) : Type u where
  fn : Unit → α
# end Ex
A Thunk encapsulates a computation without evaluation.
That is, a Thunk stores the way of how the value would be computed.
The Lean runtime has special support for Thunks. It caches their values
after they are computed for the first time. This feature is useful for implementing
data structures such as lazy lists.
Here is a small example using a Thunk.
def fib : Nat → Nat
  | 0   => 0
  | 1   => 1
  | x+2 => fib (x+1) + fib x

def f (c : Bool) (x : Thunk Nat) : Nat :=
  if c then
    x.get
  else
    0

def g (c : Bool) (x : Nat) : Nat :=
  f c (Thunk.mk (fun _ => fib x))

#eval g false 1000
The function f above uses x.get to evaluate the Thunk x.
The expression Thunk.mk (fun _ => fib x) creates a Thunk for computing fib x.
Note that fib is a very naive function for computing the Fibonacci numbers,
and it would an unreasonable amount of time to compute fib 1000. However, our
test terminates instantaneously because the Thunk is not evaluated when c is false.
Lean has a builtin coercion from any type a to Thunk a. You write the function g above as
# def fib : Nat → Nat
#  | 0   => 0
#  | 1   => 1
#  | x+2 => fib (x+1) + fib x
# def f (c : Bool) (x : Thunk Nat) : Nat :=
#  if c then
#    x.get
#  else
#    0
def g (c : Bool) (x : Nat) : Nat :=
  f c (fib x)

#eval g false 1000
In the following example, we use the macro dbg_trace to demonstrate
that the Lean runtime caches the value computed by a Thunk.
We remark that the macro dbg_trace should be used for debugging purposes
only.
def add1 (x : Nat) : Nat :=
  dbg_trace "add1: {x}"
  x + 1

def double (x : Thunk Nat) : Nat :=
  x.get + x.get

def triple (x : Thunk Nat) : Nat :=
  double x + x.get

def test (x : Nat) : Nat :=
  triple (add1 x)

#eval test 2
-- add1: 2
-- 9
Note that the message add1: 2 is printed only once.
Now, consider the same example using Unit -> Nat instead of Thunk Nat.
def add1 (x : Nat) : Nat :=
  dbg_trace "add1: {x}"
  x + 1

def double (x : Unit -> Nat) : Nat :=
  x () + x ()

def triple (x : Unit -> Nat) : Nat :=
  double x + x ()

def test (x : Nat) : Nat :=
  triple (fun _ => add1 x)

#eval test 2
-- add1: 2
-- add1: 2
-- 9
Now, the message add1: 2 is printed twice.
It may come as a surprise that it was printed twice instead of three times.
As we pointed out, dbg_trace is a macro used for debugging purposes only,
and add1 is still considered to be a pure function.
The Lean compiler performs common subexpression elimination when compiling double,
and the produced code for double executes x () only once instead of twice.
This transformation is safe because x : Unit -> Nat is pure.
Task
Functions
Functions are the fundamental unit of program execution in any programming language. As in other languages, a Lean function has a name, can have parameters and take arguments, and has a body. Lean also supports functional programming constructs such as treating functions as values, using unnamed functions in expressions, composition of functions to form new functions, curried functions, and the implicit definition of functions by way of the partial application of function arguments.
You define functions by using the def keyword followed by its name, a parameter list, return type and its body.
The parameter list consists of successive parameters that are separated by spaces.
You can specify an explicit type for each parameter.
If you do not specify a specific argument type, the compiler tries to infer the type from the function body.
An error is returned when it cannot be inferred.
The expression that makes up the function body is typically a compound expression consisting of a number of expressions
that culminate in a final expression that is the return value.
The return type is a colon followed by a type and is optional.
If you do not specify the type of the return value explicitly,
the compiler tries to determine the return type from the final expression.
def f x := x + 1
In the previous example, the function name is f, the argument is x, which has type Nat,
the function body is x + 1, and the return value is of type Nat.
The following example defines the factorial recursive function using pattern matching.
def fact x :=
  match x with
  | 0   => 1
  | n+1 => (n+1) * fact n

#eval fact 100
By default, Lean only accepts total functions.
The partial keyword may be used to define a recursive function without a termination proof; partial functions compute in compiled programs, but are opaque in proofs and during type checking.
partial def g (x : Nat) (p : Nat -> Bool) : Nat :=
  if p x then
    x
  else
    g (x+1) p

#eval g 0 (fun x => x > 10)
In the previous example, g x p only terminates if there is a y >= x such that p y returns true.
Of course, g 0 (fun x => false) never terminates.
However, the use of partial is restricted to functions whose return type is not empty so the soundness
of the system is not compromised.
partial def loop? : α := -- failed to compile partial definition 'loop?', failed to
  loop?                  -- show that type is inhabited and non empty

partial def loop [Inhabited α] : α := -- compiles
  loop

example : True := -- accepted
  loop

example : False :=
  loop -- failed to synthesize instance Inhabited False
If we were able to partially define loop?, we could prove False with it.
Lambda expressions
A lambda expression is an unnamed function.
You define lambda expressions by using the fun keyword. A lambda expression resembles a function definition, except that instead of the := token,
the => token is used to separate the argument list from the function body. As in a regular function definition,
the argument types can be inferred or specified explicitly, and the return type of the lambda expression is inferred from the type of the
last expression in the body.
def twice (f : Nat -> Nat) (x : Nat) : Nat :=
  f (f x)

#eval twice (fun x => x + 1) 3
#eval twice (fun (x : Nat) => x * 2) 3

#eval List.map (fun x => x + 1) [1, 2, 3]
-- [2, 3, 4]

#eval List.map (fun (x, y) => x + y) [(1, 2), (3, 4)]
-- [3, 7]
Syntax sugar for simple lambda expressions
Simple functions can be defined using parentheses and · as a placeholder.
#check (· + 1)
-- fun a => a + 1
#check (2 - ·)
-- fun a => 2 - a
#eval [1, 2, 3, 4, 5].foldl (· * ·) 1
-- 120

def h (x y z : Nat) :=
  x + y + z

#check (h · 1 ·)
-- fun a b => h a 1 b

#eval [(1, 2), (3, 4), (5, 6)].map (·.1)
-- [1, 3, 5]
In the previous example, the term (·.1) is syntax sugar for fun x => x.1.
Pipelining
Pipelining enables function calls to be chained together as successive operations. Pipelining works as follows:
def add1 x := x + 1
def times2 x := x * 2

#eval times2 (add1 100)
#eval 100 |> add1 |> times2
#eval times2 <| add1 <| 100
The result of the previous #eval commands is 202.
The forward pipeline |> operator takes a function and an argument and return a value.
In contrast, the backward pipeline <| operator takes an argument and a function and returns a value.
These operators are useful for minimizing the number of parentheses.
def add1Times3FilterEven (xs : List Nat) :=
  List.filter (· % 2 == 0) (List.map (· * 3) (List.map (· + 1) xs))

#eval add1Times3FilterEven [1, 2, 3, 4]
-- [6, 12]

-- Define the same function using pipes
def add1Times3FilterEven' (xs : List Nat) :=
  xs |> List.map (· + 1) |> List.map (· * 3) |> List.filter (· % 2 == 0)

#eval add1Times3FilterEven' [1, 2, 3, 4]
-- [6, 12]
Lean also supports the operator |>. which combines forward pipeline |> operator with the . field notation.
-- Define the same function using pipes
def add1Times3FilterEven'' (xs : List Nat) :=
  xs.map (· + 1) |>.map (· * 3) |>.filter (· % 2 == 0)

#eval add1Times3FilterEven'' [1, 2, 3, 4]
-- [6, 12]
For users familiar with the Haskell programming language,
Lean also supports the notation f $ a for the backward pipeline f <| a.
Monads
Monads are used heavily in Lean, as they are also in Haskell. Monads come from the wonderful world of Category Theory.
Monads in Lean are so similar to Haskell that this introduction to monads is heavily based on the similar chapter of the Monday Morning Haskell. Many thanks to the authors of that material for allowing us to reuse it here.
Monads build on the following fundamental type classes which you will need to understand first before fully understanding monads. Shown in light blue are some concrete functors and monads that will also be covered in this chapter:

This chapter is organized to give you a bottom up introduction to monads, starting with functors and applicative functors, you'll get an intuition for how these abstract structures work in Lean. Then you'll dive into monads and learn how to use some of the most useful built-in ones.
Functor
A functor is a type class that provides a map function and the map function is something many
people are already familiar with so this should be easy to follow. Here you will see some
concrete examples in action with List and Option.
Applicative Functors
Applicatives are a little more difficult to understand than functors, but their functionality can
still be summed up in a couple simple functions. Here you will learn how to create an
Applicative List and a completely custom Applicative type.
Monads Tutorial
Now that you have an intuition for how abstract structures work, you'll examine some of the problems
that functors and applicative functors don't help you solve. Then you'll learn the specifics of how
to actually use monads with some examples using the Option monad and the all important IO monad.
Reader Monad
Now that you understand the details of what makes a monadic structure work, in this section, you'll
learn about one of the most useful built in monads ReaderM, which gives your programs a
global read-only context.
State Monad
This section introduces the StateM monad. This monad allows you to access a particular type that you can
both read from and write to. It opens the door to fully stateful programming, allowing you to do many
of the things a function programming language supposedly "can't" do.
Except Monad
Similar to the Option monad the Except monad allows you to change the signature of a function so
that it can return an ok value or an error and it provides the classic exception handling
operations throw/try/catch so that your programs can do monad-based exception handling.
Monad Transformers
Now that you are familiar with all the above monads it is time to answer the question - how you can make them work together? After all, there are definitely times when you need multiple kinds of monadic behavior. This section introduces the concept of monad transformers, which allow you to combine multiple monads into one.
Monad Laws
This section examines what makes a monad a legal monad. You could just implement your monadic type classes any way you want and write "monad" instances, but starting back with functors and applicative functors, you'll learn that all these structures have "laws" that they are expected to obey with respect to their behavior. You can make instances that don't follow these laws. But you do so at your peril, as other programmers will be very confused when they try to use them.
Functor
Applicative
Monad
Reader
State
Except
Transformers
Laws
Frequently Asked Questions
What is Lean?
Lean is a new open source theorem prover being developed at Microsoft Research. It is a research project that aims to bridge the gap between interactive and automated theorem proving. Lean can be also used as a programming language. Actually, some Lean features are implemented in Lean itself.
Should I use Lean?
Lean is under heavy development, and we are constantly trying new ideas and tweaking the system. It is a research project and not a product. Things change rapidly, and we constantly break backward compatibility. Lean comes "as is", you should not expect we will fix bugs and/or add new features for your project. We have our own priorities, and will not change them to accommodate your needs. Even if you implement a new feature or fix a bug, we may not want to merge it because it may conflict with our plans for Lean, it may not be performant, we may not want to maintain it, we may be busy, etc. If you really need this new feature or bug fix, we suggest you create your own fork and maintain it yourself.
Where is the documentation?
This is the Lean 4 manual. It is a work in progress, but it will eventually cover the whole language. A public and very active chat room dedicated to Lean is open on Zulip. It is a good place to interact with other Lean users.
Should I use Lean to teach a course?
Lean has been used to teach courses on logic, type theory and programming languages at CMU and the University of Washington. The lecture notes for the CMU course Logic and Proof are available online, but they are for Lean 3. If you decide to teach a course using Lean, we suggest you prepare all material before the beginning of the course, and make sure that Lean attends all your needs. You should not expect we will fix bugs and/or add features needed for your course.
Are there IDEs for Lean?
Yes, see Setting Up Lean.
Is Lean sound? How big is the kernel? Should I trust it?
Lean has a relatively small kernel. Several independent checkers have been implemented for Lean 3. Two of them are tc and trepplein. We expect similar independent checkers will be built for Lean 4.
Should I open a new issue?
We use GitHub to track bugs and new features. Bug reports are always welcome, but nitpicking issues are not (e.g., the error message is confusing). See also our contribution guidelines.
Is it Lean, LEAN, or L∃∀N?
We always use "Lean" in writing. When specifying a major version number, we append it together with a single space: Lean 4.
Significant changes from Lean 3
Lean 4 is not backward compatible with Lean 3. We have rewritten most of the system, and took the opportunity to cleanup the syntax, metaprogramming framework, and elaborator. In this section, we go over the most significant changes.
Lambda expressions
We do not use , anymore to separate the binders from the lambda expression body.
The Lean 3 syntax for lambda expressions was unconventional, and , has been overused in Lean 3.
For example, we believe a list of lambda expressions is quite confusing in Lean 3, since , is used
to separate the elements of a list, and in the lambda expression itself. We now use => as the separator,
as an example, fun x => x is the identity function. One may still use the symbol λ as a shorthand for fun.
The lambda expression notation has many new features that are not supported in Lean 3.
Pattern matching
In Lean 4, one can easily create new notation that abbreviates commonly used idioms. One of them is a
fun followed by a match. In the following examples, we define a few functions using fun+match notation.
# namespace ex1
def Prod.str : Nat × Nat → String :=
  fun (a, b) => "(" ++ toString a ++ ", " ++ toString b ++ ")"

structure Point where
  x : Nat
  y : Nat
  z : Nat

def Point.addX : Point → Point → Nat :=
  fun { x := a, .. } { x := b, .. } =>  a+b

def Sum.str : Option Nat → String :=
  fun
    | some a => "some " ++ toString a
    | none   => "none"
# end ex1
Implicit lambdas
In Lean 3 stdlib, we find many instances of the dreadful @+_ idiom.
It is often used when the expected type is a function type with implicit arguments,
and we have a constant (reader_t.pure in the example) which also takes implicit arguments. In Lean 4, the elaborator automatically introduces lambdas
for consuming implicit arguments. We are still exploring this feature and analyzing its impact, but the experience so far has been very positive. As an example,
here is the example in the link above using Lean 4 implicit lambdas.
# variable (ρ : Type) (m : Type → Type) [Monad m]
instance : Monad (ReaderT ρ m) where
  pure := ReaderT.pure
  bind := ReaderT.bind
Users can disable the implicit lambda feature by using @ or writing a lambda expression with {} or [] binder annotations.
Here are few examples
# namespace ex2
def id1 : {α : Type} → α → α :=
  fun x => x

def listId : List ({α : Type} → α → α) :=
  (fun x => x) :: []

-- In this example, implicit lambda introduction has been disabled because
-- we use `@` before `fun`
def id2 : {α : Type} → α → α :=
  @fun α (x : α) => id1 x

def id3 : {α : Type} → α → α :=
  @fun α x => id1 x

def id4 : {α : Type} → α → α :=
  fun x => id1 x

-- In this example, implicit lambda introduction has been disabled
-- because we used the binder annotation `{...}`
def id5 : {α : Type} → α → α :=
  fun {α} x => id1 x
# end ex2
Sugar for simple functions
In Lean 3, we can create simple functions from infix operators by using parentheses. For example, (+1) is sugar for fun x, x + 1. In Lean 4, we generalize this notation using · as a placeholder. Here are a few examples:
# namespace ex3
#check (· + 1)
-- fun a => a + 1
#check (2 - ·)
-- fun a => 2 - a
#eval [1, 2, 3, 4, 5].foldl (·*·) 1
-- 120

def f (x y z : Nat) :=
  x + y + z

#check (f · 1 ·)
-- fun a b => f a 1 b

#eval [(1, 2), (3, 4), (5, 6)].map (·.1)
-- [1, 3, 5]
# end ex3
As in Lean 3, the notation is activated using parentheses, and the lambda abstraction is created by collecting the nested ·s.
The collection is interrupted by nested parentheses. In the following example, two different lambda expressions are created.
#check (Prod.mk · (· + 1))
-- fun a => (a, fun b => b + 1)
Function applications
In Lean 4, we have support for named arguments. Named arguments enable you to specify an argument for a parameter by matching the argument with its name rather than with its position in the parameter list. If you don't remember the order of the parameters but know their names, you can send the arguments in any order. You may also provide the value for an implicit parameter when Lean failed to infer it. Named arguments also improve the readability of your code by identifying what each argument represents.
def sum (xs : List Nat) :=
  xs.foldl (init := 0) (·+·)

#eval sum [1, 2, 3, 4]
-- 10

example {a b : Nat} {p : Nat → Nat → Nat → Prop} (h₁ : p a b b) (h₂ : b = a)
    : p a a b :=
  Eq.subst (motive := fun x => p a x b) h₂ h₁
In the following examples, we illustrate the interaction between named and default arguments.
def f (x : Nat) (y : Nat := 1) (w : Nat := 2) (z : Nat) :=
  x + y + w - z

example (x z : Nat) : f (z := z) x = x + 1 + 2 - z := rfl

example (x z : Nat) : f x (z := z) = x + 1 + 2 - z := rfl

example (x y : Nat) : f x y = fun z => x + y + 2 - z := rfl

example : f = (fun x z => x + 1 + 2 - z) := rfl

example (x : Nat) : f x = fun z => x + 1 + 2 - z := rfl

example (y : Nat) : f (y := 5) = fun x z => x + 5 + 2 - z := rfl

def g {α} [Add α] (a : α) (b? : Option α := none) (c : α) : α :=
  match b? with
  | none   => a + c
  | some b => a + b + c

variable {α} [Add α]

example : g = fun (a c : α) => a + c := rfl

example (x : α) : g (c := x) = fun (a : α) => a + x := rfl

example (x : α) : g (b? := some x) = fun (a c : α) => a + x + c := rfl

example (x : α) : g x = fun (c : α) => x + c := rfl

example (x y : α) : g x y = fun (c : α) => x + y + c := rfl
In Lean 4, we can use .. to provide missing explicit arguments as _.
This feature combined with named arguments is useful for writing patterns. Here is an example:
inductive Term where
  | var    (name : String)
  | num    (val : Nat)
  | add    (fn : Term) (arg : Term)
  | lambda (name : String) (type : Term) (body : Term)

def getBinderName : Term → Option String
  | Term.lambda (name := n) .. => some n
  | _ => none

def getBinderType : Term → Option Term
  | Term.lambda (type := t) .. => some t
  | _ => none
Ellipsis are also useful when explicit argument can be automatically inferred by Lean, and we want
to avoid a sequence of _s.
example (f : Nat → Nat) (a b c : Nat) : f (a + b + c) = f (a + (b + c)) :=
  congrArg f (Nat.add_assoc ..)
In Lean 4, writing f(x) in place of f x is no longer allowed, you must use whitespace between the function and its arguments (e.g., f (x)).
Dependent function types
Given α : Type and β : α → Type, (x : α) → β x denotes the type of functions f with the property that,
for each a : α, f a is an element of β a. In other words, the type of the value returned by f depends on its input.
We say (x : α) → β x is a dependent function type. In Lean 3, we write the dependent function type (x : α) → β x using
one of the following three equivalent notations:
forall x : α, β x or ∀ x : α, β x or Π x : α, β x.
The first two were intended to be used for writing propositions, and the latter for writing code.
Although the notation Π x : α, β x has historical significance, we have removed it from Lean 4 because
it is awkward to use and often confuses new users. We can still write forall x : α, β x and ∀ x : α, β x.
#check forall (α : Type), α → α
#check ∀ (α : Type), α → α
#check ∀ α : Type, α → α
#check ∀ α, α → α
#check (α : Type) → α → α
#check {α : Type} → (a : Array α) → (i : Nat) → i < a.size → α
#check {α : Type} → [ToString α] → α → String
#check forall {α : Type} (a : Array α) (i : Nat), i < a.size → α
#check {α β : Type} → α → β → α × β
The meta keyword
In Lean 3, the keyword meta is used to mark definitions that can use primitives implemented in C/C++.
These metadefinitions can also call themselves recursively, relaxing the termination
restriction imposed by ordinary type theory. Metadefinitions may also use unsafe primitives such as
eval_expr (α : Type u) [reflected α] : expr → tactic α, or primitives that break referential transparency
tactic.unsafe_run_io.
The keyword meta has been currently removed from Lean 4. However, we may re-introduce it in the future,
but with a much more limited purpose: marking meta code that should not be included in the executables produced by Lean.
The keyword constant has been deleted in Lean 4, and axiom should be used instead. In Lean 4, the new command opaque is used to define an opaque definition. Here are two simple examples:
# namespace meta1
opaque x : Nat := 1
-- The following example will not type check since `x` is opaque
-- example : x = 1 := rfl

-- We can evaluate `x`
#eval x
-- 1

-- When no value is provided, the elaborator tries to build one automatically for us
-- using the `Inhabited` type class
opaque y : Nat
# end meta1
We can instruct Lean to use a foreign function as the implementation for any definition
using the attribute @[extern "foreign_function"]. It is the user's responsibility to ensure the
foreign implementation is correct.
However, a user mistake here will only impact the code generated by Lean, and
it will not compromise the logical soundness of the system.
That is, you cannot prove False using the @[extern] attribute.
We use @[extern] with definitions when we want to provide a reference implementation in Lean
that can be used for reasoning. When we write a definition such as
@[extern "lean_nat_add"]
def add : Nat → Nat → Nat
  | a, Nat.zero   => a
  | a, Nat.succ b => Nat.succ (add a b)
Lean assumes that the foreign function lean_nat_add implements the reference implementation above.
The unsafe keyword allows us to define functions using unsafe features such as general recursion,
and arbitrary type casting. Regular (safe) functions cannot directly use unsafe ones since it would
compromise the logical soundness of the system. As in regular programming languages, programs written
using unsafe features may crash at runtime. Here are a few unsafe examples:
unsafe def unsound : False :=
  unsound

#check @unsafeCast
-- {α : Type _} → {β : Type _} → α → β

unsafe def nat2String (x : Nat) : String :=
  unsafeCast x

-- The following definition doesn't type check because it is not marked as `unsafe`
-- def nat2StringSafe (x : Nat) : String :=
--   unsafeCast x
The unsafe keyword is particularly useful when we want to take advantage of an implementation detail of the
Lean execution runtime. For example, we cannot prove in Lean that arrays have a maximum size, but
the runtime used to execute Lean programs guarantees that an array cannot have more than 2^64 (2^32) elements
in a 64-bit (32-bit) machine. We can take advantage of this fact to provide a more efficient implementation for
array functions. However, the efficient version would not be very useful if it can only be used in
unsafe code. Thus, Lean 4 provides the attribute @[implemented_by functionName]. The idea is to provide
an unsafe (and potentially more efficient) version of a safe definition or constant. The function f
at the attribute @[implemented_by f] is very similar to an extern/foreign function,
the key difference is that it is implemented in Lean itself. Again, the logical soundness of the system
cannot be compromised by using the attribute implemented_by, but if the implementation is incorrect your
program may crash at runtime. In the following example, we define withPtrUnsafe a k h which
executes k using the memory address where a is stored in memory. The argument h is proof
that k is a constant function. Then, we "seal" this unsafe implementation at withPtr. The proof h
ensures the reference implementation k 0 is correct. For more information, see the article
"Sealing Pointer-Based Optimizations Behind Pure Functions".
unsafe
def withPtrUnsafe {α β : Type} (a : α) (k : USize → β) (h : ∀ u, k u = k 0) : β :=
  k (ptrAddrUnsafe a)

@[implemented_by withPtrUnsafe]
def withPtr {α β : Type} (a : α) (k : USize → β) (h : ∀ u, k u = k 0) : β :=
  k 0
General recursion is very useful in practice, and it would be impossible to implement Lean 4 without it.
The keyword partial implements a very simple and efficient approach for supporting general recursion.
Simplicity was key here because of the bootstrapping problem. That is, we had to implement Lean in Lean before
many of its features were implemented (e.g., the tactic framework or support for wellfounded recursion).
Another requirement for us was performance. Functions tagged with partial should be as efficient as the ones implemented in mainstream functional programming
languages such as OCaml. When the partial keyword is used, Lean generates an auxiliary unsafe definition that
uses general recursion, and then defines an opaque constant that is implemented by this auxiliary definition.
This is very simple, efficient, and is sufficient for users that want to use Lean as a regular programming language.
A partial definition cannot use unsafe features such as unsafeCast and ptrAddrUnsafe, and it can only be used to
implement types we already known to be inhabited. Finally, since we "seal" the auxiliary definition using an opaque
constant, we cannot reason about partial definitions.
We are aware that proof assistants such as Isabelle provide a framework for defining partial functions that does not prevent users from proving properties about them. This kind of framework can be implemented in Lean 4. Actually, it can be implemented by users since Lean 4 is an extensible system. The developers current have no plans to implement this kind of support for Lean 4. However, we remark that users can implement it using a function that traverses the auxiliary unsafe definition generated by Lean, and produces a safe one using an approach similar to the one used in Isabelle.
# namespace partial1
partial def f (x : Nat) : IO Unit := do
  IO.println x
  if x < 100 then
     f (x+1)

#eval f 98
# end partial1
Library changes
These are changes to the library which may trip up Lean 3 users:
Listis no longer a monad.
Style changes
Coding style changes have also been made:
- Term constants and variables are now
lowerCamelCaserather thansnake_case - Type constants are now
UpperCamelCase, egNat,List. Type variables are still lower case greek letters. Functors are still lower case latin(m : Type → Type) [Monad m]. - When defining typeclasses, prefer not to use "has". Eg
ToStringorAddinstead ofHasToStringorHasAdd. - Prefer
returntopurein monad expressions. - Pipes
<|are preferred to dollars$for function application. - Declaration bodies should always be indented:
inductive Hello where | foo | bar structure Point where x : Nat y : Nat def Point.addX : Point → Point → Nat := fun { x := a, .. } { x := b, .. } => a + b - In structures and typeclass definitions, prefer
whereto:=and don't surround fields with parentheses. (Shown inPointabove)
You can copy highlighted code straight from VS Code to any rich text editor supporting HTML input. For highlighting code in LaTeX, there are two options:
- listings, which is a common package and simple to set up, but you may run into some restrictions of it and LaTeX around Unicode
minted, a LaTeX package wrapping the Pygments syntax highlighting library. It needs a few more steps to set up, but provides unrestricted support for Unicode when combined with XeLaTeX or LuaLaTex.
Example with listings
Save lstlean.tex into the same directory, or anywhere in your TEXINPUTS path, as the following test file:
\documentclass{article}
\usepackage[T1]{fontenc}
\usepackage[utf8]{inputenc}
\usepackage{listings}
\usepackage{amssymb}

\usepackage{color}
\definecolor{keywordcolor}{rgb}{0.7, 0.1, 0.1}   % red
\definecolor{tacticcolor}{rgb}{0.0, 0.1, 0.6}    % blue
\definecolor{commentcolor}{rgb}{0.4, 0.4, 0.4}   % grey
\definecolor{symbolcolor}{rgb}{0.0, 0.1, 0.6}    % blue
\definecolor{sortcolor}{rgb}{0.1, 0.5, 0.1}      % green
\definecolor{attributecolor}{rgb}{0.7, 0.1, 0.1} % red

\def\lstlanguagefiles{lstlean.tex}
% set default language
\lstset{language=lean}

\begin{document}
\begin{lstlisting}
theorem funext {f₁ f₂ : ∀ (x : α), β x} (h : ∀ x, f₁ x = f₂ x) : f₁ = f₂ := by
  show extfunApp (Quotient.mk f₁) = extfunApp (Quotient.mk f₂)
  apply congrArg
  apply Quotient.sound
  exact h
\end{lstlisting}
\end{document}
Compile the file via
$ pdflatex test.tex
- for older LaTeX versions, you might need to use
[utf8x]instead of[utf8]withinputenc
Example with minted
First install Pygments (version 2.18 or newer).
Then save the following sample LaTeX file test.tex into the same directory:
\documentclass{article}
\usepackage{fontspec}
% switch to a monospace font supporting more Unicode characters
\setmonofont{FreeMono}
\usepackage{minted}
\newmintinline[lean]{lean4}{bgcolor=white}
\newminted[leancode]{lean4}{fontsize=\footnotesize}
\usemintedstyle{tango}  % a nice, colorful theme

\begin{document}
\begin{leancode}
theorem funext {f₁ f₂ : ∀ (x : α), β x} (h : ∀ x, f₁ x = f₂ x) : f₁ = f₂ := by
  show extfunApp (Quotient.mk' f₁) = extfunApp (Quotient.mk' f₂)
  apply congrArg
  apply Quotient.sound
  exact h
\end{leancode}
\end{document}
You can then compile test.tex by executing the following command:
xelatex --shell-escape test.tex
Some remarks:
- either
xelatexorlualatexis required to handle Unicode characters in the code. --shell-escapeis needed to allowxelatexto executepygmentizein a shell.- If the chosen monospace font is missing some Unicode symbols, you can direct them to be displayed using a fallback font or other replacement LaTeX code.
\usepackage{newunicodechar} \newfontfamily{\freeserif}{DejaVu Sans} \newunicodechar{✝}{\freeserif{✝}} \newunicodechar{𝓞}{\ensuremath{\mathcal{O}}} - If you are using an old version of Pygments, you can copy
lean.pyinto your working directory, and uselean4.py:Lean4Lexer -xinstead oflean4above. If your version ofmintedis v2.7 or newer, but before v3.0, you will additionally need to follow the workaround described in https://github.com/gpoore/minted/issues/360.
(this chapter is rendered by Alectryon in the CI)
import Lean
open Lean Widget
/-!
# The user-widgets system
Proving and programming are inherently interactive tasks. Lots of mathematical objects and data
structures are visual in nature. *User widgets* let you associate custom interactive UIs with
sections of a Lean document. User widgets are rendered in the Lean infoview.

## Trying it out
To try it out, simply type in the following code and place your cursor over the `#widget` command.
-/
@[widget_module]
def helloWidget : Widget.Module where
javascript := "
import * as React from 'react';
export default function(props) {
const name = props.name || 'world'
return React.createElement('p', {}, name + '!')
}"
#widget helloWidget
/-!
If you want to dive into a full sample right away, check out
[`RubiksCube`](https://github.com/leanprover/lean4-samples/blob/main/RubiksCube/).
Below, we'll explain the system piece by piece.
⚠️ WARNING: All of the user widget APIs are **unstable** and subject to breaking changes.
## Widget sources and instances
A *widget source* is a valid JavaScript [ESModule](https://developer.mozilla.org/en-US/docs/Web/JavaScript/Guide/Modules)
which exports a [React component](https://reactjs.org/docs/components-and-props.html). To access
React, the module must use `import * as React from 'react'`. Our first example of a widget source
is of course the value of `helloWidget.javascript`.
We can register a widget source with the `@[widget]` attribute, giving it a friendlier name
in the `name` field. This is bundled together in a `UserWidgetDefinition`.
A *widget instance* is then the identifier of a `UserWidgetDefinition` (so `` `helloWidget ``,
not `"Hello"`) associated with a range of positions in the Lean source code. Widget instances
are stored in the *infotree* in the same manner as other information about the source file
such as the type of every expression. In our example, the `#widget` command stores a widget instance
with the entire line as its range. We can think of a widget instance as an instruction for the
infoview: "when the user places their cursor here, please render the following widget".
Every widget instance also contains a `props : Json` value. This value is passed as an argument
to the React component. In our first invocation of `#widget`, we set it to `.null`. Try out what
happens when you type in:
-/
structure HelloWidgetProps where
name? : Option String := none
deriving Server.RpcEncodable
#widget helloWidget with { name? := "<your name here>" : HelloWidgetProps }
/-!
💡 NOTE: The RPC system presented below does not depend on JavaScript. However the primary use case
is the web-based infoview in VSCode.
## Querying the Lean server
Besides enabling us to create cool client-side visualizations, user widgets come with the ability
to communicate with the Lean server. Thanks to this, they have the same metaprogramming capabilities
as custom elaborators or the tactic framework. To see this in action, let's implement a `#check`
command as a web input form. This example assumes some familiarity with React.
The first thing we'll need is to create an *RPC method*. Meaning "Remote Procedure Call", this
is basically a Lean function callable from widget code (possibly remotely over the internet).
Our method will take in the `name : Name` of a constant in the environment and return its type.
By convention, we represent the input data as a `structure`. Since it will be sent over from JavaScript,
we need `FromJson` and `ToJson`. We'll see below why the position field is needed.
-/
structure GetTypeParams where
/-- Name of a constant to get the type of. -/
name : Name
/-- Position of our widget instance in the Lean file. -/
pos : Lsp.Position
deriving FromJson, ToJson
/-!
After its arguments, we define the `getType` method. Every RPC method executes in the `RequestM`
monad and must return a `RequestTask α` where `α` is its "actual" return type. The `Task` is so
that requests can be handled concurrently. A first guess for `α` might be `Expr`. However,
expressions in general can be large objects which depend on an `Environment` and `LocalContext`.
Thus we cannot directly serialize an `Expr` and send it to the widget. Instead, there are two
options:
- One is to send a *reference* which points to an object residing on the server. From JavaScript's
point of view, references are entirely opaque, but they can be sent back to other RPC methods for
further processing.
- Two is to pretty-print the expression and send its textual representation called `CodeWithInfos`.
This representation contains extra data which the infoview uses for interactivity. We take this
strategy here.
RPC methods execute in the context of a file, but not any particular `Environment` so they don't
know about the available `def`initions and `theorem`s. Thus, we need to pass in a position at which
we want to use the local `Environment`. This is why we store it in `GetTypeParams`. The `withWaitFindSnapAtPos`
method launches a concurrent computation whose job is to find such an `Environment` and a bit
more information for us, in the form of a `snap : Snapshot`. With this in hand, we can call
`MetaM` procedures to find out the type of `name` and pretty-print it.
-/
open Server RequestM in
@[server_rpc_method]
def getType (params : GetTypeParams) : RequestM (RequestTask CodeWithInfos) :=
withWaitFindSnapAtPos params.pos fun snap => do
runTermElabM snap do
let name ← resolveGlobalConstNoOverloadCore params.name
let c ← try getConstInfo name
catch _ => throwThe RequestError ⟨.invalidParams, s!"no constant named '{name}'"⟩
Widget.ppExprTagged c.type
/-!
## Using infoview components
Now that we have all we need on the server side, let's write the widget source. By importing
`@leanprover/infoview`, widgets can render UI components used to implement the infoview itself.
For example, the `<InteractiveCode>` component displays expressions with `term : type` tooltips
as seen in the goal view. We will use it to implement our custom `#check` display.
⚠️ WARNING: Like the other widget APIs, the infoview JS API is **unstable** and subject to breaking changes.
The code below demonstrates useful parts of the API. To make RPC method calls, we use the `RpcContext`.
The `useAsync` helper packs the results of a call into an `AsyncState` structure which indicates
whether the call has resolved successfully, has returned an error, or is still in-flight. Based
on this we either display an `InteractiveCode` with the type, `mapRpcError` the error in order
to turn it into a readable message, or show a `Loading..` message, respectively.
-/
@[widget_module]
def checkWidget : Widget.Module where
javascript := "
import * as React from 'react';
const e = React.createElement;
import { RpcContext, InteractiveCode, useAsync, mapRpcError } from '@leanprover/infoview';
export default function(props) {
const rs = React.useContext(RpcContext)
const [name, setName] = React.useState('getType')
const st = useAsync(() =>
rs.call('getType', { name, pos: props.pos }), [name, rs, props.pos])
const type = st.state === 'resolved' ? st.value && e(InteractiveCode, {fmt: st.value})
: st.state === 'rejected' ? e('p', null, mapRpcError(st.error).message)
: e('p', null, 'Loading..')
const onChange = (event) => { setName(event.target.value) }
return e('div', null,
e('input', { value: name, onChange }), ' : ', type)
}
"
/-!
Finally we can try out the widget.
-/
#widget checkWidget
/-!

## Building widget sources
While typing JavaScript inline is fine for a simple example, for real developments we want to use
packages from NPM, a proper build system, and JSX. Thus, most actual widget sources are built with
Lake and NPM. They consist of multiple files and may import libraries which don't work as ESModules
by default. On the other hand a widget source must be a single, self-contained ESModule in the form
of a string. Readers familiar with web development may already have guessed that to obtain such a
string, we need a *bundler*. Two popular choices are [`rollup.js`](https://rollupjs.org/guide/en/)
and [`esbuild`](https://esbuild.github.io/). If we go with `rollup.js`, to make a widget work with
the infoview we need to:
- Set [`output.format`](https://rollupjs.org/guide/en/#outputformat) to `'es'`.
- [Externalize](https://rollupjs.org/guide/en/#external) `react`, `react-dom`, `@leanprover/infoview`.
These libraries are already loaded by the infoview so they should not be bundled.
In the RubiksCube sample, we provide a working `rollup.js` build configuration in
[rollup.config.js](https://github.com/leanprover/lean4-samples/blob/main/RubiksCube/widget/rollup.config.js).
## Inserting text
We can also instruct the editor to insert text, copy text to the clipboard, or
reveal a certain location in the document.
To do this, use the `React.useContext(EditorContext)` React context.
This will return an `EditorConnection` whose `api` field contains a number of methods to
interact with the text editor.
You can see the full API for this [here](https://github.com/leanprover/vscode-lean4/blob/master/lean4-infoview-api/src/infoviewApi.ts#L52)
-/
@[widget_module]
def insertTextWidget : Widget.Module where
javascript := "
import * as React from 'react';
const e = React.createElement;
import { EditorContext } from '@leanprover/infoview';
export default function(props) {
const editorConnection = React.useContext(EditorContext)
function onClick() {
editorConnection.api.insertText('-- hello!!!', 'above')
}
return e('div', null, e('button', { value: name, onClick }, 'insert'))
}
"
/-! Finally, we can try this out: -/
#widget insertTextWidget
Semantic Highlighting
The Lean language server provides semantic highlighting information to editors. In order to benefit from this in VSCode, you may need to activate the "Editor > Semantic Highlighting" option in the preferences (this is translates to "editor.semanticHighlighting.enabled": true,
in settings.json). The default option here is to let your color theme decides whether it activates semantic highlighting (the default themes Dark+ and Light+ do activate it for instance).
However this may be insufficient if your color theme does not distinguish enough syntax categories or distinguishes them very subtly. For instance the default Light+ theme uses color #001080 for variables. This is awfully close to #000000 that is used as the default text color. This makes it very easy to miss an accidental use of auto bound implicit arguments. For instance in
def my_id (n : nat) := n
maybe nat is a typo and Nat was intended. If your color theme is good enough then you should see that n and nat have the same color since they are both marked as variables by semantic highlighting. If you rather write (n : Nat) then n keeps its variable color but Nat gets the default text color.
If you use such a bad theme, you can fix things by modifying the Semantic Token Color Customizations configuration. This cannot be done directly in the preferences dialog but you can click on "Edit in settings.json" to directly edit the settings file. Beware that you must save this file (in the same way you save any file opened in VSCode) before seeing any effect in other tabs or VSCode windows.
In the main config object, you can add something like
"editor.semanticTokenColorCustomizations": {
        "[Default Light+]": {"rules": {"function": "#ff0000", "property": "#00ff00", "variable": "#ff00ff"}}
    },
The colors in this example are not meant to be nice but to be easy to spot in your file when testing. Of course you need to replace Default Light+ with the name of your theme, and you can customize several themes if you use several themes. VSCode will display small colored boxes next to the HTML color specifications. Hovering on top of a color specification opens a convenient color picker dialog.
In order to understand what function, property and variable mean in the above example, the easiest path is to open a Lean file and ask VSCode about its classification of various bits of your file. Open the command palette with Ctrl-shift-p (or ⌘-shift-p on a Mac) and search for "Inspect Editor Tokens and Scopes" (typing the word "tokens" should be enough to see it). You can then click on any word in your file and look if there is a "semantic token type" line in the displayed information.
Development Workflow
If you want to make changes to Lean itself, start by building Lean from a clean checkout to make sure that everything is set up correctly. After that, read on below to find out how to set up your editor for changing the Lean source code, followed by further sections of the development manual where applicable such as on the test suite and commit convention.
If you are planning to make any changes that may affect the compilation of Lean itself, e.g. changes to the parser, elaborator, or compiler, you should first read about the bootstrapping pipeline.
You should not edit the stage0 directory except using the commands described in that section when necessary.
Development Setup
You can use any of the supported editors for editing the Lean source code.
If you set up elan as below, opening src/ as a workspace folder should ensure that stage 0 (i.e. the stage that first compiles src/) will be used for files in that directory.
Dev setup using elan
You can use elan to easily
switch between stages and build configurations based on the current
directory, both for the lean, leanc, and leanmake binaries in your shell's
PATH and inside your editor.
To install elan, you can do so, without installing a default version of Lean, using (Unix)
curl https://raw.githubusercontent.com/leanprover/elan/master/elan-init.sh -sSf | sh -s -- --default-toolchain none
or (Windows)
curl -O --location https://raw.githubusercontent.com/leanprover/elan/master/elan-init.ps1
powershell -f elan-init.ps1 --default-toolchain none
del elan-init.ps1
The lean-toolchain files in the Lean 4 repository are set up to use the lean4-stage0
toolchain for editing files in src and the lean4 toolchain for editing files in tests.
Run the following commands to make lean4 point at stage1 and lean4-stage0 point at stage0:
# in the Lean rootdir
elan toolchain link lean4 build/release/stage1
elan toolchain link lean4-stage0 build/release/stage0
You can also use the +toolchain shorthand (e.g. lean +lean4-debug) to switch
toolchains on the spot. lean4-mode will automatically use the lean executable
associated with the directory of the current file as long as lean4-rootdir is
unset and ~/.elan/bin is in your exec-path. Where Emacs sources the
exec-path from can be a bit unclear depending on your configuration, so
alternatively you can also set lean4-rootdir to "~/.elan" explicitly.
You might find that debugging through elan, e.g. via gdb lean, disables some
things like symbol autocompletion because at first only the elan proxy binary
is loaded. You can instead pass the explicit path to bin/lean in your build
folder to gdb, or use gdb $(elan which lean).
It is also possible to generate releases that others can use,
simply by pushing a tag to your fork of the Lean 4 github repository
(and waiting about an hour; check the Actions tab for completion).
If you push my-tag to a fork in your github account my_name,
you can then put my_name/lean4:my-tag in your lean-toolchain file in a project using lake.
(You must use a tag name that does not start with a numeral, or contain _).
VS Code
There is a lean.code-workspace file that correctly sets up VS Code with workspace roots for the stage0/stage1 setup described above as well as with other settings.
You should always load it when working on Lean, such as by invoking
code lean.code-workspace
on the command line.
ccache
Lean's build process uses ccache if it is
installed to speed up recompilation of the generated C code. Without
ccache, you'll likely spend more time than necessary waiting on
rebuilds - it's a good idea to make sure it's installed.
prelude
Unlike most Lean projects, all submodules of the Lean module begin with the
prelude keyword. This disables the automated import of Init, meaning that
developers need to figure out their own subset of Init to import. This is done
such that changing files in Init doesn't force a full rebuild of Lean.
These are instructions to set up a working development environment for those who wish to make changes to Lean itself. It is part of the Development Guide.
We strongly suggest that new users instead follow the Quickstart to get started using Lean, since this sets up an environment that can automatically manage multiple Lean toolchain versions, which is necessary when working within the Lean ecosystem.
Requirements
- C++14 compatible compiler
- CMake
- GMP (GNU multiprecision library)
Platform-Specific Setup
- Linux (Ubuntu)
- Windows (msys2)
- Windows (WSL)
- macOS (homebrew)
- Linux/macOS/WSL via Nix: Call
nix developin the project root. That's it.
Generic Build Instructions
Setting up a basic parallelized release build:
git clone https://github.com/leanprover/lean4
cd lean4
cmake --preset release
make -C build/release -j$(nproc)  # see below for macOS
You can replace $(nproc), which is not available on macOS and some alternative shells, with the desired parallelism amount.
The above commands will compile the Lean library and binaries into the
stage1 subfolder; see below for details.
You should not usually run cmake --install after a successful build.
See Dev setup using elan on how to properly set up your editor to use the correct stage depending on the source directory.
Useful CMake Configuration Settings
Pass these along with the cmake --preset release command.
There are also two alternative presets that combine some of these options you can use instead of release: debug and sandebug (sanitize + debug).
-
-D CMAKE_BUILD_TYPE=
Select the build type. Valid values areRELEASE(default),DEBUG,RELWITHDEBINFO, andMINSIZEREL. -
-D CMAKE_C_COMPILER=
-D CMAKE_CXX_COMPILER=
Select the C/C++ compilers to use. Official Lean releases currently use Clang; see also.github/workflows/ci.ymlfor the CI config.
Lean will automatically use CCache if available to avoid redundant builds, especially after stage 0 has been updated.
Troubleshooting
- Call
makewith an additionalVERBOSE=1argument to print executed commands.
Installing Lean on Ubuntu
Build Dependencies
Please ensure you have the following build tools available and then follow the generic build instructions.
Basic packages
sudo apt-get install git libgmp-dev cmake ccache clang
Install Packages on OS X 14.5
We assume that you are using homebrew as a package manager.
Compilers
You need a C++11-compatible compiler to build Lean. As of November 2014, you have three options:
- clang++-3.5 (shipped with OSX, Apple LLVM version 6.0)
- gcc-4.9.1 (homebrew)
- clang++-3.5 (homebrew)
We recommend to use Apple's clang++ because it is pre-shipped with OS X and requires no further installation.
To install gcc-4.9.1 via homebrew, please execute:
brew install gcc
To install clang++-3.5 via homebrew, please execute:
brew install llvm
To use compilers other than the default one (Apple's clang++), you
need to use -DCMAKE_CXX_COMPILER option to specify the compiler
that you want to use when you run cmake. For example, do the
following to use g++.
cmake -DCMAKE_CXX_COMPILER=g++ ...
Required Packages: CMake, GMP
brew install cmake
brew install gmp
Recommended Packages: CCache
brew install ccache
Lean for Windows
A native Lean binary for Windows can be generated using MSYS2. It is easy to install all dependencies, it produces native 64/32-binaries, and supports a C++14 compiler.
An alternative to MSYS2 is to use Lean in Windows WSL.
While not necessary for pure building, you should first activate Developer Mode (Settings > Update & Security > For developers > Developer Mode), which will allow Lean to create symlinks that e.g. enable go-to-definition in the stdlib.
Installing dependencies
The official webpage of MSYS2 provides one-click installers.
Once installed, you should run the "MSYS2 MinGW 64-bit shell" from the start menu (the one that runs mingw64.exe).
Do not run "MSYS2 MSYS" instead!
MSYS2 has a package management system, pacman, which is used in Arch Linux.
Here are the commands to install all dependencies needed to compile Lean on your machine.
pacman -S make python mingw-w64-x86_64-cmake mingw-w64-x86_64-clang mingw-w64-x86_64-ccache git unzip diffutils binutils
You should now be able to run these commands:
clang --version
cmake --version
Then follow the generic build instructions in the MSYS2 MinGW shell, using:
cmake --preset release -DCMAKE_C_COMPILER=clang -DCMAKE_CXX_COMPILER=clang++
instead of cmake --preset release. This will use the clang compiler instead of gcc, which is required with msys2.
Install lean
Follow the steps in Dev setup using
elan regarding installation of the
bits you just built. Note that in an msys2 environment elan-init.sh
reports you need to add %USERPROFILE%\.elan\bin to your path, but of
course in msys2 that needs to be a valid linux style path, like this:
export PATH="$PATH:/c/users/$USERNAME/.elan/bin"
Running
You can run lean --version to see if your binaries work.
If you want a version that can run independently of your MSYS install then you need to copy the following dependent DLL's from where ever they are installed in your MSYS setup:
- libgcc_s_seh-1.dll
- libstdc++-6.dll
- libgmp-10.dll
- libwinpthread-1.dll
The following linux command will do that:
cp $(ldd lean.exe | cut -f3 -d' ' | grep mingw) .
However, if you plan to use this build to compile lean programs
to executable binaries using lake build in normal Windows command
prompt outside of msys2 environment you will also need to add a windows
version clang to your path.
Trouble shooting
-bash: gcc: command not found
Make sure /mingw64/bin is in your PATH environment. If it is not then
check you launched the MSYS2 MinGW 64-bit shell from the start menu.
(The one that runs mingw64.exe).
Lean in Windows WSL
As an alternative to the MSYS2 setup you can also use the Windows Subsystem for Linux to build Lean there, but edit and debug using Visual Studio Code in Windows.
For the most part setup in WSL is the same as Ubuntu. This document provides additional information on how to setup Windows Visual Studio Code remote debugging into your WSL environment using the lean extension running in WSL.
It is recommended that you setup Ubuntu in WSL 2. Then follow the Dev setup using elan.
Visual Studio Code setup on Windows
Install Visual Studio Code on Windows. Install the VS Code
Remote Development extension from Microsoft. This extension
includes the Remote - WSL extension. Install the lean4 extension but
into the WSL using: Install in WSL: Ubuntu
Type Ctrl+Shift+P and select Remote-WSL: Open Folder in WSL... to
open a folder containing your hello world lean package.
When everything is working you should see something like this with a functioning infoview, syntax coloring and tooltips:
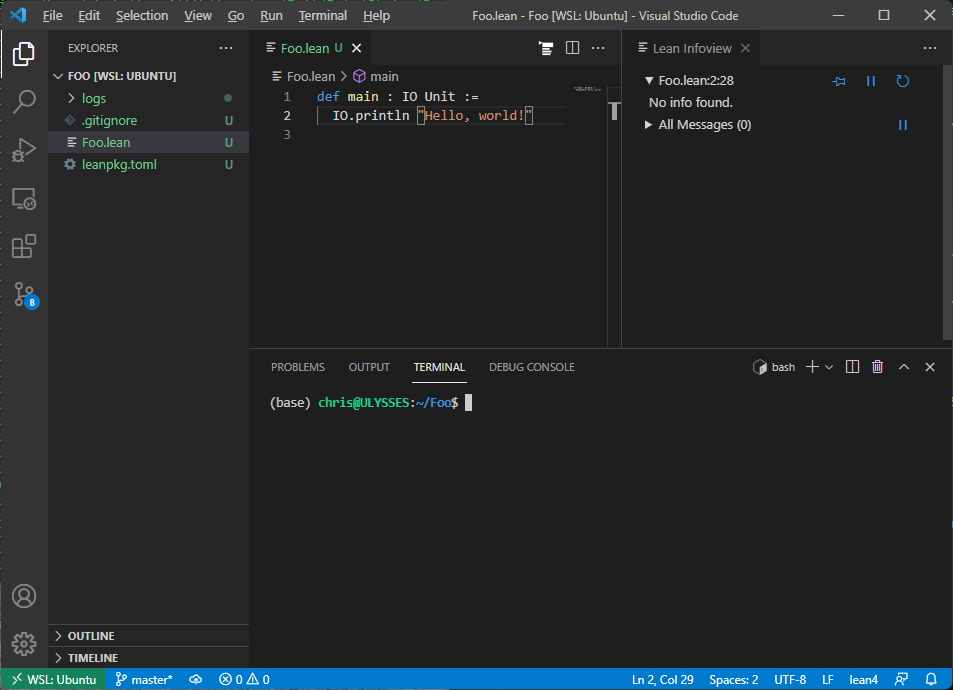
Troubleshooting
lean4: Could not find Lean version by running 'lean --version'.
Check that the lean program is available in your PATH in your WSL
environment.
Logs are showing up with a windows file path
Check that you have not set a windows path in your
lean4.serverLogging.path Visual Studio Code setting. it is best if
this setting is set as follows:
"lean4.serverLogging.path": "logs"
This will result in a logs folder being created inside your lean package folder in the WSL file system.
Lean Build Bootstrapping
Since version 4, Lean is a partially bootstrapped program: most parts of the frontend and compiler are written in Lean itself and thus need to be built before building Lean itself - which is needed to again build those parts. This cycle is broken by using pre-built C files checked into the repository (which ultimately go back to a point where the Lean compiler was not written in Lean) in place of these Lean inputs and then compiling everything in multiple stages up to a fixed point. The build directory is organized in these stages:
stage0/
  # Bootstrap binary built from stage0/src/.
  # We do not use any other files from this directory in further stages.
  bin/lean
stage1/
  include/
    config.h  # config variables used to build `lean` such as used allocator
    runtime/lean.h  # runtime header, used by extracted C code, uses `config.h`
  share/lean/
    lean.mk  # used by `leanmake`
  lib/
    lean/**/*.olean  # the Lean library (incl. the compiler) compiled by the previous stage's `lean`
    temp/**/*.{c,o}  # the library extracted to C and compiled by `leanc`
    libInit.a libLean.a  # static libraries of the Lean library
    libleancpp.a  # a static library of the C++ sources of Lean
    libleanshared.so  # a dynamic library including the static libraries above
  bin/
    lean  # the Lean compiler & server, a small executable that calls directly into libleanshared.so
    leanc  # a wrapper around a C compiler supplying search paths etc
    leanmake  # a wrapper around `make` supplying the Makefile above
stage2/...
stage3/...
Stage 0 can be viewed as a blackbox since it does not depend on any local
changes and is equivalent to downloading a bootstrapping binary as done in other
compilers. The build for any other stage starts by building the runtime and
standard library from src/, using the lean binary from the previous stage in
the latter case, which are then assembled into a new bin/lean binary.
Each stage can be built by calling make stageN in the root build folder.
Running just make will default to stage 1, which is usually sufficient for
testing changes on the test suite or other files outside of the stdlib. However,
it might happen that the stage 1 compiler is not able to load its own stdlib,
e.g. when changing the .olean format: the stage 1 stdlib will use the format
generated by the stage 0 compiler, but the stage 1 compiler will expect the new
format. In this case, we should continue with building and testing stage 2
instead, which will both build and expect the new format. Note that this is only
possible because when building a stage's stdlib, we use the previous compiler
but never load the previous stdlib (since everything is prelude). We can also
use stage 2 to test changes in the compiler or other "meta" parts, i.e. changes
that affect the produced (.olean or .c) code, on the stdlib and compiler itself.
We are not aware of any "meta-meta" parts that influence more than two stages of
compilation, so stage 3 should always be identical to stage 2 and only exists as
a sanity check.
In summary, doing a standard build via make internally involves these steps:
- compile the
stage0/srcarchived sources intostage0/bin/lean - use it to compile the current library (including your changes) into
stage1/lib - link that and the current C++ code from
src/intostage1/bin/lean
You now have a Lean binary and library that include your changes, though their own compilation was not influenced by them, that you can use to test your changes on test programs whose compilation will be influenced by the changes.
Updating stage0
Finally, when we want to use new language features in the library, we need to
update the archived C source code of the stage 0 compiler in stage0/src.
The github repository will automatically update stage0 on master once
src/stdlib_flags.h and stage0/src/stdlib_flags.h are out of sync.
If you have write access to the lean4 repository, you can also also manually trigger that process, for example to be able to use new features in the compiler itself. You can do that on https://github.com/leanprover/lean4/actions/workflows/update-stage0.yml or using Github CLI with
gh workflow run update-stage0.yml
Leaving stage0 updates to the CI automation is preferable, but should you need
to do it locally, you can use make update-stage0-commit in build/release to
update stage0 from stage1 or make -C stageN update-stage0-commit to
update from another stage. This command will automatically stage the updated files
and introduce a commit,so make sure to commit your work before that.
If you rebased the branch (either onto a newer version of master, or fixing
up some commits prior to the stage0 update, recreate the stage0 update commits.
The script script/rebase-stage0.sh can be used for that.
The CI should prevent PRs with changes to stage0 (besides stdlib_flags.h)
from entering master through the (squashing!) merge queue, and label such PRs
with the changes-stage0 label. Such PRs should have a cleaned up history,
with separate stage0 update commits; then coordinate with the admins to merge
your PR using rebase merge, bypassing the merge queue.
Further Bootstrapping Complications
As written above, changes in meta code in the current stage usually will only affect later stages. This is an issue in two specific cases.
-
For non-builtin meta code such as
notations ormacros inNotation.lean, we expect changes to affect the current file and all later files of the same stage immediately, just like outside the stdlib. To ensure this, we need to build the stage using-Dinterpreter.prefer_native=false- otherwise, when executing a macro, the interpreter would notice that there is already a native symbol available for this function and run it instead of the new IR, but the symbol is from the previous stage!To make matters more complicated, while
falseis a reasonable default incurring only minor overhead (ParserDescrs and simple macros are cheap to interpret), there are situations where we need to set the option totrue: when the interpreter is executed from the native code of the previous stage, the type of the value it computes must be identical to/ABI-compatible with the type in the previous stage. For example, if we add a new parameter toMacroor reorder constructors inParserDescr, building the stage with the interpreter will likely fail. Thus we need to setinterpreter.prefer_nativetotruein such cases to "freeze" meta code at their versions in the previous stage; no new meta code should be introduced in this stage. Any further stages (e.g. after anupdate-stage0) will then need to be compiled with the flag set tofalseagain since they will expect the new signature.For an example, see https://github.com/leanprover/lean4/commit/da4c46370d85add64ef7ca5e7cc4638b62823fbb.
-
For the special case of quotations, it is desirable to have changes in built-in parsers affect them immediately: when the changes in the parser become active in the next stage, macros implemented via quotations should generate syntax trees compatible with the new parser, and quotation patterns in macro and elaborators should be able to match syntax created by the new parser and macros. Since quotations capture the syntax tree structure during execution of the current stage and turn it into code for the next stage, we need to run the current stage's built-in parsers in quotation via the interpreter for this to work. Caveats:
- Since interpreting full parsers is not nearly as cheap and we rarely change
built-in syntax, this needs to be opted in using
-Dinternal.parseQuotWithCurrentStage=true. - The parser needs to be reachable via an
importstatement, otherwise the version of the previous stage will silently be used. - Only the parser code (
Parser.fn) is affected; all metadata such as leading tokens is taken from the previous stage.
For an example, see https://github.com/leanprover/lean4/commit/f9dcbbddc48ccab22c7674ba20c5f409823b4cc1#diff-371387aed38bb02bf7761084fd9460e4168ae16d1ffe5de041b47d3ad2d22422 (from before the flag defaulted to
false). - Since interpreting full parsers is not nearly as cheap and we rarely change
built-in syntax, this needs to be opted in using
To modify either of these flags both for building and editing the stdlib, adjust
the code in stage0/src/stdlib_flags.h. The flags will automatically be reset
on the next update-stage0 when the file is overwritten with the original
version in src/.
Test Suite
After building Lean you can run all the tests using
cd build/release
make test ARGS=-j4
Change the 4 to the maximum number of parallel tests you want to
allow. The best choice is the number of CPU cores on your machine as
the tests are mostly CPU bound. You can find the number of processors
on linux using nproc and on Windows it is the NUMBER_OF_PROCESSORS
environment variable.
You can run tests after building a specific stage by
adding the -C stageN argument. The default when run as above is stage 1. The
Lean tests will automatically use that stage's corresponding Lean
executables
Running make test will not pick up new test files; run
cmake build/release/stage1
to update the list of tests.
You can also use ctest directly if you are in the right folder. So
to run stage1 tests with a 300 second timeout run this:
cd build/release/stage1
ctest -j 4 --output-on-failure --timeout 300
Useful ctest flags are -R <name of test> to run a single test, and
--rerun-failed to run all tests that failed during the last run.
You can also pass ctest flags via make test ARGS="--rerun-failed".
To get verbose output from ctest pass the --verbose command line
option. Test output is normally suppressed and only summary
information is displayed. This option will show all test output.
Test Suite Organization
All these tests are included by src/shell/CMakeLists.txt:
-
tests/lean: contains tests that come equipped with a .lean.expected.out file. The driver scripttest_single.shruns each test and checks the actual output (*.produced.out) with the checked in expected output. -
tests/lean/run: contains tests that are run through the lean command line one file at a time. These tests only look for error codes and do not check the expected output even though output is produced, it is ignored. -
tests/lean/interactive: are designed to test server requests at a given position in the input file. Each .lean file contains comments that indicate how to simulate a client request at that position. using a--^point to the line position. Example:open Foo in theorem tst2 (h : a ≤ b) : a + 2 ≤ b + 2 := Bla. --^ textDocument/completionIn this example, the test driver
test_single.shwill simulate an auto-completion request atBla.. The expected output is stored in a .lean.expected.out in the json format that is part of the Language Server Protocol.This can also be used to test the following additional requests:
--^ textDocument/hover --^ textDocument/typeDefinition --^ textDocument/definition --^ $/lean/plainGoal --^ $/lean/plainTermGoal --^ insert: ... --^ collectDiagnostics -
tests/lean/server: Tests more of the Lean--serverprotocol. There are just a few of them, and it uses .log files containing JSON. -
tests/compiler: contains tests that will run the Lean compiler and build an executable that is executed and the output is compared to the .lean.expected.out file. This test also contains a subfolderforeignwhich shows how to extend Lean using C++. -
tests/lean/trust0: tests that run Lean in a mode that Lean doesn't even trust the .olean files (i.e., trust 0). -
tests/bench: contains performance tests. -
tests/plugin: tests that compiled Lean code can be loaded intoleanvia the--plugincommand line option.
Writing Good Tests
Every test file should contain:
- an initial
/-! -/module docstring summarizing the test's purpose - a module docstring for each test section that describes what is tested and, if not 100% clear, why that is the desirable behavior
At the time of writing, most tests do not follow these new guidelines yet.
For an example of a conforming test, see tests/lean/1971.lean.
Fixing Tests
When the Lean source code or the standard library are modified, some of the
tests break because the produced output is slightly different, and we have
to reflect the changes in the .lean.expected.out files.
We should not blindly copy the new produced output since we may accidentally
miss a bug introduced by recent changes.
The test suite contains commands that allow us to see what changed in a convenient way.
First, we must install meld. On Ubuntu, we can do it by simply executing
sudo apt-get install meld
Now, suppose bad_class.lean test is broken. We can see the problem by going to tests/lean directory and
executing
./test_single.sh -i bad_class.lean
When the -i option is provided, meld is automatically invoked
whenever there is discrepancy between the produced and expected
outputs. meld can also be used to repair the problems.
In Emacs, we can also execute M-x lean4-diff-test-file to check/diff the file of the current buffer.
To mass-copy all .produced.out files to the respective .expected.out file, use tests/lean/copy-produced.
Debugging
Some notes on how to debug Lean, which may also be applicable to debugging Lean programs in general.
Tracing
In CoreM and derived monads, we use trace![traceCls] "msg with {interpolations}" to fill the structured trace viewable with set_option trace.traceCls true.
New trace classes have to be registered using registerTraceClass first.
Notable trace classes:
-
Elab.command/Elab.step: command/term macro expansion/elaboration stepsUseful options modifying these traces for debugging syntax trees:
set_option pp.raw true set_option pp.raw.maxDepth 10 -
Meta.synthInstance: typeclass resolution -
Meta.isDefEq: unification -
interpreter: full execution trace of the interpreter. Only available in debug builds.
In pure contexts or when execution is aborted before the messages are finally printed, one can instead use the term dbg_trace "msg with {interpolations}"; val (; can also be replaced by a newline), which will print the message to stderr before evaluating val. dbgTraceVal val can be used as a shorthand for dbg_trace "{val}"; val.
Note that if the return value is not actually used, the trace code is silently dropped as well.
In the language server, stderr output is buffered and shown as messages after a command has been elaborated, unless the option server.stderrAsMessages is deactivated.
Debuggers
gdb/lldb can be used to inspect stack traces of compiled Lean code, though they cannot print values of Lean variables and terms in any legible way yet.
For example, b lean_panic_fn can be used to look at the stack trace of a panic.
The rr reverse debugger is an amazing tool for investigating e.g. segfaults from reference counting errors, though better hope you will never need it...
Git Commit Convention
We are using the following convention for writing git commit messages. For pull requests, make sure the pull request title and description follow this convention, as the squash-merge commit will inherit title and body from the pull request.
This convention is based on the one from the AngularJS project (doc, commits).
Format of the commit message
<type>: <subject>
<NEWLINE>
<body>
<NEWLINE>
<footer>
<type> is:
- feat (feature)
- fix (bug fix)
- doc (documentation)
- style (formatting, missing semicolons, ...)
- refactor
- test (when adding missing tests)
- chore (maintain, ex: travis-ci)
- perf (performance improvement, optimization, ...)
<subject> has the following constraints:
- use imperative, present tense: "change" not "changed" nor "changes"
- do not capitalize the first letter
- no dot(.) at the end
<body> has the following constraints:
- just as in
<subject>, use imperative, present tense - includes motivation for the change and contrasts with previous behavior
<footer> is optional and may contain two items:
-
Breaking changes: All breaking changes have to be mentioned in footer with the description of the change, justification and migration notes
-
Referencing issues: Closed bugs should be listed on a separate line in the footer prefixed with "Closes" keyword like this:
Closes #123, #456
Examples
fix: add declarations for operator<<(std::ostream&, expr const&) and operator<<(std::ostream&, context const&) in the kernel
The actual implementation of these two operators is outside of the kernel. They are implemented in the file 'library/printer.cpp'. We declare them in the kernel to prevent the following problem. Suppose there is a file 'foo.cpp' that does not include 'library/printer.h', but contains
expr a;
...
std::cout << a << "\n";
...
The compiler does not generate an error message. It silently uses the operator bool() to coerce the expression into a Boolean. This produces counter-intuitive behavior, and may confuse developers.
Releasing a stable version
This checklist walks you through releasing a stable version. See below for the checklist for release candidates.
We'll use v4.6.0 as the intended release version as a running example.
- One week before the planned release, ensure that someone has written the first draft of the release blog post
git checkout releases/v4.6.0(This branch should already exist, from the release candidates.)git pull- In
src/CMakeLists.txt, verify you seeset(LEAN_VERSION_MINOR 6)(for whichever6is appropriate)set(LEAN_VERSION_IS_RELEASE 1)- (both of these should already be in place from the release candidates)
- It is possible that the
v4.6.0section ofRELEASES.mdis out of sync betweenreleases/v4.6.0andmaster. This should be reconciled:- Run
git diff master RELEASES.md. - You should expect to see additons on
masterin thev4.7.0-rc1section; ignore these. (i.e. the new release notes for the upcoming release candidate). - Reconcile discrepancies in the
v4.6.0section, usually via copy and paste and a commit toreleases/v4.6.0.
- Run
git tag v4.6.0git push $REMOTE v4.6.0, where$REMOTEis the upstream Lean repository (e.g.,origin,upstream)- Now wait, while CI runs.
- You can monitor this at
https://github.com/leanprover/lean4/actions/workflows/ci.yml, looking for thev4.6.0tag. - This step can take up to an hour.
- If you are intending to cut the next release candidate on the same day, you may want to start on the release candidate checklist now.
- You can monitor this at
- Go to https://github.com/leanprover/lean4/releases and verify that the
v4.6.0release appears.- Edit the release notes on Github to select the "Set as the latest release".
- Copy and paste the Github release notes from the previous releases candidate for this version
(e.g.
v4.6.0-rc1), and quickly sanity check.
- Next, we will move a curated list of downstream repos to the latest stable release.
- For each of the repositories listed below:
- Make a PR to
master/mainchanging the toolchain tov4.6.0- Update the toolchain file
- In the Lakefile, if there are dependencies on specific version tags of dependencies that you've already pushed as part of this process, update them to the new tag.
If they depend on
mainormaster, don't change this; you've just updated the dependency, so it will work and be saved in the manifest - Run
lake update - The PR title should be "chore: bump toolchain to v4.6.0".
- Merge the PR once CI completes.
- Create the tag
v4.6.0frommaster/mainand push it. - Merge the tag
v4.6.0into thestablebranch and push it.
- Make a PR to
- We do this for the repositories:
- lean4checker
- No dependencies
- Toolchain bump PR
- Create and push the tag
- Merge the tag into
stable
- Batteries
- No dependencies
- Toolchain bump PR
- Create and push the tag
- Merge the tag into
stable
- ProofWidgets4
- Dependencies:
Batteries - Note on versions and branches:
ProofWidgetsuses a sequential version tagging scheme, e.g.v0.0.29, which does not refer to the toolchain being used.- Make a new release in this sequence after merging the toolchain bump PR.
ProofWidgetsdoes not maintain astablebranch.
- Toolchain bump PR
- Create and push the tag, following the version convention of the repository
- Dependencies:
- Aesop
- Dependencies:
Batteries - Toolchain bump PR including updated Lake manifest
- Create and push the tag
- Merge the tag into
stable
- Dependencies:
- doc-gen4
- Dependencies: exist, but they're not part of the release workflow
- Toolchain bump PR including updated Lake manifest
- Create and push the tag
- There is no
stablebranch; skip this step
- import-graph
- Toolchain bump PR including updated Lake manifest
- Create and push the tag
- There is no
stablebranch; skip this step
- Mathlib
- Dependencies:
Aesop,ProofWidgets4,lean4checker,Batteries,doc-gen4,import-graph - Toolchain bump PR notes:
- In addition to updating the
lean-toolchainandlakefile.lean, in.github/workflows/lean4checker.ymlupdate the linegit checkout v4.6.0to the appropriate tag. - Push the PR branch to the main Mathlib repository rather than a fork, or CI may not work reliably
- Create and push the tag
- Create a new branch from the tag, push it, and open a pull request against
stable. Coordinate with a Mathlib maintainer to get this merged.
- In addition to updating the
- Dependencies:
- REPL
- Dependencies:
Mathlib(for test code) - Note that there are two copies of
lean-toolchain/lakefile.lean: in the root, and intest/Mathlib/. Edit both, and runlake updatein both directories. - Toolchain bump PR including updated Lake manifest
- Create and push the tag
- Merge the tag into
stable
- Dependencies:
- lean4checker
- For each of the repositories listed below:
- Merge the release announcement PR for the Lean website - it will be deployed automatically
- Finally, make an announcement!
This should go in https://leanprover.zulipchat.com/#narrow/stream/113486-announce, with topic
v4.6.0. Please see previous announcements for suggested language. You will want a few bullet points for main topics from the release notes. Link to the blog post from the Zulip announcement. - Make sure that whoever is handling social media knows the release is out.
Optimistic(?) time estimates:
- Initial checks and push the tag: 30 minutes.
- Note that if
RELEASES.mdhas discrepancies this could take longer! - Waiting for the release: 60 minutes.
- Fixing release notes: 10 minutes.
- Bumping toolchains in downstream repositories, up to creating the Mathlib PR: 30 minutes.
- Waiting for Mathlib CI and bors: 120 minutes.
- Finalizing Mathlib tags and stable branch, and updating REPL: 15 minutes.
- Posting announcement and/or blog post: 20 minutes.
Creating a release candidate.
This checklist walks you through creating the first release candidate for a version of Lean.
We'll use v4.7.0-rc1 as the intended release version in this example.
- Decide which nightly release you want to turn into a release candidate.
We will use
nightly-2024-02-29in this example. - It is essential that Batteries and Mathlib already have reviewed branches compatible with this nightly.
- Check that both Batteries and Mathlib's
bump/v4.7.0branch containnightly-2024-02-29in theirlean-toolchain. - The steps required to reach that state are beyond the scope of this checklist, but see below!
- Check that both Batteries and Mathlib's
- Create the release branch from this nightly tag:
git remote add nightly https://github.com/leanprover/lean4-nightly.git git fetch nightly tag nightly-2024-02-29 git checkout nightly-2024-02-29 git checkout -b releases/v4.7.0 - In
RELEASES.mdremove(development in progress)from thev4.7.0section header. - Our current goal is to have written release notes only about major language features or breaking changes,
and to rely on automatically generated release notes for bugfixes and minor changes.
- Do not wait on
RELEASES.mdbeing perfect before creating therelease/v4.7.0branch. It is essential to choose the nightly which will become the release candidate as early as possible, to avoid confusion. - If there are major changes not reflected in
RELEASES.mdalready, you may need to solicit help from the authors. - Minor changes and bug fixes do not need to be documented in
RELEASES.md: they will be added automatically on the Github release page. - Commit your changes to
RELEASES.md, and push. - Remember that changes to
RELEASES.mdafter you have branchedreleases/v4.7.0should also be cherry-picked back tomaster.
- Do not wait on
- In
src/CMakeLists.txt,- verify that you see
set(LEAN_VERSION_MINOR 7)(for whichever7is appropriate); this should already have been updated when the development cycle began. set(LEAN_VERSION_IS_RELEASE 1)(this should be a change; onmasterand nightly releases it is always0).- Commit your changes to
src/CMakeLists.txt, and push.
- verify that you see
git tag v4.7.0-rc1git push origin v4.7.0-rc1- Now wait, while CI runs.
- You can monitor this at
https://github.com/leanprover/lean4/actions/workflows/ci.yml, looking for thev4.7.0-rc1tag. - This step can take up to an hour.
- You can monitor this at
- Once the release appears at https://github.com/leanprover/lean4/releases/
- Edit the release notes on Github to select the "Set as a pre-release box".
- Copy the section of
RELEASES.mdfor this version into the Github release notes. - Use the title "Changes since v4.6.0 (from RELEASES.md)"
- Then in the "previous tag" dropdown, select
v4.6.0, and click "Generate release notes". - This will add a list of all the commits since the last stable version.
- Delete anything already mentioned in the hand-written release notes above.
- Delete "update stage0" commits, and anything with a completely inscrutable commit message.
- Briefly rearrange the remaining items by category (e.g.
simp,lake,bug fixes), but for minor items don't put any work in expanding on commit messages.
- (How we want to release notes to look is evolving: please update this section if it looks wrong!)
- Next, we will move a curated list of downstream repos to the release candidate.
- This assumes that there is already a reviewed branch
bump/v4.7.0on each repository containing the required adaptations (or no adaptations are required). The preparation of this branch is beyond the scope of this document. - For each of the target repositories:
- Checkout the
bump/v4.7.0branch. - Verify that the
lean-toolchainis set to the nightly from which the release candidate was created. git merge origin/master- Change the
lean-toolchaintoleanprover/lean4:v4.7.0-rc1 - In
lakefile.lean, change any dependencies which were usingnightly-testingorbump/v4.7.0branches back tomasterormain, and runlake updatefor those dependencies. - Run
lake buildto ensure that dependencies are found (but it's okay to stop it after a moment). git commitgit push- Open a PR from
bump/v4.7.0tomaster, and either merge it yourself after CI, if appropriate, or notify the maintainers that it is ready to go. - Once this PR has been merged, tag
masterwithv4.7.0-rc1and push this tag.
- Checkout the
- We do this for the same list of repositories as for stable releases, see above.
As above, there are dependencies between these, and so the process above is iterative.
It greatly helps if you can merge the
bump/v4.7.0PRs yourself! - For Batteries/Aesop/Mathlib, which maintain a
nightly-testingbranch, make sure there is a tagnightly-testing-2024-02-29with date corresponding to the nightly used for the release (create it if not), and then on thenightly-testingbranchgit reset --hard master, and force push.
- This assumes that there is already a reviewed branch
- Make an announcement!
This should go in https://leanprover.zulipchat.com/#narrow/stream/113486-announce, with topic
v4.7.0-rc1. Please see previous announcements for suggested language. You will want a few bullet points for main topics from the release notes. Please also make sure that whoever is handling social media knows the release is out. - Begin the next development cycle (i.e. for
v4.8.0) on the Lean repository, by making a PR that:- Updates
src/CMakeLists.txtto sayset(LEAN_VERSION_MINOR 8) - Removes
(in development)from the section heading inRELEASES.mdforv4.7.0, and creates a newv4.8.0 (in development)section heading.
- Updates
Time estimates:
Slightly longer than the corresponding steps for a stable release.
Similar process, but more things go wrong.
In particular, updating the downstream repositories is significantly more work
(because we need to merge existing bump/v4.7.0 branches, not just update a toolchain).
Preparing bump/v4.7.0 branches
While not part of the release process per se, this is a brief summary of the work that goes into updating Batteries/Aesop/Mathlib to new versions.
Please read https://leanprover-community.github.io/contribute/tags_and_branches.html
- Each repo has an unreviewed
nightly-testingbranch that receives commits automatically frommaster, and has its toolchain updated automatically for every nightly. (Note: the aesop branch is not automated, and is updated on an as needed basis.) As a consequence this branch is often broken. A bot posts in the (private!) "Mathlib reviewers" stream on Zulip about the status of these branches. - We fix the breakages by committing directly to
nightly-testing: there is no PR process.- This can either be done by the person managing this process directly, or by soliciting assistance from authors of files, or generally helpful people on Zulip!
- Each repo has a
bump/v4.7.0which accumulates reviewed changes adapting to new versions. - Once
nightly-testingis working on a given nightly, saynightly-2024-02-15, we:- Make sure
bump/v4.7.0is up to date withmaster(by mergingmaster, no PR necessary) - Create from
bump/v4.7.0abump/nightly-2024-02-15branch. - In that branch,
git merge --squash nightly-testingto bring across changes fromnightly-testing. - Sanity check changes, commit, and make a PR to
bump/v4.7.0from thebump/nightly-2024-02-15branch. - Solicit review, merge the PR into
bump/v4,7,0.
- Make sure
- It is always okay to merge in the following directions:
master->bump/v4.7.0->bump/nightly-2024-02-15->nightly-testing. Please remember to push any merges you make to intermediate steps!
Documentation
The Lean doc folder contains the Lean Manual and is
authored in a combination of markdown (*.md) files and literate Lean files. The .lean files are
preprocessed using a tool called LeanInk and
Alectryon which produces a generated markdown file. We then run
mdbook on the result to generate the html pages.
Settings
We are using the following settings while editing the markdown docs.
{
    "files.insertFinalNewline": true,
    "files.trimTrailingWhitespace": true,
    "[markdown]": {
        "rewrap.wrappingColumn": 70
    }
}
Build
Using Nix
Building the manual using Nix (which is what the CI does) is as easy as
$ nix build --update-input lean ./doc
You can also open a shell with mdbook for running the commands mentioned below with
nix develop ./doc#book. Otherwise, read on.
Manually
To build and test the book you have to preprocess the .lean files with Alectryon then use our own fork of the Rust tool named mdbook. We have our own fork of mdBook with the following additional features:
- Add support for hiding lines in other languages #1339
- Make
mdbook testcall theleancompiler to test the snippets. - Ability to test a single chapter at a time which is handy when you
are working on that chapter. See the
--chapteroption.
So you need to setup these tools before you can run mdBook.
-
install Rust which provides you with the
cargotool for building rust packages. Then run the following:cargo install --git https://github.com/leanprover/mdBook mdbook -
Clone https://github.com/leanprover/LeanInk.git and run
lake buildthen make the resulting binary available to Alectryon using e.g.# make `leanInk` available in the current shell export PATH=$PWD/build/bin:$PATH -
Create a Python 3.10 environment.
-
Install Alectryon:
python3 -m pip install git+https://github.com/Kha/alectryon.git@typeid -
Now you are ready to process the
*.leanfiles using Alectryon as follows:cd lean4/doc alectryon --frontend lean4+markup examples/palindromes.lean --backend webpage -o palindromes.lean.mdRepeat this for the other .lean files you care about or write a script to process them all.
-
Now you can build the book using:
cd lean4/doc
mdbook build
This will put the HTML in a out folder so you can load out/index.html in your web browser and
it should look like https://lean-lang.org/lean4/doc/.
-
It is also handy to use e.g.
mdbook watchin thedoc/folder so that it keeps the html up to date while you are editing.mdbook watch --open # opens the output in `out/` in your default browser
Testing Lean Snippets
You can run the following in the doc/ folder to test all the lean code snippets.
```bash
mdbook test
```
and you can use the --chapter option to test a specific chapter that you are working on:
```bash
mdbook test --chapter Array
```
Use chapter name ? to get a list of all the chapter names.
Foreign Function Interface
NOTE: The current interface was designed for internal use in Lean and should be considered unstable. It will be refined and extended in the future.
As Lean is written partially in Lean itself and partially in C++, it offers efficient interoperability between the two languages (or rather, between Lean and any language supporting C interfaces).
This support is however currently limited to transferring Lean data types; in particular, it is not possible yet to pass or return compound data structures such as C structs by value from or to Lean.
There are two primary attributes for interoperating with other languages:
@[extern "sym"] constant leanSym : ...binds a Lean declaration to the external symbolsym. It can also be used withdefto provide an internal definition, but ensuring consistency of both definitions is up to the user.@[export sym] def leanSym : ...exportsleanSymunder the unmangled symbol namesym.
For simple examples of how to call foreign code from Lean and vice versa, see https://github.com/leanprover/lean4/blob/master/src/lake/examples/ffi and https://github.com/leanprover/lean4/blob/master/src/lake/examples/reverse-ffi, respectively.
The Lean ABI
The Lean Application Binary Interface (ABI) describes how the signature of a Lean declaration is encoded as a native calling convention.
It is based on the standard C ABI and calling convention of the target platform.
For a Lean declaration marked with either @[extern "sym"] or @[export sym] for some symbol name sym, let α₁ → ... → αₙ → β be the normalized declaration's type.
If n is 0, the corresponding C declaration is
extern s sym;
where s is the C translation of β as specified in the next section.
In the case of an @[extern] definition, the symbol's value is guaranteed to be initialized only after calling the Lean module's initializer or that of an importing module; see Initialization.
If n is greater than 0, the corresponding C declaration is
s sym(t₁, ..., tₘ);
where the parameter types tᵢ are the C translation of the αᵢ as in the next section.
In the case of @[extern] all irrelevant types are removed first; see next section.
Translating Types from Lean to C
-
The integer types
UInt8, ...,UInt64,USizeare represented by the C typesuint8_t, ...,uint64_t,size_t, respectively -
Charis represented byuint32_t -
Floatis represented bydouble -
An enum inductive type of at least 2 and at most 2^32 constructors, each of which with no parameters, is represented by the first type of
uint8_t,uint16_t,uint32_tthat is sufficient to represent all constructor indices.For example, the type
Boolis represented asuint8_twith values0forfalseand1fortrue. -
Decidable αis represented the same way asBool -
An inductive type with a trivial structure, that is,
- it is none of the types described above
- it is not marked
unsafe - it has a single constructor with a single parameter of relevant type
is represented by the representation of that parameter's type.
For example,
{ x : α // p }, theSubtypestructure of a value of typeαand an irrelevant proof, is represented by the representation ofα. -
Natis represented bylean_object *. Its runtime value is either a pointer to an opaque bignum object or, if the lowest bit of the "pointer" is 1 (lean_is_scalar), an encoded unboxed natural number (lean_box/lean_unbox). -
A universe
Sort u, type constructor... → Sort u, or propositionp : Propis irrelevant and is either statically erased (see above) or represented as alean_object *with the runtime valuelean_box(0) -
Any other type is represented by
lean_object *. Its runtime value is a pointer to an object of a subtype oflean_object(see the "Inductive types" section below) or the unboxed valuelean_box(cidx)for thecidxth constructor of an inductive type if this constructor does not have any relevant parameters.Example: the runtime value of
u : Unitis alwayslean_box(0).
Inductive types
For inductive types which are in the fallback lean_object * case above and not trivial constructors, the type is stored as a lean_ctor_object, and lean_is_ctor will return true. A lean_ctor_object stores the constructor index in the header, and the fields are stored in the m_objs portion of the object.
The memory order of the fields is derived from the types and order of the fields in the declaration. They are ordered as follows:
- Non-scalar fields stored as
lean_object * - Fields of type
USize - Other scalar fields, in decreasing order by size
Within each group the fields are ordered in declaration order. Warning: Trivial wrapper types still count toward a field being treated as non-scalar for this purpose.
- To access fields of the first kind, use
lean_ctor_get(val, i)to get theith non-scalar field. - To access
USizefields, uselean_ctor_get_usize(val, n+i)to get theith usize field andnis the total number of fields of the first kind. - To access other scalar fields, use
lean_ctor_get_uintN(val, off)orlean_ctor_get_usize(val, off)as appropriate. Hereoffis the byte offset of the field in the structure, starting atn*sizeof(void*)wherenis the number of fields of the first two kinds.
For example, a structure such as
structure S where
ptr_1 : Array Nat
usize_1 : USize
sc64_1 : UInt64
ptr_2 : { x : UInt64 // x > 0 } -- wrappers don't count as scalars
sc64_2 : Float -- `Float` is 64 bit
sc8_1 : Bool
sc16_1 : UInt16
sc8_2 : UInt8
sc64_3 : UInt64
usize_2 : USize
ptr_3 : Char -- trivial wrapper around `UInt32`
sc32_1 : UInt32
sc16_2 : UInt16
would get re-sorted into the following memory order:
S.ptr_1-lean_ctor_get(val, 0)S.ptr_2-lean_ctor_get(val, 1)S.ptr_3-lean_ctor_get(val, 2)S.usize_1-lean_ctor_get_usize(val, 3)S.usize_2-lean_ctor_get_usize(val, 4)S.sc64_1-lean_ctor_get_uint64(val, sizeof(void*)*5)S.sc64_2-lean_ctor_get_float(val, sizeof(void*)*5 + 8)S.sc64_3-lean_ctor_get_uint64(val, sizeof(void*)*5 + 16)S.sc32_1-lean_ctor_get_uint32(val, sizeof(void*)*5 + 24)S.sc16_1-lean_ctor_get_uint16(val, sizeof(void*)*5 + 28)S.sc16_2-lean_ctor_get_uint16(val, sizeof(void*)*5 + 30)S.sc8_1-lean_ctor_get_uint8(val, sizeof(void*)*5 + 32)S.sc8_2-lean_ctor_get_uint8(val, sizeof(void*)*5 + 33)
Borrowing
By default, all lean_object * parameters of an @[extern] function are considered owned, i.e. the external code is passed a "virtual RC token" and is responsible for passing this token along to another consuming function (exactly once) or freeing it via lean_dec.
To reduce reference counting overhead, parameters can be marked as borrowed by prefixing their type with @&.
Borrowed objects must only be passed to other non-consuming functions (arbitrarily often) or converted to owned values using lean_inc.
In lean.h, the lean_object * aliases lean_obj_arg and b_lean_obj_arg are used to mark this difference on the C side.
Return values and @[export] parameters are always owned at the moment.
Initialization
When including Lean code as part of a larger program, modules must be initialized before accessing any of their declarations. Module initialization entails
- initialization of all "constants" (nullary functions), including closed terms lifted out of other functions
- execution of all
[init]functions - execution of all
[builtin_init]functions, if thebuiltinparameter of the module initializer has been set
The module initializer is automatically run with the builtin flag for executables compiled from Lean code and for "plugins" loaded with lean --plugin.
For all other modules imported by lean, the initializer is run without builtin.
Thus [init] functions are run iff their module is imported, regardless of whether they have native code available or not, while [builtin_init] functions are only run for native executable or plugins, regardless of whether their module is imported or not.
lean uses built-in initializers for e.g. registering basic parsers that should be available even without importing their module (which is necessary for bootstrapping).
The initializer for module A.B is called initialize_A_B and will automatically initialize any imported modules.
Module initializers are idempotent (when run with the same builtin flag), but not thread-safe.
Together with initialization of the Lean runtime, you should execute code like the following exactly once before accessing any Lean declarations:
void lean_initialize_runtime_module();
void lean_initialize();
lean_object * initialize_A_B(uint8_t builtin, lean_object *);
lean_object * initialize_C(uint8_t builtin, lean_object *);
...
lean_initialize_runtime_module();
//lean_initialize(); // necessary if you (indirectly) access the `Lean` package
lean_object * res;
// use same default as for Lean executables
uint8_t builtin = 1;
res = initialize_A_B(builtin, lean_io_mk_world());
if (lean_io_result_is_ok(res)) {
lean_dec_ref(res);
} else {
lean_io_result_show_error(res);
lean_dec(res);
return ...; // do not access Lean declarations if initialization failed
}
res = initialize_C(builtin, lean_io_mk_world());
if (lean_io_result_is_ok(res)) {
...
//lean_init_task_manager(); // necessary if you (indirectly) use `Task`
lean_io_mark_end_initialization();
In addition, any other thread not spawned by the Lean runtime itself must be initialized for Lean use by calling
void lean_initialize_thread();
and should be finalized in order to free all thread-local resources by calling
void lean_finalize_thread();
@[extern] in the Interpreter
The interpreter can run Lean declarations for which symbols are available in loaded shared libraries, which includes @[extern] declarations.
Thus to e.g. run #eval on such a declaration, you need to
- compile (at least) the module containing the declaration and its dependencies into a shared library, and then
- pass this library to
lean --load-dynlib=to run codeimporting this module.
Note that it is not sufficient to load the foreign library containing the external symbol because the interpreter depends on code that is emitted for each @[extern] declaration.
Thus it is not possible to interpret an @[extern] declaration in the same file.
See tests/compiler/foreign for an example.